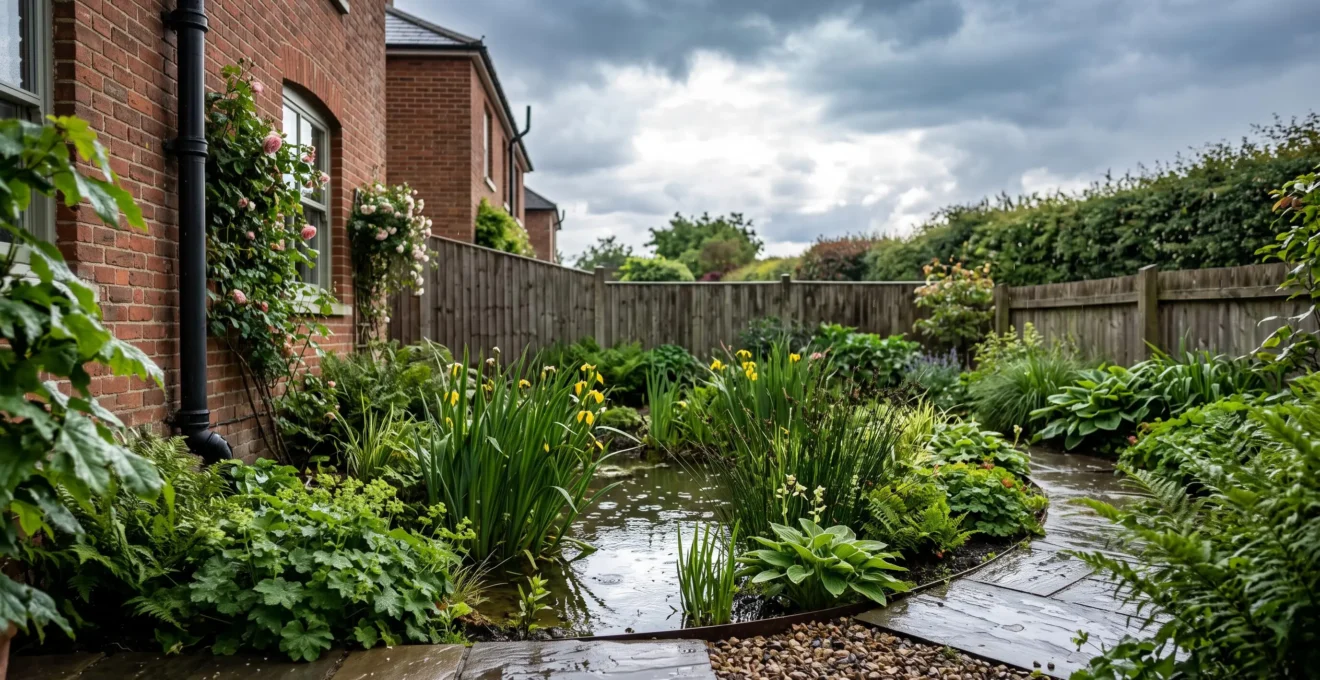
A functional rain garden is an engineered drainage system, not just a wet flowerbed; its success depends on precise design rather than simple plant selection.
- Sizing is non-negotiable and must be calculated based on the hydraulic load from your roof and other hard surfaces.
- The soil profile is an engineered medium designed for rapid percolation, not a generic compost mix.
- A planned, protected overflow channel is a critical safety feature, not a sign of failure.
Recommendation: Conduct a percolation test before you dig. It is the single most important diagnostic step to guarantee your rain garden drains effectively and avoids becoming a stagnant swamp.
With every news report of flash floods overwhelming urban drainage, the sight of a waterlogged lawn or a flooded patio has become an all-too-common anxiety for UK homeowners. In response, rain gardens are often promoted as a green, beautiful solution. The common advice is to dig a depression, fill it with some compost, and choose plants that don’t mind “wet feet.” While well-intentioned, this approach often overlooks the critical engineering principles that separate a functional flood-mitigation tool from a muddy, mosquito-breeding pit.
A truly effective rain garden isn’t just gardening; it’s a small-scale civil engineering project tailored for your property. Its purpose is to capture a significant volume of storm runoff, hold it temporarily, and allow it to filter slowly into the ground, reducing the strain on public sewer systems. Success hinges on a clear understanding of hydraulic load, soil mechanics, and planned system resilience. Simply planting marsh-loving species in a low spot is a recipe for failure when confronted with the intensity of modern British storm surges.
This guide moves beyond the simplistic advice to provide an engineer’s perspective. We will deconstruct the essential technical components required to design and build a rain garden that not only survives but thrives, actively protecting your property. We will cover the calculations for sizing, the science behind the perfect soil mix, the strategy for selecting robust plants, and the non-negotiable designs for managing overflow safely. By treating your rain garden as the engineered system it is, you can build a feature that is both a beautiful garden element and a powerful piece of home infrastructure.
This article provides a detailed roadmap, breaking down the essential engineering and horticultural decisions you’ll need to make. Explore the sections below to understand each critical component of a successful rain garden project.
Contents: Rain Garden Engineering for UK Homes
- Plants That Survive Both Drowning and Drought in Rain Gardens
- How Big Should Your Rain Garden Be to Handle Roof Runoff?
- Sand or Compost: The Perfect Soil Mix for Rapid Drainage
- The Stagnation Mistake That Turns Rain Gardens into Mosquito Pits
- Where Does the Water Go When the Rain Garden is Full?
- How to Establish a ‘Dry Garden’ Backbone in Chalky Soil?
- French Drains: How to Install One to Dry Out a Boggy Lawn?
- Bioswales vs Traditional Drains: Which Handles Heavy Rainfall Better?
Plants That Survive Both Drowning and Drought in Rain Gardens
The most common mistake in planting a rain garden is selecting species suited only for permanently wet bog gardens. A functional rain garden is a dynamic environment; it’s designed to be inundated during a storm and then drain completely, becoming relatively dry between rainfall events. Therefore, the plant selection must be uniquely adapted to tolerate both periodic drowning and subsequent drought. The key is to think in terms of “planting guilds” zoned for different moisture levels within the basin.
As the illustration shows, a well-designed rain garden has at least three distinct zones. The base or lowest point requires plants that can handle temporary submersion, like Yellow Flag Iris (Iris pseudacorus) or rushes (Juncus effusus). The sloped sides, which are moist but drain faster, are ideal for perennials like Purple Loosestrife (Lythrum salicaria) or Hemerocallis. The raised outer berm is the driest zone and should host drought-tolerant species that form a resilient edge. As RHS Master Horticulturist Peter Lickorish notes, “Introducing a few of the larger plants from this list will help start the process of mopping up moisture.” This strategic placement of zoned planting guilds ensures the entire system is robust.
Action Plan: Establishing Resilient Plantings
- Reshape Topography: Before planting, create gentle low hills and depressions within your garden to establish distinct wetter and drier micro-zones side by side.
- Plant in Autumn: Plant while soil is warm and roots are still active, allowing them to establish before the dual stresses of winter waterlogging or summer drought set in.
- Check Hardiness Ratings: Avoid tender cultivars in gardens that are both cold and wet, as resilience can vary significantly even within the same species.
- Utilise Summer Shade: For species that require it, use strategic placement to provide some shade during summer, which helps build their tolerance to dry spells.
How Big Should Your Rain Garden Be to Handle Roof Runoff?
Determining the correct size for your rain garden is the most critical engineering calculation you will make. An undersized garden will be overwhelmed by the first significant downpour, failing to provide any meaningful flood mitigation. An oversized one can be a waste of space and resources. The size is not a guess; it’s a function of the hydraulic load it needs to manage, which is primarily the water coming from connected impervious surfaces like your roof, patio, or driveway.
The standard UK recommendation, supported by the Royal Horticultural Society (RHS), is that a rain garden should have a surface area of at least 20% of the hard surface area it drains. For example, if your roof area connected to the downpipe is 50 square metres, your rain garden should be at least 10 square metres (50 x 0.20). However, this is a starting point. The final dimensions also depend on your soil type and desired level of resilience, as clay soils drain slower than sandy soils and require a larger or deeper basin to compensate.
This table, based on common UK practice, outlines different tiers of sizing for domestic projects. Choosing the right tier depends on your site conditions and risk appetite, moving from basic compliance to maximum flood resilience.
| Tier | Sizing Rule | Depth | Best For |
|---|---|---|---|
| Basic Compliance | 10% of connected hard-surface area | 150mm on sandy soil | Well-draining gardens, light roof runoff |
| Enhanced Protection | 20% of the connected hard-surface area (RHS standard formula) | 250-300mm with gravel reservoir | Clay soils, storm-prone regions |
| Maximum Resilience | 20%+ combined with water butts and overflow pipe to main drainage | 300mm max domestic depth | Integrated whole-property flood management |
Sand or Compost: The Perfect Soil Mix for Rapid Drainage
The “soil” in a rain garden is more accurately described as an engineered soil media (ESM). Its primary job is not to be rich in nutrients like a vegetable patch, but to allow for rapid percolation while still supporting plant life. Simply digging a hole in heavy clay soil and filling it with compost will create an impermeable basin—a pond, not a rain garden. The goal is a free-draining mix that can absorb a huge volume of water quickly and let it pass through to the subsoil below.
The ideal recipe balances drainage, structure, and basic fertility. The dominant component must be a coarse, gritty material. For most UK applications, a simple and effective mix by volume is 60% sharp sand, 20% existing topsoil, and 20% compost or other well-rotted organic matter. The sharp sand creates large pore spaces for water to move through freely. The topsoil provides some structure and microbial life, while the compost helps with water retention for plants and nutrient supply during establishment. On very heavy clay sites, it’s wise to increase the proportion of grit and organic matter to prevent the sand and clay from binding into a concrete-like substance.
Beyond simple drainage, this engineered soil media also acts as a highly effective natural filter. As stormwater runoff from roofs and driveways passes through the soil and plant roots, pollutants are captured and broken down. Research from the Wildfowl & Wetlands Trust confirms that well-designed rain gardens are remarkably efficient, with studies showing they can be effective at removing up to 90% of nutrients/chemicals and up to 80% of sediments from runoff. This process significantly improves the quality of the water that eventually recharges the local groundwater table.
The Stagnation Mistake That Turns Rain Gardens into Mosquito Pits
The single greatest functional failure of a rain garden is stagnation. If water sits in the basin for more than 48 hours, it signals a critical design flaw. Stagnant water not only creates a prime breeding ground for mosquitoes but is also fatal to the root systems of most plants. As the RHS advises, “Saturated soils will have insufficient oxygen for healthy root function and may lead to root decay.” A successful rain garden must drain completely within a 24 to 48-hour window. Failure to do so indicates that your site’s natural percolation rate is too slow for the garden’s depth and size.
You must diagnose your soil’s drainage capacity *before* you start digging the main basin. This is done with a simple but non-negotiable diagnostic procedure called a percolation test. This test measures the rate at which water soaks into your ground (the ‘perc rate’) and tells you if your site is suitable. If your soil drains too slowly, you will need to amend your design by making the garden wider and shallower, or by incorporating a gravel-filled reservoir or even a perforated pipe at the base to speed up dispersal.
Ignoring this step is the most common and costly mistake made by enthusiastic homeowners. The time taken to perform this test is a tiny investment compared to the effort of rectifying a failed, swampy garden later. The RHS provides a standard method for this essential test.
Where Does the Water Go When the Rain Garden is Full?
A common concern is what happens during an exceptional “deluge” event that exceeds your rain garden’s calculated capacity. An engineered rain garden anticipates this. Overflow is not a sign of failure; it’s a planned event that must be managed safely. The system must include a designated and protected overflow design to channel excess water to a safe location, preventing it from backing up towards your house foundations.
This is typically achieved by building a low lip or “berm” around the saucer-shaped basin using the excavated soil. This berm contains the water up to the garden’s maximum design depth. Crucially, a deliberate gap or low point is left in the berm on the side furthest from any buildings. This gap acts as a spillway. When the garden fills, water will exit in a controlled manner through this specific point. To prevent this controlled overflow from eroding the soil, the spillway should be lined with cobbles or heavy gravel. This armouring dissipates the water’s energy and allows it to flow away without causing damage, ideally towards a lawn, another drainage feature, or the street’s storm drain system.
Case Study: Lamb Drove, Cambourne SuDS Scheme
A powerful real-world example of this principle is the Lamb Drove residential development in Cambridgeshire. Built on impermeable clay, this 35-home scheme used an integrated system of swales, permeable paving, and a larger detention basin to manage surface water. A key part of the design was the defined overflow routes between these features, proving that a Sustainable Drainage Systems (SuDS) approach with planned overflow can be a cost-effective and lower-maintenance alternative to conventional piped drainage, even in challenging soil conditions.
How to Establish a ‘Dry Garden’ Backbone in Chalky Soil?
While it seems counterintuitive in an article about rain, understanding dry garden principles is highly relevant to rain garden engineering, especially for the upper zones and for gardens built on challenging soils like chalk. Chalky soils are alkaline, free-draining, and low in nutrients, which can be a difficult starting point. However, the techniques used to create a thriving dry garden on chalk are directly applicable to creating the resilient, drought-tolerant upper berm of a rain garden.
The primary challenge with chalk is its poor structure and inability to retain moisture in dry periods. The single most effective amendment is the addition of massive quantities of organic matter. Digging in several inches of well-rotted manure, garden compost, or leaf mould will dramatically improve water retention and provide essential nutrients. This isn’t a one-time fix; an annual mulch is required to maintain soil health. This process transforms the hostile, thin topsoil into a viable growing medium.
Once the soil is improved, the plant selection should focus on species that are naturally adapted to these conditions. Mediterranean herbs like Lavender, Rosemary, and Thyme are classic choices. Perennials such as Eryngium (Sea Holly), Verbascum, and many types of Sedum also excel. These plants have adaptations like silvery leaves or waxy cuticles that reduce water loss, making them perfect for the driest edge of a rain garden, where they will thrive without supplemental watering once established. This “dry garden backbone” ensures your rain garden’s perimeter is as resilient as its wet core.
French Drains: How to Install One to Dry Out a Boggy Lawn?
In some gardens, particularly those on heavy clay, the ground is so persistently waterlogged that a rain garden alone may struggle. In these scenarios, a French drain can be an essential piece of preliminary infrastructure—a “feeder system” that collects and directs excess groundwater into your rain garden basin or a dedicated soakaway. A French drain is essentially a gravel-filled trench containing a perforated pipe that intercepts subsurface water and channels it away.
Installation requires precision. The trench must be dug with a consistent, gentle slope—a minimum fall of 1:60 to 1:80 is recommended—to ensure water flows away from the boggy area and towards the outlet. After laying a protective geotextile membrane, the perforated pipe is placed at the bottom and the trench is backfilled with clean drainage gravel. The drain works by creating a path of least resistance for water in the saturated soil, effectively de-watering the problem area.
If the French drain terminates in a soakaway (a large, rubble-filled pit), you must adhere to strict UK building regulations to prevent structural or environmental issues. The location is critical. This table summarises the minimum separation distances outlined in Approved Document H for rainwater soakaways.
| System Type | Min. Distance from Building | Min. Distance from Boundary/Watercourse | Min. Distance from Well/Borehole |
|---|---|---|---|
| Rainwater soakaway | 5 metres from the building | 2.5 metres from boundary | Not specified for rainwater |
| Foul drainage field (septic system) | 15 metres | 10 metres from watercourse | 50 metres |
Key Takeaways
- Function Follows Form: The size, depth, and shape of your rain garden must be calculated based on the volume of water it needs to handle. It is an engineering specification, not an aesthetic choice.
- Soil Is the Engine: The speed and reliability of your rain garden are dictated by the engineered soil media. A mix dominated by sharp sand is essential for the rapid percolation required to prevent stagnation.
- Design for Overflow: An extreme storm will eventually exceed your garden’s capacity. A planned, armoured overflow spillway is a critical safety feature that protects your property by directing excess water safely away.
Bioswales vs Traditional Drains: Which Handles Heavy Rainfall Better?
When considering drainage on a slightly larger scale, such as along a driveway or across a larger property, the principles of a rain garden can be elongated to form a “bioswale.” A bioswale is essentially a linear rain garden—a shallow, vegetated channel designed to slow down, filter, and infiltrate stormwater runoff. When compared to the traditional approach of a concrete gully and a subterranean pipe, the bioswale offers overwhelmingly superior performance in handling heavy rainfall, both ecologically and financially.
A traditional drain pipe is designed for one thing: conveyance. It moves water from point A to point B as fast as possible, which often just shifts a flood risk downstream. A bioswale, in contrast, is a multi-function system. The vegetation and soil slow the water’s velocity, reducing peak flow during a storm. This delay gives the water time to infiltrate the ground, recharging groundwater tables. As it does, the soil and plant roots filter out pollutants. This approach manages water at its source rather than simply relocating the problem.
While it may seem that a green, living system would be more expensive, long-term monitoring shows the opposite. The Lamb Drove case study in Cambridgeshire, which compared an integrated SuDS scheme (including swales) against a conventional piped system for the same development, found that both the initial capital costs and ongoing maintenance costs were lower for the SuDS approach. This is backed up by industry bodies. As Interpave, The Precast Concrete Paving & Kerb Association, concluded from the project, ” SuDS work over the long-term and should cost less than conventional piped drainage.”
Before you begin your project, the next step is to accurately measure your hard-surface runoff area and perform a percolation test to establish your site’s specific parameters. These two data points are the foundation of a successful and resilient rain garden design.