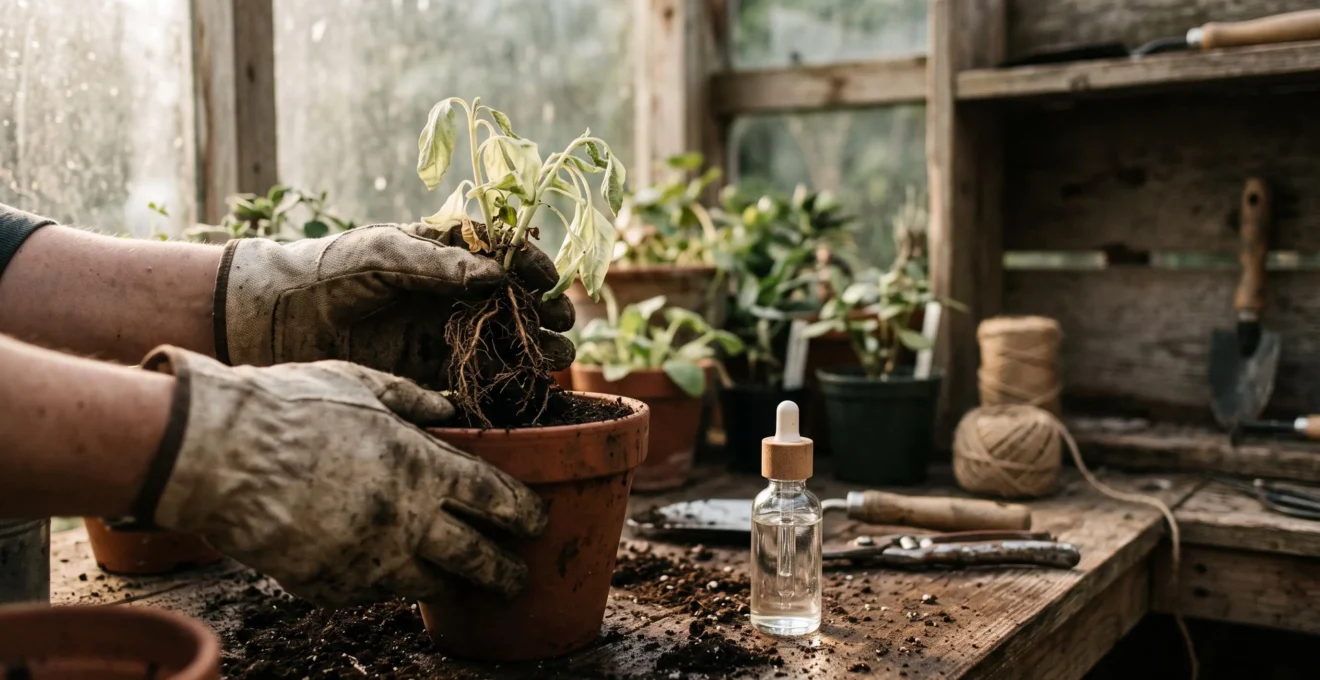
When a plant is wilting in wet soil, it’s suffocating from root rot, and you must act as a plant paramedic, not just a gardener.
- The sour smell of the soil is a definitive sign of anaerobic decay, confirming the emergency.
- Saving the plant requires a three-step intervention: surgical amputation of rotted roots, a “scorched earth” sterilization with hydrogen peroxide, and careful post-operative care.
Recommendation: Immediately remove the plant from its pot to inspect the roots. The color and smell will tell you everything you need to know to begin the rescue mission.
It’s a sight that brings a cold knot of dread to any gardener: a beloved plant, limp and yellowing, sitting in soil that is stubbornly, fatally damp. You know you haven’t forgotten to water it. In fact, you’ve been diligent. This isn’t neglect; it’s an assassination, carried out silently below the surface. This is root rot, and the conventional wisdom to “let it dry out” or “just add some peroxide” is tragically incomplete. These are not simple gardening tasks; they are emergency medical procedures.
Treating advanced root rot requires a shift in mindset. You are no longer a nurturer; you are a plant paramedic performing a critical intervention. The real problem isn’t just water, but the anaerobic suffocation it causes, turning rich soil into a toxic swamp where roots drown and decay. The hydrogen peroxide solution often touted as a cure is not a gentle remedy; it is a chemical bomb. It’s a “scorched earth” tactic that kills the pathogens but also destroys the beneficial soil microbiome, necessitating a complete system reset.
This guide abandons the platitudes. We will walk you through the three critical stages of a successful rescue mission: accurate diagnosis through sight and smell, the non-negotiable surgical amputation of diseased tissue, and the careful management of the plant’s recovery in a new, sterile environment. Forget what you think you know about overwatering. It’s time to scrub in.
To navigate this critical rescue, we will cover the essential diagnostic checks, the surgical procedure itself, and the post-operative care required both for houseplants and for outdoor plants suffering from poor landscape drainage. Follow these steps to give your plant its best chance at survival.
Summary: A Paramedic’s Guide to Fatal Root Rot
- The Sniff Test: What Does Healthy Soil Smell Like vs Rot?
- How to Check Roots Without Killing the Plant?
- Surgery for Plants: How to Trim Rotted Roots to Save the Specimen?
- The Decorative Pot Trap: Why Cover Pots Cause 50% of Houseplant Deaths?
- Chemical Drenches: Do They Work Once Rot Has Started?
- Recovery Mode: How to Water a Plant With Half a Root System?
- Compaction or Grading: Why is Water Pooling in the Middle?
- Correcting Land Grading to Stop Lawn Waterlogging in Winter
The Sniff Test: What Does Healthy Soil Smell Like vs Rot?
Before any drastic measures, your first diagnostic tool is your nose. Healthy, living soil has a distinct and pleasant “earthy” smell. This aroma comes from geosmin, a compound produced by Actinomycete bacteria, which are vital for a healthy soil ecosystem and are the source of many of our antibiotics. In fact, research shows that humans are remarkably sensitive to geosmin, detecting it at astonishingly low concentrations of just five parts per trillion. This scent is the baseline of a healthy plant.
When root rot sets in, this earthy perfume is replaced by a foul odor. As water displaces oxygen in the soil, beneficial aerobic bacteria die off and are replaced by anaerobic bacteria that thrive without oxygen. Their metabolic processes release sulfurous compounds, creating a smell that is often described as sour, marshy, or like rotting vegetables. If you gently lift the pot and the primary scent you detect is acrid or unpleasant, you have strong evidence of anaerobic decay. This smell is not a subtle hint; it is a blaring alarm that the root system is in a state of decomposition.
A simple diagnostic checklist can confirm your suspicions:
- Note the baseline: Get familiar with the rich, earthy smell of your healthy potting soil.
- Watch for a shift: Root rot introduces a noticeable, unpleasant odor. Trust your instincts; if it smells “off,” it probably is.
- Cross-check with color: The smell is a primary indicator, but it should be confirmed by a visual inspection. Healthy roots are typically firm and white or cream-colored, while rotting roots will be brown or black, soft, and mushy to the touch.
This olfactory test is the fastest, least invasive way to determine if you’re dealing with a simple case of wilting or a full-blown emergency. A bad smell demands immediate action.
How to Check Roots Without Killing the Plant?
Once the sniff test suggests trouble, a visual inspection is required to confirm the diagnosis and assess the extent of the damage. Many gardeners hesitate, fearing that unpotting a stressed plant will kill it. However, leaving it in a toxic, waterlogged environment is a guaranteed death sentence. A gentle but decisive inspection is far less dangerous. The key is to handle the plant with the care of a surgeon examining a patient.
For houseplants, the process is straightforward. First, ensure the pot has adequate drainage holes; this is a common culprit. Then, turn the pot on its side and gently tap the rim on a firm surface to loosen the root ball. Support the base of the plant with one hand and slide the entire root ball out of the pot with the other. Avoid pulling on the stem, as this can sever the remaining healthy roots. If the soil is compacted, you may need to run a clean knife around the inside edge of the pot.
Once the root ball is exposed, you are looking for clear signs of distress. As the UConn Home & Garden Education Center advises, you must look at both the potting mix and the roots themselves. Healthy roots are firm, flexible, and typically white or light tan. They will fill the pot in a structured way. In stark contrast, rotted roots are brown or black, feel soft and mushy, and may even fall apart in your hands. In advanced cases, the outer layer of the root may slide off, leaving only a stringy inner core. The soil itself might be uniformly dark and sodden, clinging together in a dense, airless mass.
Surgery for Plants: How to Trim Rotted Roots to Save the Specimen?
If your inspection confirms the presence of brown, mushy roots, it’s time to perform surgery. This is not a gentle pruning; it is a life-saving amputation to stop the spread of decay. You must be decisive. Gather your sterile tools: a sharp pair of scissors or shears, disinfected with rubbing alcohol or a bleach solution. The goal is to remove every last piece of infected tissue.
Begin by carefully washing away all the old soil from the root ball. Use a gentle stream of room-temperature water to expose the entire root system. This allows you to clearly distinguish between healthy and diseased sections. As you work, gently squeeze each root. Healthy roots will be firm and resilient. If they feel soft, break, or crumble in your hands, that is a clear sign of rot and they must be removed. This tactile feedback is just as important as the visual cues.
With your disinfected shears, begin cutting away all the black or brown roots. Your cuts must be clean and made back into the firm, white tissue. Even if it means removing a significant portion of the root system, you must be thorough. Leaving even a small amount of rotted tissue behind can allow the infection to re-establish itself in the new potting mix. It is better to have a plant with a small, healthy root system than a large, infected one. This surgical precision is paramount to the plant’s survival.
The steps for this critical procedure are as follows:
- Remove and Wash: Take the plant out of its container and wash all the dirt off the roots under a gentle stream of water.
- Pinch and Test: Gently squeeze each root. If it crumbles or feels mushy, it is rotted and must be amputated.
- Cut to Healthy Tissue: Use disinfected shears to remove all black or brown roots, cutting back until you see only firm, white root tissue.
The Decorative Pot Trap: Why Cover Pots Cause 50% of Houseplant Deaths?
After performing root surgery, it’s crucial to identify the “crime scene” to prevent a relapse. In the world of houseplants, the number one culprit is the decorative pot trap. Many indoor plants are sold in a thin plastic nursery pot, which is then placed inside a more stylish, waterproof ceramic or metal cachepot. While aesthetically pleasing, this setup is a death trap. A landmark mortality analysis found that root rot kills more houseplants than pests, neglect, and disease combined, and this double-pot system is a primary contributor.
The leading cause of death in potted plants is overwatering, because roots surrounded by water can’t take up oxygen.
– University of Minnesota Extension, Houseplant watering guidance, cited via PlantFix
The trap is insidious. The nursery pot has drainage holes, but the decorative outer pot does not. Every time you water the plant, excess water flows through the nursery pot and collects in the bottom of the cachepot, creating a stagnant reservoir. The bottom of the nursery pot is then left sitting in this pool of water. The soil in the lower portion of the pot becomes completely saturated, displacing all air and creating the perfect anaerobic conditions for rot to flourish. The gardener is often unaware, as the topsoil may feel dry, prompting them to water again and worsen the situation.
To escape this trap, you must always ensure there is an air gap. After watering, wait 15-20 minutes, then tip out any and all excess water that has collected in the decorative pot. An even better solution is to place a layer of pebbles, a plastic spacer, or an overturned saucer at the bottom of the decorative pot. This elevates the nursery pot, ensuring its base is never submerged, even if a small amount of water remains. This simple act of creating an air gap is the single most effective preventative measure against houseplant root rot.
Chemical Drenches: Do They Work Once Rot Has Started?
With the rotted roots amputated and the pot situation rectified, many turn to chemical solutions, with hydrogen peroxide (H2O2) being the most common. But it’s vital to understand what it does—and doesn’t—do. Hydrogen peroxide is not a miracle cure; it’s a broad-spectrum sterilizing agent. As one expert from AOL explains, “The reason hydrogen peroxide can help with root rot is that when it decomposes, it releases oxygen and water. The increased oxygen improves aeration in the soil, giving roots more access to it.” This burst of oxygen can kill the anaerobic bacteria causing the rot.
A standard mixture is one part 3% hydrogen peroxide to two parts water. After repotting the plant with its trimmed roots into fresh, well-draining soil, you drench the soil with this solution. This serves as a final sterilization step to kill any remaining pathogens. However, this action is a “scorched earth” tactic. Hydrogen peroxide is non-selective; it will kill the harmful pathogens, but it will also wipe out the beneficial bacteria and fungi that form a healthy soil microbiome and protect the plant from future infections.
Using a peroxide drench means you must commit to rebuilding the soil’s ecosystem from scratch. Without this follow-up, the sterile soil is vulnerable to reinfection. This is the step most guides miss.
Action Plan: The Microbiome Reset After a Peroxide Drench
- Recognize the Trade-Off: Acknowledge that if you rely on beneficial bacteria or fungi in your soil, a hydrogen peroxide drench can disrupt these crucial microbial populations.
- Reintroduce Protection: After the initial drench, consider follow-up treatments with biological fungicides. Products containing Trichoderma or Bacillus subtilis reintroduce beneficial microbes that actively compete with and suppress root rot pathogens.
- Rebuild the Soil: In subsequent waterings, incorporate organic matter like compost tea or a mild, natural anti-fungal. Elements like cinnamon powder or neem-based products can help ward off minor infections while the soil microbiome re-establishes itself.
This “reset” is not optional. Treating the soil with hydrogen peroxide without planning for microbial recovery is like performing surgery and then sending the patient home without antibiotics or probiotics.
Recovery Mode: How to Water a Plant With Half a Root System?
The plant has survived surgery and sterilization. Now it enters the most delicate phase: post-operative care. The plant is weak, with a drastically reduced root system. Its ability to absorb water and nutrients is severely compromised. The primary mistake at this stage is to revert to a normal watering schedule. A plant with half its roots needs, at most, half its usual water. Overwatering now will immediately trigger a relapse.
The urgency of proper watering is underscored by the speed at which soil becomes toxic. Once saturated, soil that stays waterlogged for roughly 48 to 72 hours tips into an oxygen-starved, anaerobic state where rot can re-emerge. Your goal is to keep the soil lightly moist, but never soggy. Let the top inch or two of soil dry out completely between waterings. When you do water, do so thoroughly until it runs out the bottom, then immediately discard all excess water. Remember the decorative pot trap.
The plant’s recovery depends on the extent of the initial damage. If there wasn’t a lot of root death, the plant may bounce back readily. Your job is to provide the best possible environment. Repotting into a mix with superior aeration is critical. Amending the soil with perlite, bark chips, or coarse sand creates more air pockets, making the medium less susceptible to waterlogging. In severe cases where most of the root system was lost, the plant may not be able to support its existing foliage. You might consider pruning back some of the leaves to reduce the demand on the struggling roots. For some plants, the best chance of survival is to take cuttings from healthy upper portions and propagate them as a new plant, treating the original as a lost cause.
Compaction or Grading: Why is Water Pooling in the Middle?
While root rot in pots is often a drainage issue, waterlogging in lawns and garden beds points to larger environmental problems: soil compaction or improper land grading. If you notice persistent puddles or squishy patches in your yard long after a rain, you have a drainage problem that will eventually lead to root rot in your turfgrass and garden plants. The first step is to diagnose the cause. As lawn care expert Thompson notes, “If infiltration is slow and the wet spot matches a hard-use area (dogs/kids/mowers), it’s compaction.”
Compacted soil has had its air pockets squeezed out, preventing water from penetrating the surface. This is common in high-traffic areas. To determine if your soil is compacted or if you have a deeper drainage issue, you can perform a simple “perk test.”
- Dig a Hole: In the problem area, dig a hole roughly one foot deep and one foot wide. Fill it with water and let it drain completely. This pre-saturates the surrounding soil.
- Refill and Measure: Refill the hole with water and place a ruler inside. Measure the water level every hour to calculate the drainage rate in inches per hour.
- Interpret the Result: A drainage rate of less than 1 inch per hour indicates poor drainage that needs correction. A rate between 1 and 4 inches is ideal. Conversely, a rate exceeding 4 inches per hour means the soil drains too quickly, which can also be a problem.
This test provides a clear, quantitative answer. If the water sits for hours, you’re dealing with either severe compaction or a layer of heavy clay beneath the topsoil that is preventing infiltration. This diagnosis dictates your next move: either relieving the compaction or undertaking a larger project to redirect the water flow.
Key Takeaways
- Root rot is an emergency caused by anaerobic suffocation; you must act as a plant paramedic.
- Diagnosis is a two-step process: the sour smell of decay, confirmed by the sight of brown, mushy roots.
- Saving a plant requires a non-negotiable surgical amputation of all rotted tissue, followed by a “scorched earth” sterilization and careful post-operative care.
Correcting Land Grading to Stop Lawn Waterlogging in Winter
Fixing a waterlogged lawn is not just about aesthetics; it’s about protecting your home’s foundation and preventing a breeding ground for pests. Soggy lawns drown grass roots, breed mosquitoes, and can lead to costly structural damage. In fact, according to FEMA data, even in low-risk zones, a home is far more likely to flood than to catch fire over three decades. The right solution depends on the severity of the problem you diagnosed.
For mild cases of compaction or slight depressions, the solution can be simple. Core aeration—the process of pulling small plugs of soil from the lawn—is highly effective at relieving compaction and improving water infiltration. For low spots, you can top-dress the area with a layer of compost or sandy topsoil, gradually raising the ground level over time. These are the least invasive and most cost-effective first steps.
However, for moderate to severe drainage issues, more significant intervention is required. If your property has poor grading—meaning it doesn’t slope gently away from your house—water will naturally pool in low areas or against your foundation. Correcting this may involve regrading the landscape, a project that involves bringing in fill dirt to create a proper slope (typically a 2% grade away from the foundation). For persistent and severe waterlogging, the ultimate solution is often installing a French drain. This is a trench filled with gravel and a perforated pipe that collects surface and groundwater and diverts it away from the problem area to a suitable outlet. This triage of solutions—from simple aeration to complex drainage systems—allows you to match the cure to the severity of the illness.
Protecting your landscape from winter waterlogging requires a proactive approach. Addressing compaction and grading issues before the wet season sets in is the best way to ensure the health of your lawn and the integrity of your property.
Now that you are equipped with the mindset of a plant paramedic, the first step is always diagnosis. Go to your struggling plant, gently remove it from its pot, and face the truth. Let its smell and the condition of its roots guide your next, life-saving action.