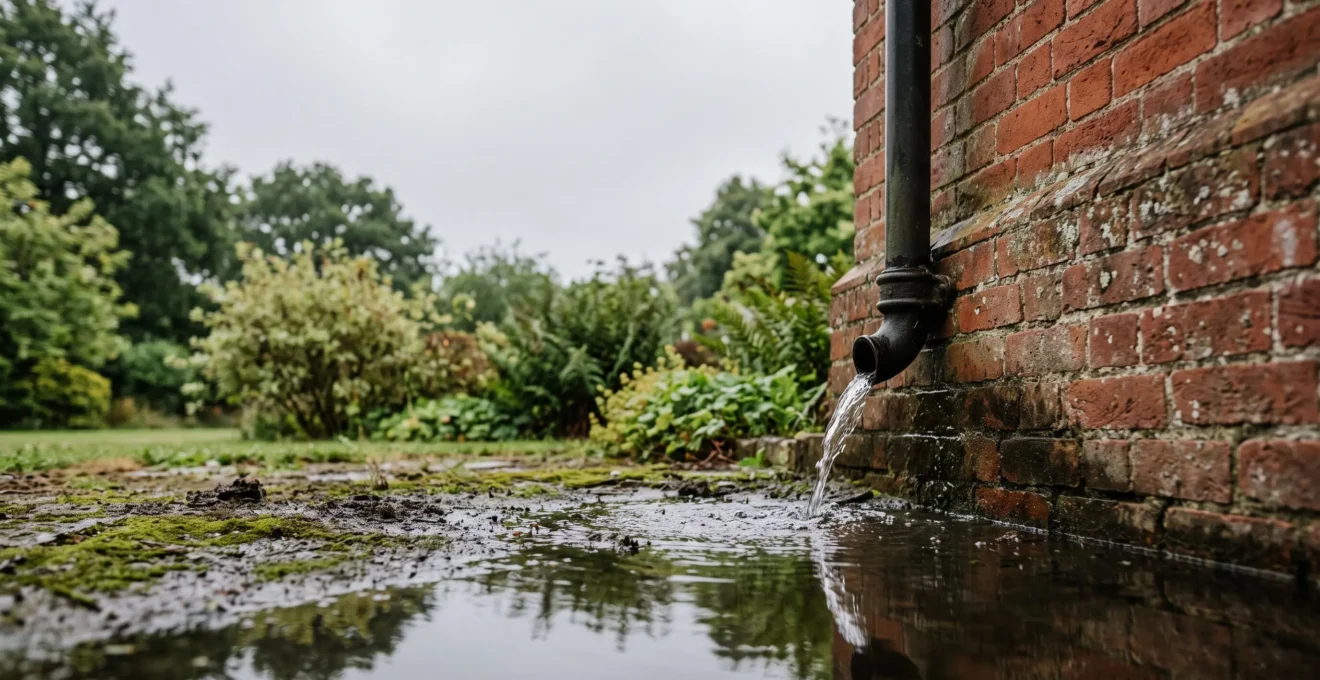
Contrary to common belief, persistent damp in period properties is rarely a failure of the original structure; it is almost always caused by external ground level mistakes that concentrate water against the foundations.
- High ground levels from modern flower beds or patios “bridge” the damp-proof course (DPC), allowing moisture to bypass it.
- Hard, non-permeable surfaces create intense “splashback” during rainfall, saturating the base of the brickwork.
- Faulty or poorly positioned downpipes and soakaways can dump tonnes of water directly into the ground next to the building.
Recommendation: Before considering any internal damp treatment, conduct a thorough audit of your home’s external perimeter to identify and rectify sources of water stagnation.
For owners of period properties, the appearance of dark, persistent damp patches on ground-floor walls is a familiar and dreaded sight. The immediate diagnosis is often “rising damp,” a term that conjures images of moisture mysteriously wicking up from the earth. This is typically followed by a recommendation for an expensive and invasive chemical damp-proof course injection. However, from a structural surveyor’s perspective, this approach often treats a symptom while completely ignoring the root cause.
The reality is that the original builders of Victorian and Edwardian homes understood water management well. These properties were constructed with robust, physical damp-proof courses (like slate) and sub-floor ventilation designed to last centuries. The problem is not that these systems are failing, but that they are being systematically overwhelmed by modern landscaping choices that their designers never anticipated. Concentrated water loading at the base of a wall creates immense hydrostatic pressure, forcing moisture into the brickwork through any available path.
This guide departs from the conventional narrative. It does not focus on internal remedies. Instead, it provides a surveyor’s analysis of the external errors that cause water to accumulate against your foundations. By understanding these mechanisms—from bridged DPCs and splashback to mismanaged roof water—you can correctly diagnose the problem and implement effective, long-lasting solutions that work with your home’s original design, rather than against it.
This article will dissect the most common external causes of damp in period homes, providing the knowledge needed to audit your own property. We will explore how seemingly harmless garden features can be the source of significant structural issues.
Table of Contents: A Surveyor’s Breakdown of External Damp Causes
- Why Flower Beds Built Against Walls Cause Damp Courses to Fail?
- How to Keep Air Bricks Clear Using Gravel Trenches?
- Splashback: How Hard Surfaces Near Walls Soak Brickwork
- The Downpipe Error Dumping Tonnes of Water on Foundations
- How Far Must a Soakaway Be From Foundations to Be Safe?
- Why Your New Driveway Needs to Be Permeable by Law?
- What is the Minimum Gradient Needed to Shed Water off a Patio?
- Hardscape Features That Comply With UK Permeable Paving Regulations
Why Flower Beds Built Against Walls Cause Damp Courses to Fail?
One of the most frequent causes of damp in older homes is the raised flower bed built directly against an external wall. While aesthetically pleasing, this common garden feature is a primary culprit in creating a “bridge” for moisture to bypass the property’s damp-proof course (DPC). A DPC is a horizontal barrier, historically made of slate or bitumen felt, built into the wall to prevent groundwater from rising via capillary action. For it to function, it must be clear of the ground.
UK building standards are explicit on this point. A key building survey inspection point is to check that the DPC is positioned at least 150mm, roughly two brick courses, above external ground level. When a flower bed is filled with soil, compost, and mulch, it raises the external ground level, often burying the DPC completely. This saturated soil and organic matter acts like a sponge held against the wall, creating a continuous path for moisture to travel up and over the DPC and into the porous brickwork above. This is not rising damp in the true sense; it is penetrating damp caused by DPC bridging.
A real-world survey of a Victorian terrace illustrates this perfectly. The owner was told they had rising damp, but a detailed inspection revealed the true causes were a raised patio and a flower bed blocking a sub-floor air brick. The correct solution was not a chemical injection, but the simple, structural repair of lowering the external ground levels and restoring ventilation. The damp symptoms resolved once the wall was allowed to dry out. This highlights a critical principle: always investigate external ground levels before assuming an internal DPC has failed.
How to Keep Air Bricks Clear Using Gravel Trenches?
Sub-floor ventilation is a cornerstone of period property design, intended to keep the structural timbers dry and prevent rot. This ventilation is provided by air bricks, which must be kept clear and unobstructed to allow for a consistent flow of air. When these are blocked by raised ground levels, paving, or dense planting, the humid, stagnant air trapped beneath the floorboards becomes a breeding ground for damp and decay. A highly effective and traditional solution to protect these air bricks and the base of the wall is the installation of a gravel-filled trench, often known as a French drain.
As one independent surveying firm explains, this feature serves a clear purpose. Oliver Walker Independent Surveyors note in their guide on the topic:
You will probably notice that some of the properties have a gravel filled trench at the base of the walls. This is a French Drain and its purpose is to disperse water that would otherwise soak into (and up) the wall.
– Oliver Walker Independent Surveyors, French Drains guide
Creating this protective zone involves digging a trench along the base of the wall, typically around 300mm wide and deep, and backfilling it with clean drainage gravel (e.g., 20mm shingle). This creates a dry, well-aerated void that serves two functions: it prevents soil and debris from physically blocking the air bricks, and it creates a barrier that intercepts and drains away surface water and splashback before it can saturate the base of the wall. In a case involving an 1840s brick house with high external ground levels, installing a gravel trench was the key intervention to reduce the water load on the foundations and restore ventilation.
Splashback: How Hard Surfaces Near Walls Soak Brickwork
While DPC bridging is a well-known issue, a more subtle but equally damaging phenomenon is “splashback.” This occurs when rainwater falls onto a hard, non-permeable surface—such as a concrete path, tarmac driveway, or stone patio—adjacent to a wall. The force of the impact causes the water to bounce back up, intensely soaking the lower courses of the brickwork. This constant wetting creates a zone of saturation that can lead to penetrating damp, salt contamination (efflorescence), and severe frost damage.
Surveyors have identified a clear pattern of this effect. The lowest part of a wall is almost always a wet area, not just from ground moisture but from this rebound effect. Experts note the existence of a 150mm zone where rain bounces upwards, significantly wetting the brickwork. Even with a functioning DPC, this persistent saturation above the DPC line can cause the visible symptoms of damp inside. Over winter, this trapped moisture is particularly destructive. As the water freezes, it expands, causing the face of the brick to delaminate and crumble—a process known as spalling. This permanently damages the brick and increases its porosity, making it even more vulnerable to future water ingress.
The solution to splashback involves breaking the connection between the hard surface and the wall. Creating a gravel-filled trench at the wall’s base, as previously discussed, is the best method. The gravel absorbs the impact of the rain and allows the water to drain away harmlessly into the ground, rather than bouncing onto the brickwork. This simple intervention can dramatically reduce the moisture level in the lower wall and prevent long-term decay.
The Downpipe Error Dumping Tonnes of Water on Foundations
Your roof collects an enormous volume of water during a rainstorm. The entire system of gutters and downpipes is designed to channel this water safely away from the building and into the main drainage system. However, a single crack, disconnected joint, or blocked gully can turn this system into a high-volume water pump, injecting thousands of litres directly into the ground beside your foundations. This is one of the most common and catastrophic causes of localised damp and, in severe cases, structural subsidence.
A homeowner on a popular forum described the anxiety of this discovery: after noticing a disconnected downpipe, they began having “nightmares about subsidence,” an anxiety amplified by seeing a neighbouring house with a classic diagonal subsidence crack. This fear is well-founded. When soil becomes saturated, it loses its load-bearing capacity. Clay soils, common throughout the UK, will swell when wet and shrink when dry, causing ground movement that can crack foundations and walls. A leaking downpipe creates a point of extreme, concentrated water loading that the ground was never meant to handle.
Regular inspection of your rainwater goods is therefore not just about cosmetic maintenance; it’s a critical structural check. Identifying a problem early can prevent thousands of pounds in repairs. Look for water staining on the wall beneath joints, green algae growth, or small gullies being eroded into the ground at the base of the pipe. These are all red flags that water is escaping where it shouldn’t.
Action Plan: Auditing for Subsidence Risks from Drains
- Wall Inspection: Check for the appearance of new cracks in walls, especially diagonal ones spreading from the corners of doors and windows.
- Internal Check: Look for uneven or sloping floors. Test doors to see if they stick in their frames, and check for new gaps appearing between skirting boards and the floor.
- External Ground Inspection: Examine paving for any cracking or sinking. Check if fences are tilting or if you can see soil pulling away from the building’s foundations.
- Basement/Cellar Check: In properties with basements, look for any signs of standing water or persistent dampness that could indicate a leak in underground drains.
- Direct Observation: During heavy rain, visually inspect every downpipe to ensure water is flowing into the drain, not spilling from joints or the base.
How Far Must a Soakaway Be From Foundations to Be Safe?
A soakaway is a simple yet effective system for disposing of rainwater from your roof. It is essentially a large pit, filled with rubble or plastic crates, that allows collected water to percolate slowly and harmlessly back into the ground. However, its location is absolutely critical. A soakaway positioned too close to the house does the exact opposite of what’s intended: instead of dispersing water, it concentrates it in the ground right next to your foundations, creating the very damp and subsidence risks it is meant to prevent.
To mitigate this risk, UK Building Regulations are unequivocal. Under Approved Document H, a rainwater soakaway must be positioned at least 5 metres from any building or road. This distance is non-negotiable and is a crucial safety margin to prevent the ground near foundations from becoming saturated and unstable. The effectiveness of a soakaway also depends entirely on the type of soil. Heavy clay soils do not drain well, and a soakaway in clay can quickly become a simple water-filled hole, increasing hydrostatic pressure against nearby structures. As drainage experts warn, this is a serious issue:
Clay soils are particularly vulnerable. When clay becomes saturated, it loses bearing capacity and swells. When it dries out, it shrinks.
– The Drainage Designers, Can You Build a Soakaway Near House Foundations?
Before installing a new soakaway, a simple percolation test is essential to confirm the ground is suitable. This involves digging a test hole and timing how long it takes for a known volume of water to drain away. A professional can advise on the exact methodology, but the basic steps are straightforward for a homeowner to assess viability:
- Excavate a trial hole to the proposed depth of the soakaway.
- Fill the excavated section with water and observe the drainage rate.
- If the water soaks away within a few hours, the ground is likely suitable for a standard soakaway.
- If the water pools and fails to drain, the ground has poor permeability (likely high clay content), and an alternative drainage strategy is required.
Why Your New Driveway Needs to Be Permeable by Law?
In recent decades, the widespread replacement of front gardens with traditional, impermeable surfaces like concrete and tarmac has had a significant environmental impact. These hard surfaces prevent rainwater from soaking naturally into the ground, instead directing massive volumes of runoff into the public drainage system. This overwhelms the sewers during heavy rainfall, contributing to flash flooding and pollution of rivers. To combat this, UK law was changed to manage water at its source.
Since 2008 in England, planning permission is required to lay a traditional impermeable driveway of more than five square metres. However, you do not need permission if the new surface is permeable. This legislation effectively mandates the use of Sustainable Drainage Systems (SuDS) for new front gardens and hardscaping. As industry guides like Checkatrade explain, “If you’re planning hard landscaping, you’ll need to provide a SUDS (Sustainable Drainage System) to ensure surface water… is collected and treated where it falls.” This is not just environmental red tape; it is a critical principle for protecting your property.
By choosing a permeable solution, you are not only complying with the law and helping to prevent flooding, but you are also actively preventing water from being channelled towards your home’s foundations. An impermeable driveway that slopes towards the house acts like a funnel, directing every drop of rain against your brickwork and creating the exact splashback and saturation issues discussed earlier. A permeable surface is a fundamental part of a holistic water management strategy for any property, turning a potential hazard into a passive drainage feature.
What is the Minimum Gradient Needed to Shed Water off a Patio?
When installing any hard, impermeable surface like a patio or path, its ability to shed water effectively is paramount. A perfectly flat patio will allow water to “pond” on its surface, creating slip hazards, encouraging algae growth, and allowing water to sit against the house for extended periods, inevitably finding its way into the brickwork. To prevent this, the surface must be constructed with a slight, almost imperceptible slope, known as a “fall,” to direct water away from the property.
There is no single legally mandated gradient, but building standards and professional landscaping guidelines provide a clear best practice. For a paved patio, a minimum fall of 1 in 80 is generally recommended. This means that for every 80 units of horizontal distance, the surface level should drop by 1 unit. For example, a 4-metre (400cm) wide patio should have a total fall of 5cm from the side nearest the house to its outer edge (400 / 80 = 5). A slightly steeper gradient of 1 in 60 is often preferred as it provides a better tolerance for any minor inaccuracies during construction and more positive drainage.
This gradient should always direct water away from the building, ideally towards a suitable drainage point like a lawn, a flower bed (set well away from the house), or a dedicated channel drain connected to a soakaway. The direction of the fall is just as important as the angle. A patio that slopes back towards the house, no matter how slightly, is a catastrophic design flaw that will guarantee persistent damp problems at the base of the wall.
Key Takeaways
- Damp-Proof Course (DPC) Integrity: The DPC must have a clear 150mm (two brick courses) separation from any external ground, soil, or paving to prevent moisture bridging.
- Water Redirection is Key: All external surfaces, from patios to paths, must be graded to actively channel rainwater away from the building’s foundations.
- Manage Concentrated Runoff: Gutters, downpipes, and soakaways must be maintained and correctly positioned (soakaways 5m+ away) to prevent them from discharging large volumes of water into the ground near the house.
Hardscape Features That Comply With UK Permeable Paving Regulations
Complying with SuDS regulations and protecting your property’s foundations is not a matter of forgoing a driveway or patio, but of choosing the right materials and design. Modern permeable hardscaping offers a range of effective and aesthetically pleasing solutions that allow water to drain through the surface, replenishing the groundwater table instead of contributing to runoff. These systems are the first line of defence in a robust water management plan for any period home.
Common compliant solutions include:
- Permeable Paving Blocks: These look like standard block paving but have larger gaps between the units and sit on a sub-base of graded aggregates, allowing water to filter through the joints.
- Gravel or Shingle: The simplest permeable surface, often used with honeycomb-like cellular grids just below the surface to prevent the gravel from migrating and forming ruts.
- Resin-Bound Surfacing: A system where small stones are mixed with a clear resin and trowelled onto a permeable sub-base, creating a smooth, hard-wearing, and fully porous surface.
More advanced SuDS features like rain gardens—shallow planted depressions designed to hold and slowly absorb rainwater—are also excellent, though as the sustainable drainage charity susdrain notes, space constraints can mean these features sometimes need to be sited near buildings, requiring careful design. For most homeowners, a professionally installed permeable driveway or patio provides the perfect balance of compliance, functionality, and foundation protection. It deals with rainwater exactly where it falls, eliminating the risk of splashback and preventing surface water from ever reaching the walls of your home.
Ultimately, protecting a period home from damp is an exercise in respecting its original design while mitigating the pressures of the modern environment. By shifting your focus from the internal symptoms to the external causes, you can diagnose the true source of the problem and implement logical, structural solutions. An audit of your garden, paving, and roof drainage is the single most valuable step any owner of an older property can take to ensure its long-term health and integrity.