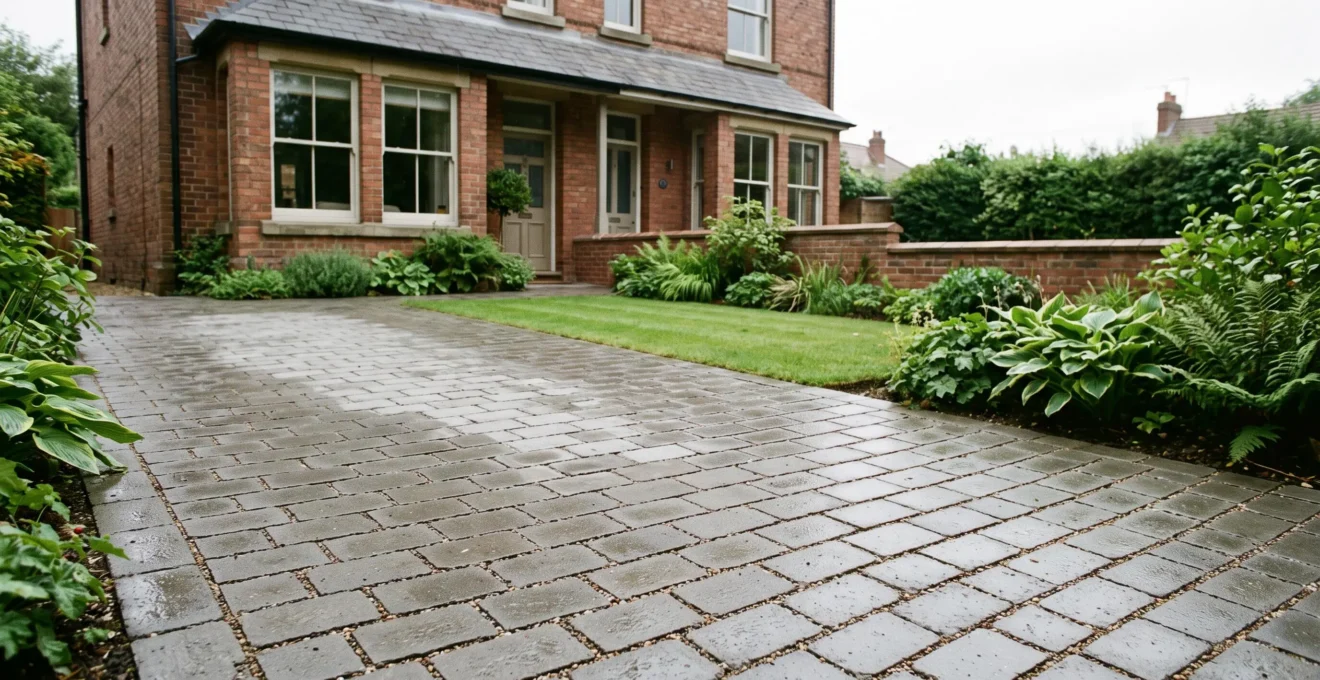
Failure to comply with UK drainage regulations is not merely a legal issue; it is a structural engineering failure waiting to happen, with significant financial consequences.
- The performance and legality of a permeable driveway are dictated by its unseen engineered sub-base (e.g., MOT Type 3), not the visible surface pavers.
- A non-compliant installation, often discovered during conveyancing surveys, can jeopardise or halt a property sale, forcing costly remedial works.
Recommendation: Approach any hardscaping project as a complete water management system, where sub-base engineering and jointing techniques are prioritised over surface aesthetics.
Planning a new driveway or patio is often a project filled with aesthetic choices: the colour of the block paving, the pattern of the lay, the sleek lines of a modern design. Yet, for homeowners in the UK, a far more critical and often overlooked consideration lies beneath the surface. Since 2008, legislation governing impermeable surfaces has turned the seemingly simple act of paving a front garden into a matter of legal and engineering compliance. Many homeowners, and even some contractors, remain dangerously unaware of the specifics, focusing on the visible finish while ignoring the foundational engineering that determines legality and longevity.
The common advice to simply “use permeable pavers” is a gross oversimplification. It misses the crucial point that permeability is a function of an entire system, from the jointing sand down to the carefully specified sub-base. It also ignores the host of related hardscaping features, from decking in conservation areas to the wiring for outdoor lights, that carry their own regulatory and technical risks. This superficial understanding leads to installations that are not only illegal but are destined for premature failure through subsidence, frost damage, and flooding.
The true key to a successful, durable, and compliant hardscaping project lies not in the choice of stone, but in adopting a civil engineer’s perspective. It requires understanding the project as an integrated drainage system designed to manage water, not just shed it. This guide departs from the surface-level advice. We will dissect the legal requirements, expose the common but catastrophic engineering mistakes, and detail the correct technical specifications for building hardscapes that are not only beautiful but are also lawful and built to withstand the rigours of the British climate.
To navigate these technical and legal requirements effectively, this article breaks down the core components of compliant hardscaping. The following sections provide a structured, engineering-led overview to ensure your project is a long-term success.
Summary: A Civil Engineer’s Guide to UK Permeable Paving Regulations
- Why Your New Driveway Needs to Be Permeable by Law?
- How to Lay Paving on Sand to Prevent Sinking and Cracking?
- Composite or Timber: Which is Less Slippery in Wet British Winters?
- The Pointing Mistake That Blows Out in the First Frost
- How to Wire Outdoor Lighting into Hardscapes Without Shorting?
- Do You Need Planning Permission for Decking in a Conservation Area?
- How Big Should Your Rain Garden Be to Handle Roof Runoff?
- How to Build Rain Gardens to Handle British Storm Surges?
Why Your New Driveway Needs to Be Permeable by Law?
The legal requirement for permeable driveways is rooted in the Flood and Water Management Act 2010, which codified government guidance on Sustainable Drainage Systems (SuDS). The law addresses the increasing risk of surface water flooding caused by urban creep—the incremental replacement of porous ground with impermeable surfaces like concrete and traditional asphalt. For homeowners, this translates to a simple rule: any new or replacement driveway or paved front garden area exceeding five square metres must either be constructed from permeable materials or have provisions to direct runoff to a permeable area on the property, such as a lawn or a purpose-built soakaway.
Ignoring this legislation is not a trivial matter. The consequences are financial and logistical, often surfacing at the most inopportune times. Local authorities have the power to issue enforcement notices demanding the removal of non-compliant surfaces, a risk that is becoming more tangible as councils get stricter. In one year alone, local authorities across the UK issued over 15,000 enforcement notices to homeowners for various planning breaches, including non-compliant paving. This figure underscores a growing intolerance for illegal installations.
Perhaps the most significant risk emerges during the sale of a property. A conveyancing survey will flag a non-compliant driveway, creating a major legal and financial obstacle that can derail the entire transaction. The buyer’s solicitor will demand a solution, which often means either a significant price reduction or the costly, last-minute replacement of the entire driveway before the sale can proceed.
Case Study: The Hidden Cost of Non-Compliance in Stoke-on-Trent
A UK driveway installer reported a stark real-world example of this risk. They were called to three separate properties in Stoke-on-Trent over a two-year period where homeowners were forced by conveyancing survey findings to completely rebuild recently installed, non-SuDS-compliant driveways. What was thought to be a finished project became a sudden, expensive, and deal-threatening liability, demonstrating how a “quick” paving job can turn into a five-figure problem during the critical house-selling process, as documented in cases flagged by conveyancing surveys.
Therefore, compliance is not an optional extra; it is a fundamental project requirement with serious legal and financial implications. It protects not only the wider environment from flood risk but also the homeowner from future enforcement action and significant loss of property value.
How to Lay Paving on Sand to Prevent Sinking and Cracking?
The long-term stability of any paved surface, particularly a permeable one, is determined not by the expensive blocks on top but by the unseen engineering of the sub-base and laying course beneath. A common cause of failure—sinking, rutting, and cracking—is the incorrect use of materials, specifically using traditional ‘sharp sand’ and a dense sub-base (MOT Type 1) for a system that must remain porous. This approach is fundamentally flawed for SuDS compliance and guarantees eventual structural failure.
A compliant permeable system relies on a concept called hydraulic performance. The entire construction, from the joints between pavers to the sub-base deep below, must form a single, free-draining entity. The standard for this is British Standard BS 7533-13. It requires a completely different construction method. Instead of a dense, compacting sub-base like MOT Type 1, a permeable installation must use an open-graded aggregate, such as MOT Type 3. The crucial difference is the deliberate absence of ‘fines’ (small particles and dust) in MOT Type 3, which creates voids for water to pass through freely.
The table below, based on standard aggregate specifications, highlights the critical engineering differences between the traditional and the compliant sub-base materials. A proper sub-base must be specified as open-graded, like the products detailed in specifications for MOT Type 3 aggregate.
| Criterion | MOT Type 1 | MOT Type 3 |
|---|---|---|
| Fines content | High (well-graded, compacts densely) | Low/near-absent (open-graded) |
| Primary function | Load-bearing, general-purpose sub-base | Free-draining, permeable sub-base |
| Typical use | Traditional (impermeable) driveways and roads | SuDS and permeable paving, patios, garden paths |
| Frost/heave resistance | Standard | Enhanced, reduces risk of frost heave by preventing water saturation |
The laying course itself must also be permeable. Replacing sharp sand with a 2/6.3mm clean aggregate ensures water that passes through the paving joints is not blocked at the final layer. This systems-based approach is the only way to prevent both structural failure and non-compliance.
Action Plan: Building a BS 7533-Compliant Permeable Base
- Excavate and construct an open-graded, permeable sub-base (e.g., MOT Type 3), not standard compacting stone, to the depth required for domestic driveway loads.
- Once the sub-base is built, install the laying course at a consistent depth, typically 50mm for domestic applications.
- Replace sharp or grit sand with a permeable chipping, graded 2/6.3 Gc 80/20 per BS EN 13242:2007, allowing water to pass through to the sub-base.
- Choose pavers with interlocking nibs to maintain a consistent 6mm joint for hydraulic performance while providing structural stability.
- Fill joints with the same permeable aggregate, not a cement-based compound, to preserve the entire pavement’s drainage capacity from top to bottom.
Composite or Timber: Which is Less Slippery in Wet British Winters?
For hardscaping areas like decks and patios, the choice between timber and composite decking involves more than just aesthetics and maintenance; it is a critical safety consideration, especially during the perpetually damp British winters. The risk of a slippery surface is a function of material properties and its interaction with water and organic growth. Both materials present different challenges that a homeowner must understand to make an informed decision.
Traditional timber decking, particularly smooth-planed softwood, is notoriously prone to becoming slippery. The wood’s porous cellular structure provides an ideal environment for algae, mould, and moss to take hold. When wet, this thin layer of biofilm becomes a slick, hazardous surface. While grooved boards are often marketed as being ‘anti-slip’, these grooves can actually trap moisture and organic debris, potentially exacerbating the problem if not meticulously cleaned. Hardwoods like Iroko or Balau are denser and more resistant to organic growth, but they are not immune and require regular treatment.
Composite decking, particularly modern ‘capped’ or ‘shielded’ varieties, offers a distinct advantage in this regard. These boards consist of a wood-plastic composite core protected by a non-porous polymer shell. This outer layer is far more resistant to moisture absorption and, consequently, to the growth of algae. While no surface is truly ‘slip-proof’ when wet, a clean composite board will generally offer superior slip resistance to a similarly wet timber board that has developed biofilm. However, the key word is ‘clean’. A build-up of dirt and debris on a composite deck can still support algal growth and reduce its safety.
Ultimately, the level of slip resistance for either material is directly proportional to its maintenance. A well-maintained timber deck, regularly cleaned and treated with an anti-slip finish, can be safer than a neglected composite deck covered in leaf litter. However, from a baseline material perspective, capped composite decking provides a less hospitable surface for the organic growth that is the primary cause of slipperiness in the UK’s wet climate.
The Pointing Mistake That Blows Out in the First Frost
For traditional patios and pathways using impermeable stone slabs, the choice of jointing material—the ‘pointing’—is one of the most common points of failure in the British climate. A seemingly minor error in material selection can lead to the catastrophic failure of the joints during the very first winter. The mistake is using a rigid, non-porous cement-based mortar in a misguided attempt to create a ‘strong’ and ‘sealed’ joint.
This approach is fundamentally at odds with the physics of a freeze-thaw cycle. In the UK, water is an ever-present feature. It will inevitably find its way into the tiny pores of the slabs and the bedding layer beneath. When temperatures drop below zero, this trapped water freezes and expands with immense force—up to 9% by volume. A rigid cement mortar joint creates a sealed box with no escape route for this pressure. The expanding ice exerts enormous hydraulic pressure against the mortar, which, being brittle, eventually cracks and blows out, leaving a shattered, crumbling joint.
The damage is not just aesthetic. The compromised joint now allows even more water to penetrate the sub-layer, accelerating the degradation of the bedding material and leading to wobbly, unstable paving slabs. This process repeats and worsens with every frost, turning a pristine patio into a hazardous mess within a few seasons.
The correct engineering solution is to work with the climate, not against it. Modern pointing involves using a permeable, flexible jointing compound. These resin-based materials cure to a hard finish but remain micro-porous and slightly flexible. This allows any trapped water to escape as vapour and provides enough flexibility to absorb the stresses of thermal expansion and contraction without cracking. By allowing the system to ‘breathe’, these compounds prevent the build-up of hydraulic pressure, ensuring the joints survive the winter intact.
How to Wire Outdoor Lighting into Hardscapes Without Shorting?
Integrating electrical lighting into hardscape designs such as driveways, patios, and walls adds significant aesthetic appeal and functionality. However, it also introduces a considerable risk of electrical failure and, more importantly, a serious safety hazard if not executed with professional diligence. The primary challenge is protecting the wiring and connections from the constant presence of moisture, ground movement, and physical damage—factors that are guaranteed in any UK garden.
The most common cause of failure is inadequate protection of the cabling. Simply burying a standard electrical cable under paving is a recipe for disaster. Ground heave from frost, settlement of the sub-base, or an errant garden spade can easily nick or crush the insulation, leading to a short circuit. All buried cables must be run inside a suitable armoured conduit or be Steel Wire Armoured (SWA) cable itself. This provides essential mechanical protection. Furthermore, all buried cables should be laid on a bed of sand and covered with warning tape before backfilling, as a signal to any future excavation work.
The choice of fittings is equally critical. All outdoor lights, transformers, and junction boxes must have an appropriate Ingress Protection (IP) rating. For garden lighting, IP65 is the minimum acceptable standard for fixtures exposed to rain, while fittings that may be submerged in puddles or are recessed into paving (uplighters) must be rated at least IP67. Using interior-grade components outdoors is a guaranteed failure point and a serious fire or electrocution risk.
Finally, any outdoor electrical circuit must be protected by a Residual Current Device (RCD) at the consumer unit. An RCD is a life-saving device that monitors the electrical current and will instantly cut the power if it detects a fault, such as a damaged cable leaking current to the earth. This is not optional; it is a legal requirement under the IET Wiring Regulations (BS 7671). Due to the inherent risks, all hardscape electrical work should be designed and installed by a qualified electrician. This ensures the system is not only functional but, above all, safe.
Do You Need Planning Permission for Decking in a Conservation Area?
The rules governing garden structures like decking fall under the UK’s “Permitted Development” rights. For most properties, building a deck is considered permitted development, not requiring a full planning application, provided it meets strict criteria. These typically include that the decking is no more than 30cm above the ground and, together with other extensions and outbuildings, covers no more than 50% of the garden area. However, these rights are significantly curtailed when the property is located within a Conservation Area.
A Conservation Area is a location designated for its special architectural or historic interest. The goal is to preserve or enhance its character. Consequently, local planning authorities have much tighter control over any development, and standard permitted development rights are often restricted or removed entirely by an ‘Article 4 Direction’. This means that work that would not need permission elsewhere—such as building a deck, erecting a fence, or even painting a house a different colour—may require a full planning application.
For decking specifically, the key factor in a Conservation Area is its visibility from public viewpoints. A low-level deck in a secluded back garden might be viewed differently from a raised deck at the front of a property. The primary concern of the planning authority will be the deck’s impact on the character and appearance of the Conservation Area. They will assess its design, materials, scale, and position. Using materials that are sympathetic to the local vernacular (e.g., traditional timber over a modern composite) and a design that is subservient to the main building will be crucial for gaining approval.
Therefore, the definitive answer is: always assume you need to check. Before committing to any plans or purchasing materials for a deck in a Conservation Area, it is imperative to contact your local council’s planning department. They can confirm whether an Article 4 Direction is in place and what the specific local policies are. Proceeding without this confirmation is a significant gamble that could result in an enforcement notice demanding the deck’s removal at your own expense.
How Big Should Your Rain Garden Be to Handle Roof Runoff?
A rain garden is a highly effective SuDS solution for managing roof runoff, turning a potential flooding problem into an ecological asset. However, its success hinges on it being correctly sized to handle the volume of water it will receive during a typical British downpour. An undersized garden will be overwhelmed, defeating its purpose, while an oversized one is an inefficient use of space. Sizing it correctly is a straightforward engineering calculation based on two key variables: the collection area (your roof) and the soil’s infiltration rate.
As a practical rule of thumb for residential projects with moderately draining soil (e.g., loam or sandy clay), a rain garden should have a surface area that is approximately 20% of the impermeable area it is draining. For example, if you are directing a downpipe that drains a 50 square metre section of your roof, your rain garden should be around 10 square metres (50 x 0.20 = 10).
A more precise calculation can be made using the following formula:
Rain Garden Area (m²) = Roof Area (m²) x Rainfall Depth (m) / Rain Garden Storage Depth (m)
- Roof Area: The horizontal footprint of the roof section draining to the garden.
- Rainfall Depth: For design purposes in the UK, a value of 0.02m (20mm) is a common figure representing a heavy rainfall event.
- Rain Garden Storage Depth: This is the depth of water the garden is designed to hold temporarily, typically between 0.15m (15cm) and 0.30m (30cm).
Using our 50m² roof example with a storage depth of 15cm (0.15m):
Area = 50m² x 0.02m / 0.15m = 6.67m²
This provides a more refined sizing. If your soil has poor drainage (heavy clay), you should err on the side of a larger garden, potentially increasing the size by 20-30% or engineering a more robust drainage layer at the base.
The shape can be adapted to your garden’s layout—long and thin or a wider basin—as long as the total surface area is correct. The key is to create a depression that has sufficient volume to capture and hold the ‘first flush’ of a storm, allowing it to slowly and safely infiltrate back into the ground.
Key takeaways
- SuDS compliance for driveways over 5m² is a legal requirement in the UK, enforced with notices and critically checked during property sales.
- The performance of a permeable system is determined by its engineered sub-base (e.g., MOT Type 3), not the surface pavers. Using the wrong aggregate guarantees failure.
- Common failure points like incorrect pointing are preventable with proper material selection (flexible, permeable compounds) to withstand the UK’s freeze-thaw climate.
How to Build Rain Gardens to Handle British Storm Surges?
Building a rain garden that can effectively handle the intense, short-duration storm surges characteristic of the UK climate goes beyond simply digging a hole. It requires a thoughtful, engineered approach to soil composition and planting. The goal is to create a bioretention system that captures, filters, and slowly releases stormwater, reducing the strain on public drainage systems while creating a valuable garden habitat.
The heart of a successful rain garden is its soil profile. A typical lawn or garden border often has compacted soil that is unsuitable for rapid infiltration. The basin must be excavated—typically to a depth of 60-80cm—and backfilled with a custom, free-draining bioretention soil mix. A standard mix consists of approximately 60% sand, 20% compost, and 20% native topsoil. The high sand content ensures rapid drainage, while the compost provides nutrients for the plants and helps to filter pollutants from the runoff.
Plant selection is the final, crucial component. Plants in a rain garden must be resilient enough to tolerate periods of both inundation and drought. The base of the basin, which will experience the most prolonged wetness, is suited for species like Yellow Flag Iris (Iris pseudacorus), sedges (Carex species), and rushes (Juncus species). The sloping sides of the garden, which drain more quickly, are ideal for plants that can handle ‘wet feet’ but also tolerate drier conditions, such as Purple Loosestrife (Lythrum salicaria), Dogwood (Cornus sanguinea), and various ferns. Using native plants is highly recommended as they are already adapted to the local climate and support local wildlife.
By combining correct sizing, a properly engineered soil medium, and strategic planting, a rain garden becomes more than just a boggy patch. It becomes a high-performance piece of green infrastructure, a small-scale, personal flood defence that actively manages stormwater exactly where it falls. It is the ultimate expression of SuDS principles applied to a residential setting.
To ensure your hardscaping project is both legally compliant and structurally sound for the long term, the critical first step is to specify the correct sub-base and drainage system in your plans before a single paver is ordered or a spade hits the ground.