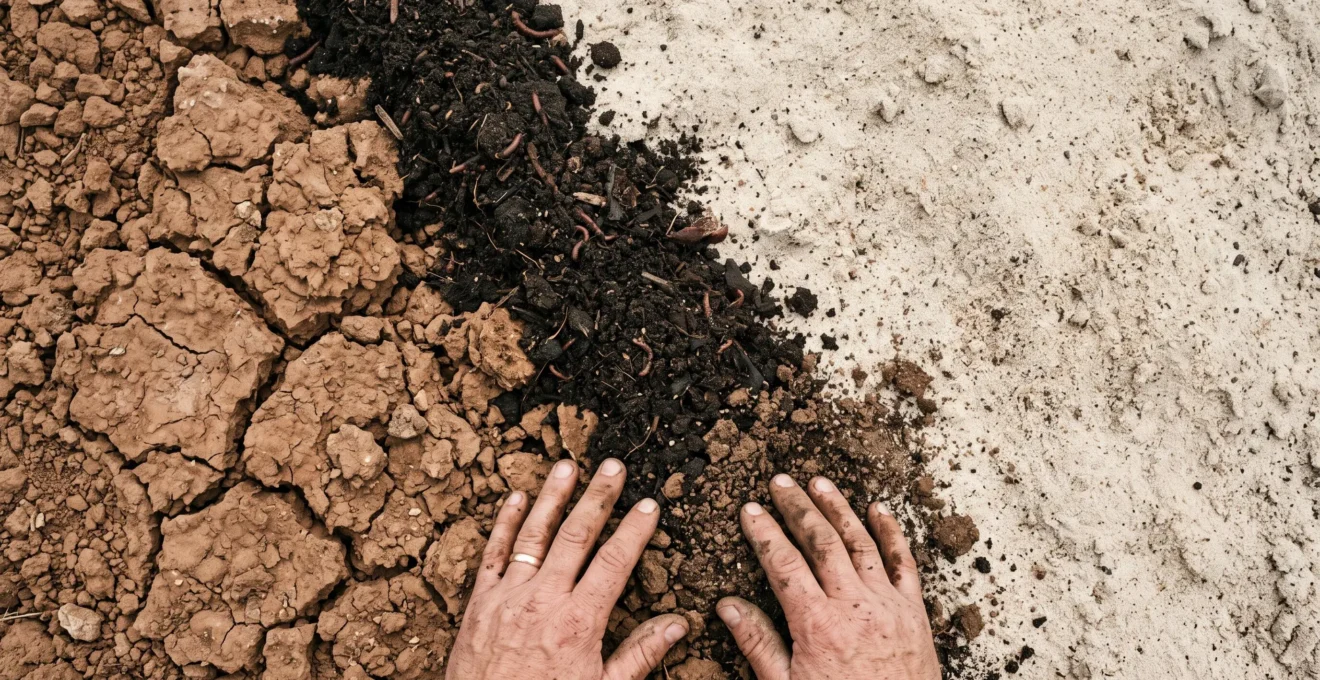
Endlessly adding compost won’t permanently fix your soil because most organic matter is designed to decompose; the real solution lies in building a stable, physical scaffolding within the soil itself.
- Stable amendments like biochar provide a porous, carbon-rich structure that lasts for centuries.
- Application should be done with minimal digging, using ‘bio-drilling’ cover crops to preserve soil life.
Recommendation: Start by diagnosing the root cause of your soil issue—is it texture, compaction, or grading?—before choosing your amendment.
Every gardener with difficult soil knows the cycle. You battle with heavy, sticky clay that drowns roots in winter, or with thirsty, nutrient-leaching sand that demands constant watering in summer. The universal advice is always the same: “just add more compost.” And so you do, year after year, turning your back for a season only to find the old problems creeping back. The soil compacts, the sand dries out, and the frustration mounts. This is because we’ve been taught to treat a structural problem with a purely biological solution.
Compost is essential for soil life and fertility, but it is, by its very nature, temporary. It’s food, meant to be consumed by soil organisms. While this process releases nutrients, it means the volume and structure it provides inevitably diminish. To achieve a permanent fix, you must think less like a chef feeding your soil and more like an engineer building a lasting framework. The key isn’t just organic matter, but the *type* of organic matter and *how* it physically interacts with existing soil particles.
What if the solution wasn’t in adding more degradable material, but in introducing a stable, physical scaffolding that permanently alters the soil’s geological character? This involves using amendments that resist decomposition and techniques that build, rather than destroy, the delicate architecture of the soil. It’s about creating stable aggregates, microscopic domains where air, water, and life can coexist.
This guide will deconstruct the physics of permanent soil improvement. We will explore why some amendments last for centuries while others disappear, how to apply them without destroying the very structure you aim to build, and how to diagnose the true underlying cause of your soil woes, be it texture, compaction, or even the slope of your land. It’s time to stop the cycle and build a soil that works for you, for good.
To navigate this deep dive into soil structure, the following sections will guide you through the science and practical steps for a permanent transformation. From the ancient secret of biochar to the modern understanding of cover crops, you’ll find the tools to re-engineer your garden from the ground up.
Summary: Clay or Sand: A Guide to Permanent Soil Structure Solutions
- Why Biochar Lasts 100 Years in Soil Compared to Compost?
- Digging vs Top Dressing: How to Apply Amendments Without Wrecking Structure?
- The Woodchip Error That Starves Your Plants of Nitrogen
- How to Make Leaf Mould: The ‘Gold Dust’ for Clay Soil Remediation?
- Mushroom Compost: Is It Too Alkaline for Your Rhododendrons?
- Compaction or Grading: Why is Water Pooling in the Middle?
- Sand or Compost: The Perfect Soil Mix for Rapid Drainage
- Correcting Land Grading to Stop Lawn Waterlogging in Winter
Why Biochar Lasts 100 Years in Soil Compared to Compost?
The fundamental difference between compost and biochar lies in the stability of their carbon. Compost is a product of biological decomposition, rich in ‘labile’ carbon that soil microbes readily consume. This is why it’s a fantastic source of nutrients but a short-term structural amendment. Biochar, in contrast, is created through pyrolysis—heating organic matter in a low-oxygen environment. This process transforms the carbon into a highly stable, crystalline structure known as recalcitrant carbon. It’s essentially a form of charcoal designed for soil.
This structural permanence isn’t a modern invention. Indigenous communities in the Amazon created “Terra Preta” (black earth) thousands of years ago by incorporating charcoal and organic waste into the notoriously poor jungle soil. These man-made soils remain incredibly fertile today, a living testament to biochar’s longevity. This is because the porous nature of biochar acts like a permanent microscopic sponge, holding onto water and nutrients that would otherwise leach away, particularly in sandy soils. Its immense surface area also provides a lasting refuge for beneficial microbes.
Modern science confirms this ancient practice; studies using carbon-dating techniques show that the majority of biochar carbon remains in storage after a century, with many estimates suggesting persistence for millennia. This is the closest thing to a “permanent” structural amendment a gardener can get. It doesn’t just add organic matter; it adds a lasting physical framework. As soil scientist Christoph Steiner explains, this structure is key to its function.
We believe that the structure of charcoal provides a secure habitat for microbiota, which is very important for crop production.
– Christoph Steiner, Environmental Health Perspectives
By adding biochar, you are not just feeding the soil for a season; you are building a permanent, high-performance habitat for the entire soil food web, improving both water retention in sand and aeration in clay for decades to come.
Digging vs Top Dressing: How to Apply Amendments Without Wrecking Structure?
The traditional image of soil improvement involves a spade and hard work: digging, tilling, and double-digging amendments deep into the soil. While this provides instant gratification, this mechanical disruption is often counter-productive. It shatters the delicate, invisible architecture of the soil—the fungal hyphae networks, the worm channels, and the stable soil aggregates that you are trying to create. Tilling can destroy in minutes what nature took years to build, leading to compaction and poor water infiltration over time.
A more effective and sustainable approach is to mimic nature by top-dressing. Applying amendments like compost or leaf mould as a layer on the surface allows soil life to do the work of incorporation for you. Earthworms, beetles, and microbes will gradually pull the organic matter down into the soil profile, creating stable channels and building structure without the destructive impact of a spade. This method respects the existing soil food web and promotes its health.
For breaking up deeper compaction without digging, the most elegant solution is biomechanical action, using living plants. Cover crops with strong, deep taproots, such as daikon-type radishes or alfalfa, can be planted in compacted areas. These roots drill down through dense layers, and when they die and decompose, they leave behind open channels for air and water. This “bio-drilling” is a powerful, non-invasive way to improve aeration and drainage. Research consistently shows this method works; indeed, field trials have found that in no-till plots, cover crops significantly reduced soil compaction in the hardpan layer below the topsoil.
Action Plan: Using Cover Crops to Fix Compaction Without Digging
- Identify compacted zones: Use a simple metal rod or conduct a percolation test (dig a hole, fill it with water, and time how long it takes to drain) to map out problem areas.
- Select the right species: Plant deep-rooting species like forage radish, chicory, or sweet clover that are known to penetrate dense soil layers.
- Allow for in-place decay: Cut the cover crop at ground level before it sets seed, leaving the roots in the ground to rot. These decaying roots create the crucial channels.
- Leverage soil life: The decaying roots feed earthworms and microbes, whose activity further loosens soil and builds stable aggregates over time.
- Combine with reduced tillage: Avoid tilling the area in subsequent seasons to preserve the newly formed channels and allow organic matter to build up.
The Woodchip Error That Starves Your Plants of Nitrogen
One of the most persistent myths in gardening is that using fresh wood chips as mulch will “rob” the soil of nitrogen, starving nearby plants. This fear is rooted in a partial understanding of the Carbon-to-Nitrogen (C:N) ratio. Decomposing high-carbon materials like wood does require nitrogen, and the microbes responsible for this decomposition will pull available nitrogen from their immediate surroundings. This process is called nitrogen immobilization or “drawdown.” However, the fear that this will harm established plants is largely unfounded.
The critical detail most advice misses is the location of this drawdown. When wood chips are used as a surface mulch, the nitrogen immobilization happens almost exclusively at the razor-thin interface where the mulch meets the soil. In fact, soil science shows that the zone of reduced nitrogen is roughly the top half-inch of soil. The roots of most established shrubs, trees, and perennials are located far below this zone and are unaffected. The “error” is in mixing large quantities of fresh, un-composted wood chips *into* the root zone of your soil, where the nitrogen competition would be direct and potentially harmful to young seedlings.
Used correctly as a surface mulch, wood chips are immensely beneficial. They conserve moisture, suppress weeds, and moderate soil temperature. Over time, as the bottom layer slowly decomposes, it creates a rich, fungal-dominated humus that dramatically improves soil structure. A comprehensive review of scientific literature confirms this.
Experimental research reveals that neither nitrogen immobilization nor growth suppression occurs as a result of using woody materials for mulch.
– Journal of Environmental Horticulture (review), Cited in ‘Will Mulching Reduce Soil Nitrogen?’, Tyrant Farms
So, do not be afraid to use wood chips as a top dressing. The real mistake isn’t using them, but tilling them into the soil where they can compete with shallow-rooted plants for nitrogen. For mulching, they are one of the best long-term structural improvers you can use.
How to Make Leaf Mould: The ‘Gold Dust’ for Clay Soil Remediation?
While compost is the product of a hot, fast, bacterial-driven process, leaf mould is its cool, slow, fungal counterpart. It is, quite simply, what you get when you let leaves decompose by themselves over one to two years. The resulting material is not particularly high in nutrients, but its physical properties are what make it “gold dust,” especially for heavy clay soil. The decomposition is performed primarily by fungi, which break down the tough lignin in leaves, creating a fine, crumbly, and exceptionally stable form of humus.
This fungal humus is a master of particle bridging. Its fine, fibrous particles work their way between the tiny, flat platelets of clay, forcing them apart and preventing them from sticking together. This creates pore space for air and water, instantly improving aeration and drainage. Unlike more rapidly decomposing compost, the stable structure of leaf mould provides this benefit for a much longer period. It also has an exceptional ability to hold water, retaining up to 500 times its own weight, which helps improve the drought resistance of both clay and sandy soils.
The texture is key. Well-rotted leaf mould is dark, soft, and sweet-smelling, with a consistency that feels like a forest floor. It’s teeming with the fine, white threads of fungal hyphae, the architects of good soil structure.
Making leaf mould is incredibly simple. You only need two things: leaves and patience. Rake up fallen leaves in the autumn—a mix of types is good, but any will do. Moisten them thoroughly and pack them into black plastic sacks with a few air holes poked in the sides, or simply build a large, freestanding pile in a shady corner. Then, walk away. After a year, you’ll have a partially decomposed product perfect as a mulch. After two years, you’ll have the fine, dark, crumbly material that is perfect for incorporating into planting holes or using in potting mixes to permanently improve soil structure.
Mushroom Compost: Is It Too Alkaline for Your Rhododendrons?
Spent Mushroom Compost (SMC) is a widely available and affordable soil amendment, but using it without understanding its properties can be a costly mistake. It is the leftover substrate from mushroom farming, typically a mix of straw, manure, and gypsum or chalk. While it can be a good source of organic matter, it carries two significant risks: high pH and high salinity.
The primary concern is its alkalinity. Mushroom growers often add chalk or lime to the substrate to prevent fungal diseases, which means the final compost product can have a pH of 8.0 or even higher. This is perfectly fine, even beneficial, for a vegetable garden where most plants prefer a neutral to slightly alkaline soil. However, for acid-loving (ericaceous) plants like rhododendrons, azaleas, blueberries, and camellias, this high pH is toxic. It locks up essential nutrients like iron, leading to yellowing leaves (chlorosis) and stunted growth. A thesis from the Swedish University of Agricultural Sciences noted that initial assessment of the composts… revealed alkaline pH values… which are unfavourable for plant growth, confirming this well-known characteristic.
A second, less-known danger is salinity. The mushroom growing process can concentrate salts, and the resulting compost can have an extremely high Electrical Conductivity (EC), which is a measure of total dissolved salts. These salts can “burn” plant roots and inhibit water uptake, causing plants to wilt even in moist soil. The effect can be dramatic; one study found that electrical conductivity of spent mushroom compost measured at 23.50 mS/cm, a level drastically higher than the recommended threshold of less than 0.5 mS/cm for sensitive plants. This makes fresh, un-leached SMC a particularly risky choice for potted plants or starting seeds.
The verdict is clear: spent mushroom compost is a useful bulk amendment for vegetable beds and lawns that can tolerate its alkaline nature. But it should never be used near acid-loving plants. For them, amendments like leaf mould or pine bark fines are far safer and more effective choices.
Compaction or Grading: Why is Water Pooling in the Middle?
When water consistently pools in your lawn or garden beds, it points to one of two structural flaws: a problem below the surface (compaction) or a problem with the surface itself (improper grading). The first suspect is often a hidden compaction layer, also known as a hardpan. This is a dense, almost impermeable layer of soil a few inches to a foot below the surface, often created by heavy foot traffic or construction equipment. Water percolates through the topsoil but hits this hardpan and stops, creating a “perched water table” that saturates the root zone and drowns plants.
You can diagnose a hardpan with a simple probe—a thin metal rod that you push into the ground. If it moves easily and then stops abruptly at a consistent depth, you’ve likely found your compaction layer. While mechanical aeration can provide a temporary fix, a long-term solution involves bio-drilling with deep-rooted cover crops, as discussed earlier. Plants with aggressive taproots are particularly effective. For instance, controlled trials found that forage radish produced more than twice as many roots as cereal rye at 15–50cm depth under high compaction, demonstrating their superior ability to punch through dense layers.
However, this biological approach has its limits and requires patience. It’s not always a one-season fix for severe compaction. This is where a realistic understanding of the technique is important.
Case Study: Forage Radish Compaction Trial
A greenhouse trial at Auburn University sought to test the limits of bio-drilling. Forage radishes were grown in tall cylinders containing an artificial hardpan layer. The results were telling: while no single radish taproot managed to fully penetrate the highly compacted layer in one season, the radishes grown in the compacted soil still produced significantly longer roots and more overall biomass than those in uncompacted soil. This highlights that while one season of cover cropping may not completely shatter a severe hardpan, it initiates the process, creating fissures and adding organic matter that weakens the layer over time, paving the way for future root growth and water infiltration.
If your probe test reveals no distinct hardpan and the pooling is widespread, the problem is more likely to be improper grading, which requires a different set of solutions focused on reshaping the surface of the land.
Sand or Compost: The Perfect Soil Mix for Rapid Drainage
The question of what to add to heavy clay soil to improve drainage is fraught with misinformation. The most dangerous myth is that adding a little sand to clay will lighten it. In reality, this often creates the opposite effect: a material akin to low-grade concrete. The fine sand particles simply fill the microscopic pore spaces between the even finer clay platelets, resulting in a denser, more impermeable mass than what you started with. This is a failure to understand particle physics.
The key to improving clay structure is not just to add larger particles, but to create stable gaps between the clay platelets. This is where the combination of sand *and* compost becomes so powerful. The correct approach is to use a large volume of coarse sand (like builder’s sand, not fine play sand) mixed with an equally large volume of a stable organic amendment like compost or leaf mould. The coarse sand provides the large, permanent particles that create macro-pores for drainage, while the organic matter acts as the “glue” for particle bridging.
The organic matter coats the sand and clay particles, binding them together into larger, irregular clumps called aggregates. These aggregates are the holy grail of soil structure. The spaces *within* the aggregates hold moisture and nutrients, while the large spaces *between* the aggregates allow excess water to drain away and air to reach the roots. You are not just mixing ingredients; you are building a new, more complex architecture.
For sandy soil, the logic is reversed but the solution is similar. The problem with sand is its lack of structure and inability to hold water or nutrients. Here, the goal is to add materials that fill the large gaps and increase surface area. Fine-textured amendments like compost, and especially leaf mould or biochar, are ideal. They act like millions of tiny sponges, dramatically increasing the soil’s water and nutrient-holding capacity, or Cation Exchange Capacity (CEC). The perfect mix is not an “either/or” choice; it’s a strategic combination of materials to achieve a desired physical structure.
Key Takeaways
- Permanent soil improvement is a physical engineering challenge, not just a biological feeding one.
- Stable, “recalcitrant” carbon from sources like biochar and leaf mould provides a lasting structural framework that compost cannot.
- Minimize soil disturbance by top-dressing amendments and using deep-rooted cover crops (“bio-drilling”) to break up compaction from within.
Correcting Land Grading to Stop Lawn Waterlogging in Winter
If you’ve ruled out compaction as the cause of waterlogging, the issue is almost certainly improper land grading. This means the surface of your lawn or garden does not have a sufficient or correct slope to guide excess water away. An ideal lawn has a gentle, almost imperceptible slope of 1-2% (a drop of 1-2 feet over 100 feet) leading away from your home’s foundation and towards a safe drainage area like a street or a lower part of the yard. When the land is perfectly flat, or worse, has low spots or “bowls,” water has nowhere to go and simply sits, saturating the soil and creating a muddy, anoxic environment that kills grass and plant roots.
Correcting minor grading issues can sometimes be done by top-dressing. This involves spreading a thin layer (about half an inch) of a soil/compost mix over the low spots, gradually building them up over several seasons. For more significant problems, the land may need to be re-graded, which involves stripping the turf, bringing in topsoil to create the desired slope, and then re-seeding or re-sodding. This is a labor-intensive project but is often the only permanent solution for serious waterlogging caused by poor grading.
A more modern and ecological approach to managing surface water is to work *with* it rather than just trying to get rid of it. This involves creating intentional landscape features like swales or rain gardens. A swale is a shallow, broad channel with gently sloped sides that is designed to slow down and intercept runoff, allowing it to soak into the ground. A rain garden is a shallow depression planted with water-tolerant native plants, strategically placed to collect runoff from roofs or lawns. These features turn a drainage problem into an asset, reducing waterlogging while also filtering pollutants and creating a habitat for wildlife.
Solving a waterlogging problem begins with understanding water flow. By observing where water pools after a heavy rain, you can map the contours of your land and decide whether the solution is to build up low spots, re-shape the entire slope, or create a dedicated feature to capture and manage the excess. This is the final piece of the structural puzzle, ensuring that even a well-amended soil isn’t overwhelmed by poor surface drainage.
Transforming your soil from a source of frustration to a foundation of success is a process of applied science. By diagnosing the true cause—be it texture, compaction, or grading—and applying these structural principles, you can build a garden that is more resilient, less demanding, and permanently productive.