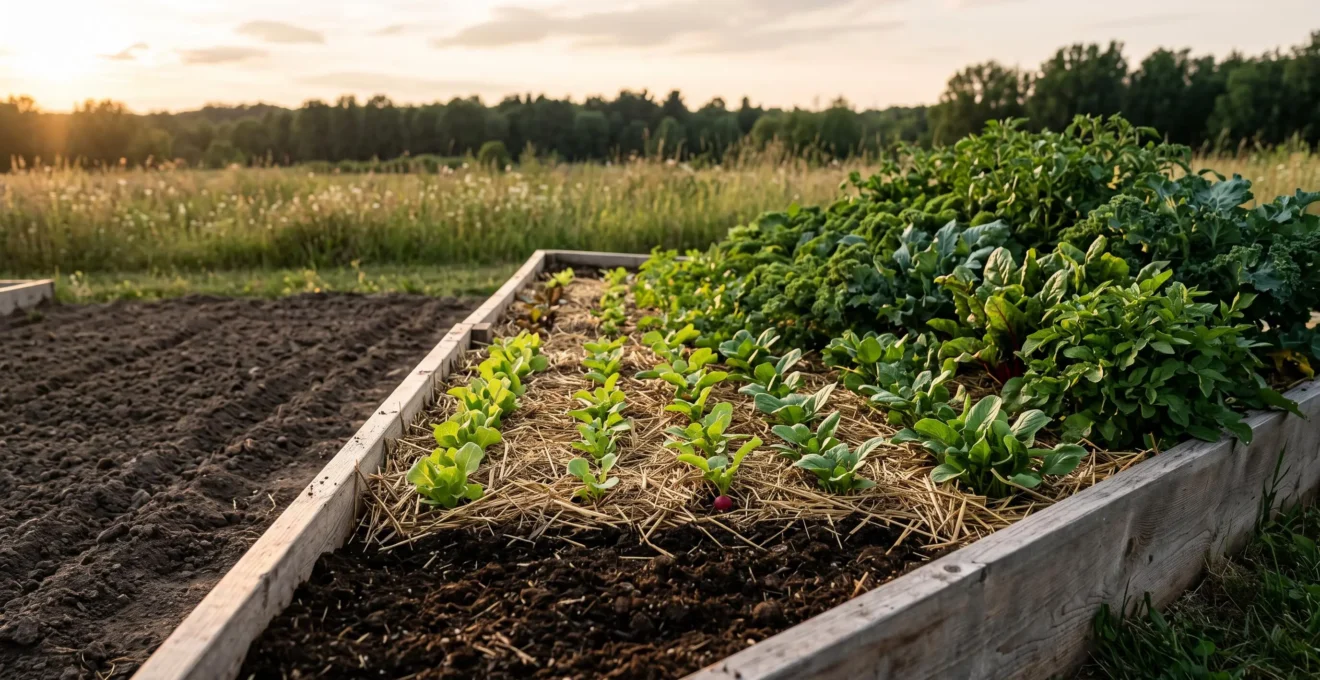
Achieving soil self-sufficiency is not about adding more inputs; it’s about building a system that manages its own fertility.
- Many ‘green manures’ like Mustard don’t fix nitrogen but are strategic nutrient scavengers.
- Nutrient lock-out is often caused by an excess of one input (like manure), not a deficiency in the soil.
- Long-term structure (from biochar) is as crucial as short-term fertility (from compost).
Recommendation: Shift your mindset from ‘feeding plants’ to ‘building a soil ecosystem’ over a three-year cycle.
For any dedicated allotment holder, the cycle is familiar: lugging heavy bags of compost, puzzling over which bottled feed to buy, and wondering if you’ll ever break free from the garden centre. The promise of a truly organic, self-sufficient plot feels just out of reach, a goal perpetually postponed by the immediate need to feed this season’s crops. Common advice tells us to “add more compost” or “use green manure,” but these are tactics, not a strategy. They keep us on a treadmill of annual inputs, forever treating the symptoms of poor soil rather than curing the cause.
The dependency on external inputs is a fragile model. What if the real key to a resilient, productive, and truly self-sufficient allotment wasn’t about what you add each spring, but about the ecosystem you build over years? What if you could create a soil so alive and well-structured that it largely feeds itself? This is not a fanciful dream; it is the outcome of a deliberate, long-term strategy. It requires a shift in perspective—from gardener to ecosystem manager.
This guide lays out a three-year plan to achieve just that. We will move beyond simple fixes and explore the interconnected principles of nutrient budgeting, long-term soil structure, and biological fertility. We will dissect the roles of different organic amendments, learn when to use them for maximum leverage, and, most importantly, understand how to weave them into a coherent system that ultimately makes bagged fertilisers and compost obsolete. This is your blueprint for building a living, self-sustaining soil bank.
To guide you through this strategic journey, this article breaks down the essential components for building a self-sufficient soil ecosystem. The following sections provide a detailed roadmap, from understanding individual amendments to integrating them into a cohesive whole.
Summary: A Strategic Plan for Soil Self-Sufficiency
- Mustard or Phacelia: Which Green Manure Fixes More Nitrogen?
- How to Brew Comfrey Tea That Rivals Commercial Potash Feeds?
- The pH Lock-Out: Why Adding More Manure Won’t Fix Yellow Leaves?
- Chicken vs Horse Manure: Which is Too ‘Hot’ for Fresh Application?
- Slow vs Fast Release: When to Apply Bone Meal for Maximum Uptake?
- Carbon to Nitrogen Ratio: The Secret to Fast In-Situ Composting?
- Why Biochar Lasts 100 Years in Soil Compared to Compost?
- Creating Self-Sustaining Ecosystems: How to Stop Buying Compost and Fertilizer?
Mustard or Phacelia: Which Green Manure Fixes More Nitrogen?
The question itself contains a common misconception that sabotages many soil-building plans. We sow green manures expecting them to magically pull nitrogen from the air. The strategic reality is that many of the most popular fast-growing green manures, including mustard and phacelia, are not nitrogen-fixers at all. They are nutrient scavengers, and understanding this distinction is the first step in using them effectively.
Nitrogen-fixing is a specific biochemical process performed by bacteria living in the root nodules of legumes (like clover, vetch, and field beans). Mustard and phacelia lack this ability. Their primary role in a nutrient management plan is to act as a biological sponge. They rapidly grow deep roots that ‘catch’ or ‘scavenge’ free nutrients, like residual nitrates, that would otherwise be leached away by winter rains. When you dig them in, they release these captured nutrients back into the topsoil for the next crop. This is not creating new fertility, but conserving existing fertility.
The following table from the RHS clarifies their roles and demonstrates that neither is a nitrogen-fixer. Their value lies elsewhere: in preventing nutrient loss, suppressing weeds, and adding organic matter. Buried white mustard, for example, has significant other benefits; a controlled pot trial on green manure incorporation found that it increased total soil carbon by 10% over the control group.
| Feature | Mustard (Sinapis alba) | Phacelia (Phacelia tanacetifolia) |
|---|---|---|
| Nitrogen fixer | No | No |
| Sowing window | March to September | April to August |
| Time before digging in | 2 to 3 months | 2 to 3 months |
| Special trait | Brassica family; avoid before other brassicas due to clubroot risk | Flowers attract pollinators; may overwinter in mild areas |
Choosing between them is a tactical decision. Mustard grows quickly and has biofumigant properties that can help suppress soil-borne diseases. Phacelia produces beautiful flowers that are a magnet for pollinators and has a fine, fibrous root system that is excellent for improving soil structure. The strategy is to use them in rotation gaps to hold onto nutrients, not to create them.
How to Brew Comfrey Tea That Rivals Commercial Potash Feeds?
In a self-sufficient nutrient budget, comfrey is a strategic asset for one simple reason: potassium. Fruiting vegetables like tomatoes, peppers, and cucumbers have a high demand for potassium (potash) to develop flowers and fruit. While compost provides a balanced meal, comfrey tea is a targeted, high-potassium supplement you can generate on-site. The key is to brew a concentrate that is genuinely potent, and this involves a specific anaerobic process, not just soaking leaves in a bucket.
The ‘stinking, slimy bucket’ method of aerobic rotting often results in a weak, variable feed. A superior method is to create an anaerobic concentrate. This process excludes oxygen, leading to a different kind of decomposition that preserves more nutrients and creates a stable, storable liquid. The resulting dark, viscous liquid is incredibly rich. In fact, lab-style breakdowns of fermented comfrey concentrate show that its NPK ratio is approximately 1.8-0.5-5.3. This profile, high in potassium (K) and low in nitrogen (N), makes it a near-perfect rival to commercial tomato feeds.
To create this potent concentrate, follow these steps:
- Wilt harvested comfrey leaves in the sun for a few hours. This reduces the water content and concentrates the nutrients.
- Pack the wilted leaves tightly into a container with a tap at the bottom (a water butt or a bucket with a hole drilled). Do not add water.
- Place a weight on top of the leaves to compress them further and place a lid on the container to seal it.
- Over four to six weeks, a dark, thick liquid will decompose out of the leaves and collect at the bottom. Drain this concentrate off via the tap.
- Dilute the concentrate at a ratio of approximately 1 part liquid to 10-15 parts water before applying as a root drench to your fruiting plants. The remaining sludge is a fantastic compost activator.
As one permaculture expert aptly puts it, comfrey offers incredible system leverage:
Comfrey is one of the highest-leverage perennials you can plant in a backyard: two Bocking 14 crowns supply most of the potassium budget for a small vegetable garden.
– A permaculture grower’s take on comfrey’s leverage, Growperma
By establishing a comfrey patch, you are essentially installing a biological potassium factory on your allotment, a critical step toward closing your nutrient loop.
The pH Lock-Out: Why Adding More Manure Won’t Fix Yellow Leaves?
Here lies one of the greatest paradoxes in gardening. You see yellowing leaves (chlorosis), assume a nutrient deficiency, and respond by adding more rich organic matter like manure or compost. Yet, the problem persists or even worsens. The issue is often not a lack of nutrients in the soil, but a nutrient lock-out. Your soil bank is full, but the plants can’t make a withdrawal. The most common culprit is soil pH.
Soil pH acts as a gatekeeper, controlling which nutrients are chemically available for plants to absorb through their roots. Even if a nutrient is physically present in abundance, if the pH is outside its optimal range, it becomes insoluble and ‘locked out’. This is a frequent problem on allotments that have received heavy, repeated applications of alkaline materials like mushroom compost or certain manures over many years, pushing the pH too high (alkaline).
This illustration of a gate embedded in soil is a powerful metaphor for this concept. The nutrients are right there, visible beyond the bars, but inaccessible to the plant roots in the foreground. The gate is the pH imbalance.
As the table below shows, different nutrients have different availability windows. Iron, crucial for chlorophyll production, becomes notoriously unavailable in alkaline soils above pH 7.5, leading to classic yellowing leaves. Simply adding more iron-rich manure won’t solve it; you must address the underlying pH problem first, usually by adding acidic materials like pine needle mulch or sulphur over time.
| Nutrient | Optimal pH Range | Risk Zone |
|---|---|---|
| Nitrogen (N) | 6.0–7.5 | Below 6.0 or above 7.5 |
| Phosphorus (P) | 6.0–7.0 | Strongly acidic soils |
| Potassium (K) | Broad range | Relatively consistent across pH |
| Iron, Zinc, Manganese | Below 7.0 | Alkaline soils above 7.5 trigger chlorosis |
Furthermore, lock-out isn’t just about pH. An excess of one nutrient can physically block the uptake of another, a phenomenon known as antagonism. For example, growers are often surprised to learn that an overabundance of potassium from too much manure can inhibit the plant’s ability to absorb magnesium and calcium, even if they are plentiful in the soil. The strategic lesson is clear: balance and diversity of inputs are more important than quantity.
Chicken vs Horse Manure: Which is Too ‘Hot’ for Fresh Application?
Manure is a cornerstone of organic fertility, but not all manure is created equal. The most critical distinction for a gardener is between ‘hot’ and ‘cold’ manures. This terminology doesn’t refer to temperature, but to the manure’s nitrogen content and its readiness for use. Applying the wrong type at the wrong time can do more harm than good, and chicken manure is the classic example of a ‘hot’ input that must be handled with strategic care.
Chicken manure is considered ‘hot’ because it is extremely concentrated in nitrogen and salts. If applied fresh to the garden, this high nitrogen content can effectively ‘burn’ plant roots, causing them to dehydrate and die. It’s like giving a person a meal made entirely of salt. Fresh chicken manure absolutely must be composted before it comes anywhere near living plant roots. During the composting process, microbes break down the volatile compounds, stabilise the nitrogen, and dilute the salts, turning it into a superb, balanced soil amendment.
Horse manure, by contrast, is generally considered ‘cooler’, though it still benefits from composting. Its nitrogen content is lower than chicken manure’s, and it’s typically mixed with a large volume of carbon-rich bedding material like straw or wood shavings. This high carbon content ‘balances’ the nitrogen, making it less volatile. While well-rotted horse manure can sometimes be applied directly as a mulch, composting it is always the safer and more strategic option. It ensures any weed seeds are killed and creates a more stable, homogenous product.
In the context of our three-year plan, the strategy is to see all manure as a raw ingredient for the composting system, not as a ready-to-use fertiliser. Chicken manure is a high-nitrogen ‘green’ for your compost pile, perfect for activating a carbon-heavy heap of ‘browns’ like woodchip or cardboard. Horse manure is a more balanced mix, but still an input for the compost system first and foremost. Never apply fresh manure directly to your vegetable beds.
Slow vs Fast Release: When to Apply Bone Meal for Maximum Uptake?
Within our nutrient management strategy, some amendments are for immediate effect, while others are a long-term investment. Bone meal falls squarely into the second category. It is a classic organic amendment, but its value is squandered if applied incorrectly. Understanding its nature as a slow-release source of phosphorus is key to unlocking its power.
Bone meal is primarily valued for two elements: phosphorus (P) and calcium (Ca). Phosphorus is the “energy currency” of the plant world, absolutely essential for strong root development, cell division, and the formation of flowers and seeds. Unlike nitrogen, which is highly mobile and can be applied as a liquid ‘fast feed’, phosphorus is relatively immobile in the soil. It doesn’t travel well with water and needs to be placed exactly where the roots will grow to find it.
This immobility dictates the entire strategy for its application. Broadcasting bone meal over the surface of an established bed is highly inefficient. Very little of the phosphorus will ever make its way down to the root zone where it’s needed. It will sit in the top inch of soil, unavailable to the majority of the plant’s root mass. This is a waste of a valuable resource and a common mistake for inexperienced gardeners.
The correct and most strategic time to apply bone meal is at the moment of planting. For maximum uptake, it should be incorporated directly into the soil of the root zone. The best methods include:
- Mixing into the planting hole: When transplanting seedlings like tomatoes, brassicas, or beans, add a small handful of bone meal to the bottom of the planting hole and mix it with the soil before placing the plant in.
- Preparing root crop beds: For crops like carrots, parsnips, and potatoes that rely on strong root development, incorporate bone meal into the top 6-8 inches of the entire bed during preparation, before sowing seeds or planting tubers.
By placing this slow-release nutrient source directly in the path of developing roots, you ensure it will be available to the plant throughout the crucial early stages of its life, building the strong foundation needed for a healthy harvest.
Carbon to Nitrogen Ratio: The Secret to Fast In-Situ Composting?
Composting is the engine of a self-sufficient garden, and the fuel for that engine is the Carbon-to-Nitrogen (C:N) ratio. Grasping this single concept transforms composting from a passive act of piling up garden waste into a proactive process of creating high-quality soil amendment. Whether in a dedicated bin or directly on the garden bed (‘in-situ’), this ratio is the secret to success.
In simple terms, composting is a process where microorganisms consume organic waste. To thrive, these microbes need a balanced diet: carbon for energy and nitrogen for protein and reproduction. The ideal diet, or C:N ratio, for hot, fast composting is roughly 25 to 30 parts carbon for every 1 part nitrogen by weight.
- ‘Browns’ are high in Carbon (C): Think of dry, woody materials. Examples include fallen leaves, straw, sawdust, woodchip, and shredded cardboard or paper. These provide the fuel.
- ‘Greens’ are high in Nitrogen (N): Think of fresh, moist materials. Examples include grass clippings, kitchen scraps, coffee grounds, comfrey leaves, and fresh manure. These provide the microbial activators.
A pile with too much carbon (too many browns) will be dry, slow, and may never heat up. A pile with too much nitrogen (too many greens) will become a slimy, smelly, anaerobic mess. The art of fast composting is simply layering or mixing greens and browns to hit that ~30:1 sweet spot, while also ensuring adequate moisture and aeration.
This same principle applies to ‘in-situ’ composting methods like sheet mulching or “lasagna gardening.” This is where you build your compost pile directly on the garden bed where you intend to grow. You might lay down a layer of cardboard (carbon), followed by a layer of kitchen scraps (nitrogen), a layer of leaves (carbon), a layer of grass clippings (nitrogen), and so on. The decomposition is slower and cooler than in a dedicated hot bin, but the result is the same: a rich, fertile bed created in place with minimal effort. You are building soil structure and fertility simultaneously, directly where it’s needed most.
Key takeaways
- Strategic soil building is a multi-year process, not a quick fix.
- Understand the specific role of each input: comfrey for potassium, green manure for scavenging, biochar for structure.
- Avoid nutrient lock-out by diversifying inputs and not over-relying on one source like manure.
Why Biochar Lasts 100 Years in Soil Compared to Compost?
In our three-year plan, we must differentiate between inputs that provide short-term fertility and those that build long-term structure. Compost is the king of fertility, providing a rich diet of nutrients and organic matter that feeds the soil life. However, it is consumed relatively quickly, often within a single season. Biochar, on the other hand, is a structural amendment. It is the permanent scaffolding that enhances the soil for generations. Its incredible longevity is down to its fundamental chemical stability.
Biochar is essentially charcoal, created by burning organic matter in a low-oxygen environment (pyrolysis). This process drives off volatile compounds and leaves behind a near-pure, stable carbon skeleton. While compost is a soft, easily digestible meal for soil microbes, biochar is a hard, crystalline structure that is almost indigestible. Its stability is scientifically measured by its hydrogen-to-carbon ratio (H:C). As according to USDA Climate Hub researchers, biochar with a low H:C ratio (below 0.7) is incredibly resistant to microbial decomposition and can persist in the soil for hundreds, even thousands, of years.
This persistence is not its only virtue. As this extreme close-up reveals, biochar has a vast, porous, honeycomb-like structure at a microscopic level. This creates a permanent habitat for beneficial soil microorganisms and fungi. It also acts like a sponge, holding onto water and soluble nutrients, preventing them from leaching away and making them available to plant roots. It is not a fertiliser itself; it is a fertiliser-extender and a permanent home for soil life.
However, applying raw biochar can temporarily decrease yields, as its empty pores can suck nutrients from the soil. The strategic move is to ‘charge’ or ‘inoculate’ it first. This means pre-soaking it in a nutrient-rich solution like comfrey tea or mixing it into your compost pile for several weeks before application. This fills its porous structure with nutrients and microbes, turning it from an empty hotel into a fully-catered luxury resort for your soil ecosystem from day one.
Action Plan: Charging Biochar for Soil Integration
- Select a high-quality biochar with a hydrogen to carbon ratio below 0.7 to ensure long-term stability in the soil.
- ‘Charge’ the raw biochar by mixing it thoroughly with nutrient sources like finished compost, worm castings, or well-rotted manure.
- Let the mixture sit and cure for at least two weeks, keeping it moist with water or a dilute liquid feed like comfrey tea.
- Once charged, incorporate the inoculated biochar into your garden beds at a rate of about 5-10% by volume.
- Monitor your soil over the following seasons; this is a one-time structural investment that pays dividends for decades.
Creating Self-Sustaining Ecosystems: How to Stop Buying Compost and Fertilizer?
We have now assembled the key components of our strategy: conserving nutrients with scavengers, generating targeted feeds with comfrey, understanding lock-out, managing manures, and building permanent structure with biochar. The final step in our three-year plan is to integrate these elements into a single, cohesive, self-sustaining ecosystem. The goal is to ‘close the loop’—to ensure that the outputs of one part of the system become the inputs for another, drastically reducing the need for anything to be brought in from the outside.
A truly self-sufficient allotment is a web of interconnected cycles. It’s a place where comfrey leaves are cut and dropped as mulch (chop-and-drop), slowly releasing nutrients to the soil below. It’s where green manures are grown in fallow beds not just to be dug in, but to be cut and added as a nitrogen-rich activator to the compost pile. Kitchen scraps don’t go into the bin; they feed a wormery or a hot compost system that will, in turn, be used to charge next year’s biochar.
This image of a small, integrated backyard ecosystem is not an idealized fantasy; it is a practical blueprint. The compost bins process waste from the house and garden, the chickens provide high-nitrogen manure (for composting!) while eating pests and weeds, and the mulched beds are the final destination for all this well-managed fertility, growing healthy crops that will eventually produce more ‘waste’ to start the cycle anew.
Moving towards this model is a gradual process. Year 1 is about establishing the key systems: build your compost bins, plant your comfrey patch, and make your first batch of biochar. Year 2 is about refinement: start making potent comfrey tea, get your C:N ratio right for fast composting, and use green manures strategically in rotation gaps. Year 3 is about integration: your systems are now mature. You have a steady supply of various composts, liquid feeds, and structural amendments. You are now primarily managing your own resources, responding to your soil’s needs with amendments you created yourself. You are no longer just a gardener; you are the custodian of a small, productive, and resilient ecosystem.
Start today by mapping out your own allotment’s resources and drafting a simple plan. Begin your journey toward true soil self-sufficiency, one strategic step at a time.