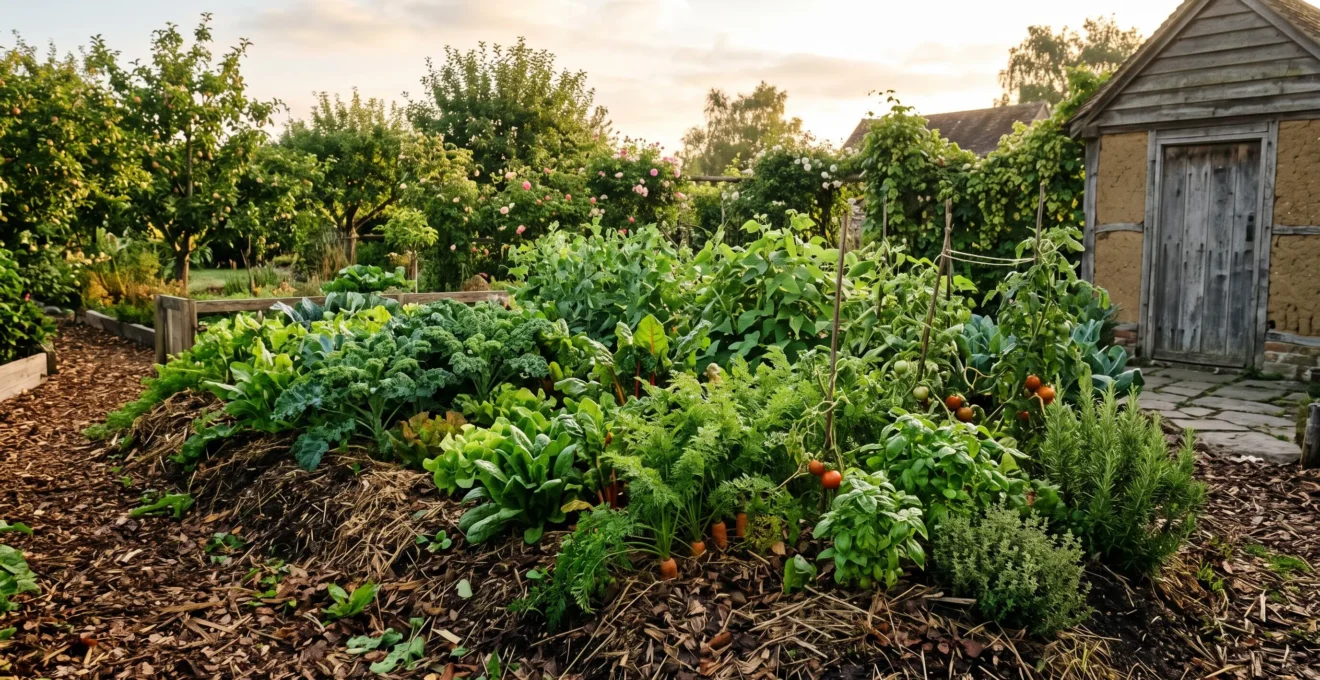
Achieving a self-sustaining garden isn’t about better compost piles; it’s about re-engineering your space into a closed-loop nutrient cycling engine.
- Success depends on managing the Carbon-to-Nitrogen ratio directly on the soil surface, not in a separate bin.
- Dedicated “biomass generator” plants like comfrey can produce all the mulch and fertility your garden needs on-site.
Recommendation: Begin the transition today by converting a patch of lawn into a no-dig bed using cardboard and on-site organic matter—the foundational step toward system self-sufficiency.
The annual ritual for many gardeners is a trip to the store for bags of compost, soil amendments, and fertilizer. We treat the garden as a dependent entity that requires constant external inputs to survive, let alone thrive. This cycle is not only costly and labor-intensive but also fundamentally disconnects us from the natural processes that build fertile land. We are taught to build compost piles, a valuable skill, but one that still treats fertility as something created “over there” and then moved. This approach often overlooks the risks of introducing contaminants and the power of building soil health in place.
What if the entire premise was flawed? What if, instead of feeding our gardens, we designed them to feed themselves? The shift from a dependent plot to a self-sustaining ecosystem is not about a new technique; it’s a new paradigm. It involves seeing your garden as a living, breathing nutrient cycling engine. This perspective moves beyond simple composting and asks deeper questions about the biological and chemical mechanics at play. It focuses on engineering decomposition pathways directly where they are needed and cultivating plants whose primary job is to generate biomass for the system.
This article provides a blueprint for closing the loop. We will deconstruct the core scientific principles, from the crucial carbon-to-nitrogen ratio that fuels soil microbes to the long-term strategies that shift your soil from a simple medium to a complex, resilient food web. By understanding these underlying mechanisms, you can stop being a provider of inputs and become the architect of a truly autonomous garden ecosystem.
This guide explores the essential strategies to build a garden that creates its own fertility. You will discover the science behind in-place composting, the power of specific plants to generate mulch, the hidden risks of imported soil, and a long-term plan to achieve complete self-sufficiency.
Summary: A Guide to the Self-Sustaining Garden
- Carbon to Nitrogen Ratio: The Secret to Fast In-Situ Composting?
- Chop-and-Drop: Is It Messy or the Ultimate Fertilizer technique?
- The Import Risk: Why Buying Topsoil Threatens Your Ecosystem?
- Comfrey and Cardoon: Growing Your Own Mulch in a Corner?
- When to Stop Inputs: How long Before a Garden Balances Itself?
- Mustard or Phacelia: Which Green Manure Fixes More Nitrogen?
- Cardboard and Compost: How to Convert a Lawn to a Bed in One Day?
- Managing Organic Soil Nutrients: The 3-Year Plan for Self-Sufficiency
Carbon to Nitrogen Ratio: The Secret to Fast In-Situ Composting?
The concept of “greens” and “browns” is central to traditional composting, but its true power is unleashed when applied directly to the garden bed. This is the science of the Carbon-to-Nitrogen (C:N) ratio, the dietary preference of the microbial workforce that builds your soil. Think of it as the fuel mix for your garden’s decomposition engine. While soil microbes themselves have a C:N ratio around 10:1, they require food with a 24:1 ratio to get the energy (carbon) and protein (nitrogen) they need to thrive and multiply. Providing this ideal ratio is the key to rapid, odorless decomposition right where you need it.
Materials rich in carbon, the “browns,” provide energy and structure. These include things like wood chips, straw, or fallen leaves. They are typically dry, woody, and decompose slowly, primarily driven by fungi. Nitrogen-rich materials, the “greens,” are the protein source for microbes. Fresh grass clippings, green manure cover crops, or kitchen scraps are high in nitrogen, moist, and break down quickly, fueling a bacterial bloom. The goal is not to eliminate one or the other but to layer them in a way that creates the perfect 24:1 to 30:1 ratio. A thick layer of carbon-heavy wood chips alone will actually cause microbes to draw nitrogen from the soil to break it down, temporarily starving your plants. Conversely, a thick mat of wet grass clippings will turn into a slimy, anaerobic mess.
By layering these materials directly on the soil surface—a technique known as sheet mulching—you create a self-regulating compost system. A layer of cardboard (high carbon) topped with grass clippings (high nitrogen) and finished with leaves (high carbon) creates a balanced diet that encourages a diverse population of bacteria, fungi, and earthworms to get to work.
This table illustrates the C:N ratio of common materials, which is crucial for planning your in-situ composting strategy. The data is based on a comparative analysis by soil science experts.
| Material | Approximate C:N Ratio | Decomposition Speed |
|---|---|---|
| Wood chips / woody prunings | ~400-500:1 | Slow (fungal-driven) |
| Dry straw | ~80:1 | Slow to moderate |
| Fallen autumn leaves | ~40-80:1 | Moderate |
| Coffee grounds | ~20:1 | Fast |
| Fresh grass clippings / green manure | ~15-25:1 | Fast (bacterial-driven) |
| Aged manure | ~15-20:1 | Fast |
Chop-and-Drop: Is It Messy or the Ultimate Fertilizer technique?
Chop-and-drop is the practical application of in-situ composting, transforming living plants into a direct-source fertilizer and mulch layer. The technique is brutally simple: you cut plant material (leaves, stems) and simply drop it on the soil surface around the base of your plants. While it might seem messy to a gardener accustomed to tidy, bare soil, it is one of the most efficient ways to build a closed-loop fertility system. This method mimics the natural process of a forest, where falling leaves and decaying matter constantly replenish the soil. It creates a protective blanket that suppresses weeds, retains moisture, and, most importantly, provides a slow-release feast for the soil food web.
The benefits are not just theoretical. A study comparing mulched plots using this method to bare-soil controls found that microbial biomass carbon was 60.9% higher in the mulched plots. This demonstrates a direct and significant boost to the life in the soil, which is the engine of nutrient availability. As the chopped material decomposes, it releases its stored nutrients back into the soil, making them available to the roots of nearby plants. Earthworms pull the organic matter deeper, aerating the soil and creating channels for water and roots. It’s a complete, self-contained system for nutrient cycling.
Case Study: Chop-and-Drop in a Kentucky Food Forest
In a broad-acre native food forest in Kentucky, a practitioner actively manages fast-growing, coppicing species like Box Elder and Black Locust specifically for this purpose. They regularly chop branches and leaves, cutting them into fine pieces and laying them around fruit trees and other plantings. This forms a long-term fungal food source and a thick mulch layer that slows water runoff, reduces evaporation, and continuously feeds the soil ecosystem, eliminating the need for any imported mulch or fertilizer.
The process is straightforward:
- Cut back healthy leaves and stems from nutrient-rich plants in your garden.
- Chop the material into smaller pieces; finer chopping accelerates decomposition.
- Spread the chopped matter directly over the soil as a natural mulch layer.
- Allow earthworms, fungi, and microbes to break down the material over time.
- Repeat the process regularly to build soil and reduce reliance on external inputs.
The Import Risk: Why Buying Topsoil Threatens Your Ecosystem?
In the quest for a perfect garden, the quickest fix often seems to be importing a truckload of “premium” topsoil or compost. However, this common practice can be a Trojan horse, introducing a host of hidden risks that undermine the very ecosystem you’re trying to build. When you bring in external soil, you have no control over its origin or contents. You risk importing persistent herbicide residues, dormant weed seeds, and, most alarmingly, industrial contaminants. The integrity of your carefully managed closed-loop system is compromised, potentially setting your soil health back years.
One of the most significant modern threats is contamination from per- and polyfluoroalkyl substances (PFAS), also known as “forever chemicals.” These compounds are found in a vast range of industrial and consumer products and do not break down in the environment. A major pathway for their entry into the food chain is through compost and fertilizer derived from contaminated biosolids (sewage sludge). According to environmental watchdog analysis, nearly 70 million acres of U.S. farmland could be tainted by PFAS from this source. A separate peer-reviewed study confirmed this risk, finding compost made with “compostable” food serviceware and manure was contaminated with up to 45 times more PFAS than compost made from clean inputs.
This illustration represents the unseen danger of importing soil. What looks like a helpful addition can introduce contaminants that are impossible to remove, harming the long-term health of your garden ecosystem.
Beyond chemical risks, imported soil can also disrupt the unique biological signature of your garden. Your native soil has a specific microbial community adapted to your local climate and conditions. Introducing a foreign soil can bring in aggressive, non-native microbes that may outcompete your beneficial organisms. Building soil from within, using materials generated on your own property, is the only way to guarantee its safety and ensure you are fostering a biological community that is perfectly adapted to your site.
Comfrey and Cardoon: Growing Your Own Mulch in a Corner?
If importing organic matter is risky, the logical solution is to grow it yourself. This is where dedicated “biomass generators” come in. These are plants grown not for food, but for their ability to produce enormous amounts of leafy material that can be chopped and dropped to feed the soil. By dedicating a small, otherwise unused corner of your garden to these workhorse plants, you can create a perpetual source of high-nutrient mulch. Two of the most effective and popular choices for this role are Russian comfrey (Symphytum x uplandicum) and cardoon (Cynara cardunculus).
Comfrey is legendary in permaculture circles for a reason. It is a “dynamic accumulator,” a plant with a deep taproot that can mine minerals from the subsoil and concentrate them in its leaves. While the concept of dynamic accumulation is complex, lab analysis shows that Russian comfrey is exceptionally effective, producing leaves with 53,000 ppm of potassium (dry weight). It can be harvested multiple times a year, yielding up to 2.8 pounds of fresh biomass per square foot. These nutrient-dense leaves break down quickly, releasing potassium, nitrogen, and other minerals directly to the root zone of neighboring plants, acting as a perfect natural fertilizer.
The large, fuzzy leaves of comfrey are packed with nutrients mined from deep in the soil, making them a perfect on-demand fertilizer when chopped and dropped.
Cardoon, a relative of the artichoke, is another excellent choice, particularly for its sheer volume. It produces enormous, silvery, architectural leaves that provide a massive amount of carbon-rich material. While not as nutrient-dense as comfrey, its biomass is perfect for creating a thick, weed-suppressing, and moisture-retentive mulch layer. By planting a small patch of comfrey for nutrient-rich “green” material and a patch of cardoon for carbon-heavy “brown” material, you have created a complete, on-site system for producing the two key ingredients for in-situ composting. This strategy transforms a passive garden space into an active fertilizer factory.
When to Stop Inputs: How long Before a Garden Balances Itself?
The ultimate goal of a closed-loop system is to reach a state of equilibrium where external inputs are no longer necessary. But how do you know when you’ve arrived? The answer isn’t on a calendar; it’s in the soil itself. The single most visible and reliable indicator of a healthy, self-sustaining soil ecosystem is the abundance and diversity of earthworms. These creatures are more than just bait; they are keystone species in the soil food web, the engineers of fertility. A thriving earthworm population is a sign that your system is working—that you are providing enough organic matter to feed the soil and that the soil environment is healthy enough to support complex life.
The link between earthworms and productivity is well-documented. While typical arable soils may contain 150-350 earthworms per square meter, a UK on-farm survey found that populations above 400 per square meter are linked to significant benefits in plant productivity. When you consistently find a high density of worms—and different types of worms, from surface-dwelling red wigglers to deep-burrowing nightcrawlers—it’s a strong signal that your soil has a robust structure, good aeration, and a steady supply of food. At this point, the system is largely self-regulating. The worms and other soil life are breaking down organic matter, cycling nutrients, and making them available to plants faster than the plants can consume them.
You can stop adding significant external inputs when your on-site systems (chop-and-drop, green manures) and the resulting soil life can maintain this high level of activity. The garden has, in effect, learned to feed itself. Monitoring your earthworm population provides direct feedback on the maturity of your soil ecosystem.
Action Plan: Audit Your Soil’s Earthworm Population
- Excavate a Sample: After removing surface litter, carefully dig a soil block roughly 20cm x 20cm x 20cm (8x8x8 inches).
- Conduct the Count: Place the soil on a tarp and hand-sort it, counting every earthworm you find within the sample.
- Track Over Time: Repeat this test in the same location periodically, ideally in the spring or after autumn rains when worms are most active, to monitor population trends.
- Interpret the Results: A steadily rising number and diversity of earthworms indicate that your soil health is improving and the system is moving toward self-sufficiency. A count of 10 or more in this sample size is a great sign (correlating to >400/m²).
- Adjust Your Strategy: If counts are stagnant or declining, it’s a signal to revisit your practices. Are you providing enough organic matter? Is your tillage too aggressive? This feedback loop is essential for management.
Mustard or Phacelia: Which Green Manure Fixes More Nitrogen?
Green manures, or cover crops, are plants grown specifically to be cut down and incorporated into the soil to improve its fertility and structure. When discussing nitrogen, however, a critical distinction is often missed, leading to a common misconception about popular cover crops like mustard and phacelia. The direct answer is that neither mustard nor phacelia fixes nitrogen from the atmosphere. This ability is almost exclusively found in plants from the legume family (Fabaceae), such as clover, vetch, and beans, which form a symbiotic relationship with rhizobia bacteria in their root nodules.
So, why are mustard and phacelia so highly valued? They perform other, equally important roles. Mustard (a brassica) is a fantastic “biofumigant.” When its plant tissue is chopped and incorporated into the soil, it releases compounds called glucosinolates, which can help suppress certain soil-borne pathogens and nematodes. It also grows very quickly, producing a large amount of biomass in a short time, adding valuable organic matter to the soil. It is excellent for “cleaning” a bed between main crops.
Phacelia (Phacelia tanacetifolia) is a “nitrogen scavenger.” While it doesn’t fix new nitrogen, it has an incredibly fine and deep fibrous root system that is exceptionally good at capturing and holding onto any free nitrogen already present in the soil, preventing it from leaching away with winter rains. When the phacelia is terminated, this captured nitrogen is released back into the topsoil as the plant decomposes, making it available for the next crop. Furthermore, its flowers are a magnet for pollinators and other beneficial insects. Therefore, the choice isn’t about which one fixes more nitrogen, but about your specific goal: use legumes (like vetch) to add new nitrogen, mustard to add biomass and cleanse the soil, and phacelia to preserve existing nutrients and boost soil structure.
Cardboard and Compost: How to Convert a Lawn to a Bed in One Day?
One of the biggest hurdles to starting or expanding a garden is the back-breaking work of removing an existing lawn. The “sheet mulching” or “lasagna gardening” method, using cardboard and compost, elegantly solves this problem. It’s a no-dig technique that allows you to smother an area of grass and build a fertile new garden bed on top of it, often in a single afternoon. This method is the ultimate expression of working with nature, not against it. Instead of removing the turf, you use it as the foundational nitrogen layer of your new in-situ compost pile.
The process leverages the C:N ratio principle on a large scale. First, the area is covered with a layer of overlapping plain brown cardboard. This is your high-carbon layer. It acts as a light-blocking barrier that smothers the grass underneath, causing it to die and decompose. It’s crucial to remove all plastic tape and use non-glossy cardboard to ensure it breaks down completely. The cardboard also attracts earthworms, who love the dark, moist environment and will begin the process of tilling and aerating the compacted lawn soil below.
This wide view shows the transformation in progress: a section of lawn is covered with overlapping cardboard and a layer of homemade compost, creating a new garden bed without any digging.
On top of the cardboard, you add a nitrogen-rich “green” layer, such as homemade compost, grass clippings, or kitchen scraps. This activates the decomposition process. This is followed by another high-carbon “brown” layer, like shredded leaves, straw, or wood chips, which serves as the final mulch. You have effectively built a layered compost pile directly where you want to plant. You can plant larger seedlings directly into pockets of compost on top of the pile immediately, or wait a few months for the layers to break down into a rich, friable, and perfectly structured garden bed, teeming with life.
Key Takeaways
- A self-sustaining garden is an engineered ecosystem, not a container to be filled with inputs.
- Success hinges on managing on-site decomposition by balancing Carbon (browns) and Nitrogen (greens).
- The safest and most effective fertility comes from biomass grown within the system, eliminating contamination risks.
Managing Organic Soil Nutrients: The 3-Year Plan for Self-Sufficiency
Achieving a truly self-sufficient garden ecosystem is not an overnight event; it’s a gradual, multi-year process of biological succession. It involves intentionally shifting your soil’s primary decomposition pathway from a fast, bacterial-dominated system to a slower, more complex, and resilient fungal-dominated one. A three-year plan can guide this transition, moving from building basic soil structure to establishing a mature, self-regulating nutrient cycling engine.
Year 1: Foundation and Biomass. The first year is about building soil volume and smothering competition. This is where techniques like sheet mulching are critical. The focus is on adding massive amounts of organic matter to feed a bloom of bacteria and begin building a basic soil structure. This is also the year to establish your “biomass generator” plants like comfrey and cardoon. You are essentially creating the raw materials and the physical habitat for the future soil food web.
Year 2: Activation and Integration. In the second year, the focus shifts to activating the soil life. Your chop-and-drop plants are now established and can be harvested regularly to provide a steady stream of on-site mulch. This is the time to use green manures strategically between crops to scavenge nutrients and add diverse organic matter. Earthworm populations should be visibly increasing. As a multi-year Kansas State University field study demonstrated, earthworm populations increase progressively over several years under systems with cover crops and reduced tillage. You are actively feeding the system you built in year one.
Year 3: Maturation and Fungal Dominance. By the third year, the system begins to mature. The consistent addition of woody and fibrous materials from chop-and-drop and decaying roots encourages a shift toward a fungal-dominated decomposition pathway. Fungal networks (mycelium) are more efficient at storing nutrients and water, creating a more stable and resilient soil. Studies comparing cropland to natural forests confirm that fungal decomposition channels strengthen as an ecosystem matures. At this stage, your garden requires significantly fewer inputs, holds moisture more effectively, and has a robust, self-regulating population of soil organisms. Your role shifts from being a constant provider to a minor course-corrector in a system that largely manages itself.
By following these principles, from understanding the fundamental science to implementing a long-term strategy, you can systematically transition your garden from a dependent plot into a thriving, self-sufficient ecosystem that produces its own fertility.