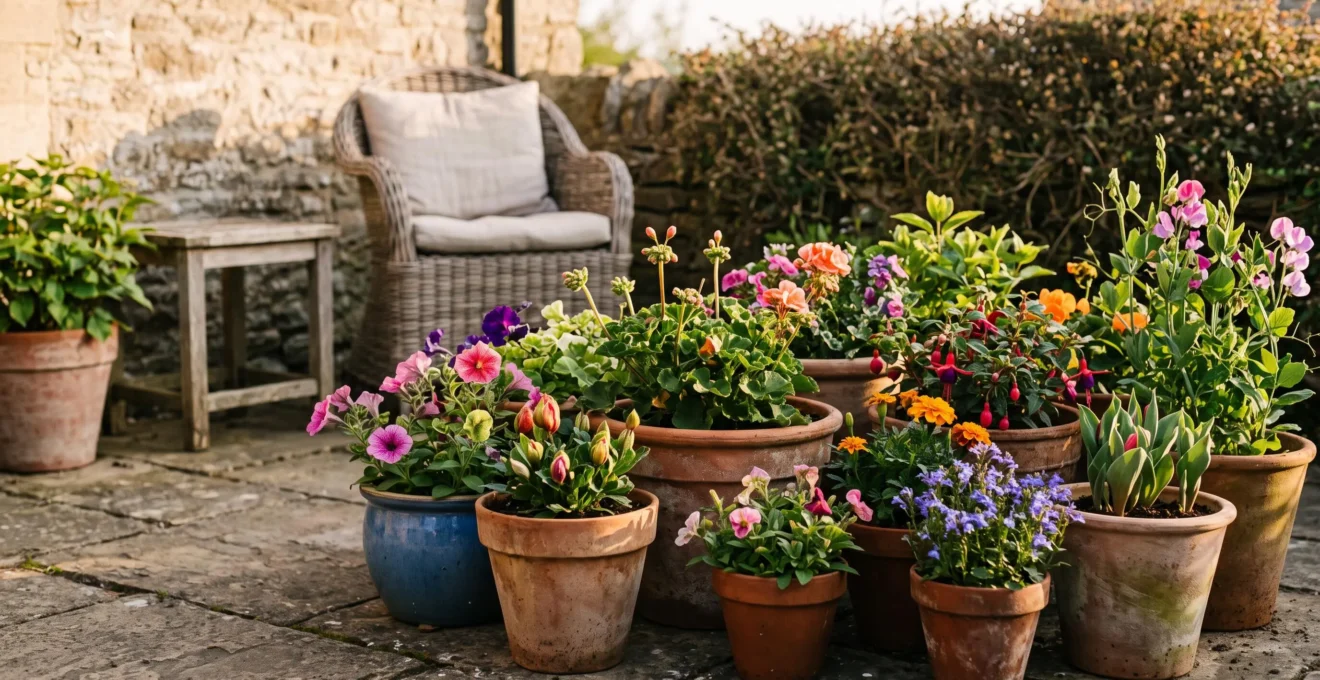
Achieving year-round patio colour isn’t about having a ‘green thumb’; it’s about mastering the flow of plant energy and time.
- Redirecting a plant’s hormonal triggers through precise deadheading forces more flowers.
- Staggering sowings and layering bulbs creates a continuous, overlapping sequence of blooms.
- Analysing the total resource cost—not just price—of seeds versus plugs allows for smarter gap-filling.
Recommendation: Start by auditing your current pots not for what’s blooming, but for where the plant’s energy is being spent—on new flowers, or on setting seed.
Every urban gardener knows the initial thrill. In May, your patio is a riot of colour, a carefully curated masterpiece of vibrant annuals spilling from every pot. But by August, the show often begins to fade. The petunias grow leggy, the zinnias look tired, and gaps appear where the initial stars of the season have burned out. The common advice is simple: deadhead a bit, feed occasionally, and buy more plants to plug the holes. This reactive approach, however, is both costly and inefficient. It treats your patio like a static display that needs constant replacement, rather than a living, dynamic ecosystem.
What if the secret to perpetual colour wasn’t just about choosing the right plants, but about actively managing their energy? The real art of container gardening lies in becoming a director of plant behaviour. It’s about understanding the hormonal triggers that command a plant to produce more flowers, the strategic timing that ensures one wave of blooms hands the baton to the next, and the economic sense to know when to invest in speed (plugs) versus volume (seeds). This is a shift from passive planting to proactive design, treating your small space as a four-season stage for a continuous floral performance.
This guide will deconstruct the strategies that professional designers use to achieve that coveted year-round effect. We will explore the science behind why deadheading works, how to create a production line of ‘cut-and-come-again’ flowers, and the methods for layering time itself within a single pot. By mastering these systems, you can transform your patio from a short-lived sprint of colour into a year-long marathon of beauty.
Contents: A Designer’s Guide to Non-Stop Patio Colour
- Why Deadheading Triggers Hormones for More Flowers?
- How to Sow ‘Cut-and-Come-Again’ Flowers for 6 Months of Bouquets?
- Plugs or Seeds: Which is More Cost-Effective for Filling Gaps?
- The False Spring Mistake That Kills 80% of Bedding Plants
- How to Feed Annuals in Pots Without Causing Salt Buildup?
- Windowsill vs Grow Light: Is Natural Light Enough for February Sowing?
- The Lasagna Method: Layering Bulbs for 3 Months of Color?
- Year-Round Seasonal Colour: Filling the November and February Gaps
Why Deadheading Triggers Hormones for More Flowers?
Deadheading is the single most repeated piece of advice for annuals, but it’s often explained simply as “tidying up.” The reality is a fascinating act of hormonal manipulation. A plant’s primary biological purpose is to reproduce, which means creating seeds. Once a flower is pollinated and begins to fade, the plant redirects all its energy into developing that seed pod. By snipping off the spent bloom, you interrupt this process. The plant, sensing its reproductive mission has failed, is triggered to try again by producing a new wave of flowers. It’s a strategic redirection of the plant’s finite energy resources from seed production back to vegetative and floral growth.
For nearly a century, scientists believed the hormone auxin, produced in the growing tip, was the sole director of this process. However, the mechanism is more complex and immediate. New research reveals that the release of new buds can happen up to 24 hours before any change in auxin levels. This suggests that the demand for sugars is a more powerful driver. As one study explains, the initiation of bud growth after shoot tip loss is not solely dependent on the absence of apical auxin. By removing a developing seed head—a major sugar sink—you free up resources that are immediately rerouted to dormant buds, telling them it’s their turn to grow. This is why pinching a petunia’s tip prompts bushy side shoots, while snipping a salvia’s spent flower spike encourages new spikes from the base.
To maximize this effect, precision is key. For single-stem flowers like zinnias or marigolds, trace the stem of the spent flower down to the first set of full, healthy leaves and make your cut just above it. This encourages the plant to branch out from that node. For plants with flower spikes like salvia or celosia, wait until about 75% of the flowers on the spike have faded, then cut the entire stalk back to the base of the plant to encourage new spikes from the crown. This simple act is the engine of continuous summer colour.
How to Sow ‘Cut-and-Come-Again’ Flowers for 6 Months of Bouquets?
While deadheading prolongs the show for a single plant, succession sowing creates a continuous production line of fresh, vigorous replacements. This is the secret behind both a flower farmer’s endless supply and a patio designer’s perpetually full containers. The principle of ‘cut-and-come-again’ applies to annuals that respond to harvesting by producing more stems, but even these workhorses have a finite lifespan. A cosmos plant sown in April will be magnificent in July, but may be exhausted by September. The solution is temporal layering: sowing the same flower in batches every 3-4 weeks.
Imagine dedicating one or two large pots on your patio specifically as your ‘cutting garden’. You’re not growing for display in that pot, but for harvesting bouquets that will fill vases indoors and plug gaps in your other, more decorative containers. By sowing a new batch of seeds before the previous one has peaked, you ensure you always have plants in their prime. As one flower farmer notes when planning for a season-long supply of cosmos, a grower would schedule 2-3 replantings through the season to always have vigorous growth to cut from. This professional strategy scales down perfectly to a small patio.
Excellent candidates for this method include cosmos, zinnias, scabiosa (pincushion flower), annual phlox, and snapdragons. Start your first batch indoors in early spring, then direct sow the next batch into your cutting pot a month later, and another a month after that. This staggered start means you’ll have a continuous supply of fresh, long-stemmed flowers from June through to the first frosts. It turns your patio from a static display into a dynamic and productive floral studio, providing colour both outdoors and in.
Plugs or Seeds: Which is More Cost-Effective for Filling Gaps?
When a gap appears in a container mid-season, the immediate impulse is to buy a ‘garden-ready’ plant from a local centre for instant impact. While effective, this is by far the most expensive option. The real strategic decision for an urban gardener is a cost-benefit analysis between starting from seed and buying small plug plants. The choice depends on your most valuable resource: time or money. Looking purely at sticker price, seeds are the undeniable winner. However, a more sophisticated ‘Total Resource Cost’ analysis, factoring in your time, materials, and failure risk, tells a different story.
A simple direct cost comparison shows that acquiring 40 garden-ready plants could cost £56, whereas 40 plug plants might only be £11. Seeds are even cheaper per plant, but require heat, light, trays, and compost, not to mention your time. One grower who tallied her expenses found that the true cost of raising plants from seed, including labour, was more than double the cost of buying in professional plugs. Her analysis showed that factoring in seed cost and an hour of daily labor, the same volume from seed totaled $3,528 versus $1,621 for plugs. For a home gardener, the ‘labour’ cost is your free time, but the principle holds.
This data gives us a clear framework for making decisions. Use seeds early in the season when you have more time and want to produce large volumes of plants cheaply. Use plug plants for mid-season gap-filling, when you need a reliable, quick-growing plant to take over from a faded performer without the risk or time investment of starting from scratch. Keep expensive garden-ready plants for late-season emergencies when there’s no time left for a plant to grow on.
The following table breaks down the strategic use case for each method, helping you make the most efficient choice for your patio.
| Method | Typical Cost (40 plants) | Time to Bloom-Ready | Failure Risk | Best Use Case |
|---|---|---|---|---|
| Seeds | Lowest per plant, but needs propagation supplies | 4-8 weeks indoors plus hardening off | Higher (germination failure, damping off) | Early-season volume, filling large pots cheaply |
| Plug Plants | £11 for 40 plants | 4-6 weeks growing on | Low-Medium | Mid-season gap-filling for instant impact |
| Garden-Ready Plants | £56 for 40 plants | Instant | Low | Late-season emergencies |
The False Spring Mistake That Kills 80% of Bedding Plants
There is no mistake more common or more devastating than falling for the ‘false spring’. A week of beautiful, warm weather in April tempts gardeners to rush out and buy trays of tender summer bedding like petunias, geraniums, and begonias. But a single late frost, which can occur well into May in many climates, is all it takes to wipe out your entire investment. Understanding plant hardiness isn’t just trivia; it’s a crucial risk management strategy. Annuals are typically categorized as ‘Hardy’, ‘Half-Hardy’, or ‘Tender’.
Hardy annuals (like Calendula or Nigella) can be sown outside before the last frost. Tender annuals (like Zinnia or Cosmos) are extremely sensitive to cold and must not be planted out until all risk of frost has passed. The largest group, half-hardy annuals (like Petunias and Marigolds), are the most deceptive. They can handle a little cold but will be severely damaged or killed by a frost. The key is to know your local ‘last frost date’ and wait until at least two weeks after it to plant out tender and half-hardy species. Official RHS hardiness ratings clarify that H2 plants tolerate 1-5°C, while H3 plants can only go down to -5°C under specific conditions, a threshold a late frost easily breaches.
If you do buy early, you must be prepared to ‘harden them off’—gradually acclimatising them to outdoor conditions over 7-10 days—and be ready to protect them. Moving pots against a warm house wall or covering them with horticultural fleece overnight can make all the difference. As veteran gardener David Hurrion advises, patience is the wiser and more economical virtue.
Far better to put off buying summer bedding plants until the beginning of May, when the fresher stock is likely to be happier and will grow away strongly.
– David Hurrion, David Hurrion Gardening Blog
How to Feed Annuals in Pots Without Causing Salt Buildup?
Container annuals are hungry plants. Unlike their garden-grown counterparts, their roots can’t forage for nutrients, making them completely dependent on you. Regular feeding is essential to fuel the non-stop flower production we demand of them. However, a common but rarely discussed problem in container gardening is the gradual accumulation of mineral salts from fertilizers and tap water. This salt buildup can be toxic to plant roots, leading to stunted growth, burnt leaf edges, and a general failure to thrive, even when you think you’re doing everything right.
You can often see the evidence as a white, crusty deposit on the soil surface or around the pot’s drainage holes. This residue is what’s left behind when water evaporates. To prevent it, the strategy is twofold: feed smarter and flush regularly. Instead of using a strong feed infrequently, opt for a “weakly, weekly” approach. Use a balanced liquid fertilizer (like a seaweed feed or a tomato feed) at half or quarter strength with every watering during the peak growing season. This provides a steady stream of nutrients without delivering a massive dose of salts all at once.
Secondly, you must periodically flush the pots. Once a month, take your pots to a spot where they can drain freely and water them thoroughly with plain water until it gushes out of the bottom. Let it drain for 20 minutes, then do it again. This process, known as leaching, dissolves the accumulated salts and washes them out of the root zone. Using rainwater for this flush is ideal as it’s naturally free of the minerals found in tap water. This simple maintenance routine is the key to keeping your container plants healthy and receptive to the nutrients you provide all season long.
Action Plan: Your Patio Pot Health Audit
- Surface Check: Inspect the top inch of soil and the rim of your terracotta pots. Do you see a white, crusty residue? This is a key sign of salt buildup.
- Drainage Test: The next time you water, observe how quickly it drains. If water sits on the surface for a long time, your soil may be compacted, worsening salt issues.
- Foliage Scan: Look at the edges of the leaves on your plants. Are they brown, dry, or ‘burnt’ looking? This is a classic symptom of root damage from excess salts.
- Feeding Regimen Review: Are you using a granular, slow-release fertilizer or strong liquid feeds? Consider switching to a half-strength liquid feed with each watering to reduce salt delivery.
- Leaching Plan: Schedule a ‘flushing day’ once a month. Plan to drench each pot with plain water twice to actively wash out accumulated salts and reset the soil environment.
Windowsill vs Grow Light: Is Natural Light Enough for February Sowing?
Starting seeds indoors in late winter gives you a tremendous head start on the season. A February sowing can mean strong, flowering plants by May. The most common place for this is a south-facing windowsill, but is it truly enough? The answer, for many, is no. The issue isn’t just the presence of light, but its quality, intensity, and duration. In February, even on a bright windowsill, the sun’s angle is low, the daylight hours (photoperiod) are short, and cloud cover can drastically reduce the light’s intensity.
Plants require a specific spectrum of light for photosynthesis, primarily in the blue and red wavelengths. While sunlight contains this, its intensity in late winter is often too weak to promote strong, stocky growth. The result is a common problem called etiolation, or ‘legginess’. Seedlings stretch desperately towards the weak light source, becoming pale, thin, and fragile. These leggy seedlings rarely develop into robust plants; they are prone to disease and breakage when planted out.
This is where a simple LED grow light becomes a game-changing tool for the serious patio gardener. You don’t need a professional setup. A single, full-spectrum LED bulb or strip positioned just a few inches above your seed tray provides two critical things a windowsill cannot: consistency and proximity. The light provides the ideal spectrum at a high intensity right where it’s needed, and a simple timer can ensure the seedlings get a consistent 14-16 hours of light per day, regardless of the weather outside. The result is compact, strong, dark green seedlings that are perfectly prepared for a successful life on the patio. For an early start, a grow light is not a luxury; it’s an investment in quality.
The Lasagna Method: Layering Bulbs for 3 Months of Color?
While annuals provide the bulk of summer colour, spring-flowering bulbs are the key to kickstarting the season early. The ‘Lasagna Method’ is a brilliant container planting technique that takes the idea of succession planting and applies it vertically within a single pot. Instead of waiting for one type of bulb to finish before the next can begin, you are layering them by bloom time to create a continuous, rolling display of flowers from as early as February through to May from one container.
The concept is simple: you plant bulbs in layers, just like making a lasagna. The largest and latest-flowering bulbs go in the deepest layer. The mid-season bloomers go in the middle layer. And the smallest, earliest-flowering bulbs go in the top layer. The plants are clever; their shoots will naturally find their way around the bulbs above them to reach the light. This is temporal layering in its most literal and beautiful form.
A classic recipe for a large patio pot would be: a bottom layer of late-spring tulips (like ‘Queen of Night’); a middle layer of mid-spring daffodils or hyacinths; and a top layer of early-spring crocuses or miniature irises. As the crocuses fade in late winter, the daffodils will be pushing through, and as they finish, the tulips will take over for the grand finale. You can even plant a few winter-hardy violas or pansies on the very top layer to provide colour and interest while you wait for the first bulb shoots to appear. This single, hard-working pot can provide three solid months of changing colour, bridging the gap from late winter to the start of the annuals’ season.
Key Takeaways
- Think of your patio as an energy system: Every action, from deadheading to feeding, is about directing the plant’s finite energy toward producing more flowers.
- Layer time, not just plants: Use succession sowing for annuals and the Lasagna Method for bulbs to create an overlapping, continuous sequence of blooms.
- Analyse the total cost: Make strategic choices between seeds, plugs, and plants based on your resources of time, money, and the risk you’re willing to take at different points in the season.
Year-Round Seasonal Colour: Filling the November and February Gaps
The true test of a four-season patio is its performance during the most challenging months: the ‘shoulder seasons’ of late autumn and late winter. November and February are often seen as barren gaps between the end of the autumn crescendo and the first hint of spring. However, with strategic plant choices, these months can be filled with subtle beauty, structure, and even surprising pops of colour. The goal is not to replicate the riot of summer, but to ensure there is always something of interest to look at.
In November, as the last of the tender annuals succumb to frost, the focus shifts to plants with persistent structure and late-season tenacity. This is where ornamental grasses shine, their frosted seed heads providing architectural interest all winter. Pots of ornamental kale or cabbage offer incredible colour and texture that intensifies with the cold. Some hardy salvias, like ‘Amistad’, will often continue to throw out deep purple spires until a very hard frost finally stops them. It’s about celebrating the beauty of a more muted, textural palette.
February is the month of anticipation, and bridging this gap is about deploying the earliest of the early bloomers. This is the domain of Hellebores (Christmas or Lenten Rose), whose exquisite, downward-facing flowers are impervious to snow and frost. Pots of winter-flowering violas can provide cheerful colour through the coldest weather, while the first miniature irises (like ‘Reticulata’) and snowdrops can be planted in small, sheltered pots to provide a precious, jewel-like display. These small touches of life are a vital bridge, a promise that the full power of spring, powered by the bulb lasagna you planted in autumn, is only weeks away.
By shifting your mindset from reactively filling gaps to proactively managing energy and time, you transform your relationship with your patio garden. It becomes a year-long project of creative direction, a rewarding system to manage rather than a display to simply maintain. Start today by auditing one pot, not just for what is or isn’t flowering, but for where its energy is going, and take the first step toward creating your own continuous, four-season colour engine.