In summary:
- Stop guessing where the ‘sunny spot’ is; create a simple, one-day sun map to reveal your garden’s true solar potential.
- Maximising yield is not just about direct light; managing airflow and harnessing reflected light and stored heat (thermal mass) is critical.
- Artificial lighting is often uneconomical for winter vegetables in the UK; it’s more effective to work with your existing light by choosing the right plants for the right place.
- The key to overcoming the UK’s challenging climate is to think like an engineer, optimising your garden’s unique ‘solar budget’.
For any vegetable grower in the UK, the sight of stubbornly green tomatoes in late August is a familiar frustration. You’ve followed the conventional wisdom: you used good compost, you watered diligently, and you chose what you thought was a sunny spot. Yet, the cool, damp British summer has once again delayed the prize. This annual disappointment stems from a fundamental misunderstanding of the most critical resource in your garden: solar energy.
The common advice to “give plants sun” is dangerously vague. It fails to account for the shifting shadows from a neighbour’s fence, the low arc of the winter sun, or the pockets of trapped heat that can make or break a harvest. Success isn’t about luck or having ‘green fingers’; it’s about precision. The true key to unlocking your garden’s potential lies in treating it not as a patch of dirt, but as a system of microclimates that can be measured, mapped, and managed.
This guide reframes the challenge. Instead of hoping for more sun, you will learn how to quantify and optimise your garden’s existing solar budget. We will move from guesswork to a data-driven strategy, transforming your approach to planting. By systematically mapping light and heat, you can engineer your space to harvest every available photon and turn it into a quantifiable increase in yield. This article will show you precisely how to map your garden’s light, analyse its shaded zones, manipulate light and airflow, and understand the economic reality of artificial solutions, ultimately putting you in control of your harvest.
To navigate this data-driven approach, here is a breakdown of the key strategies we will cover. This guide provides a complete framework for analysing and optimising the solar performance of any UK garden.
Contents: A strategic guide to solar optimisation
- How to Create a Sun Map of Your Garden in One Day?
- Dappled vs Deep Shade: Which Vegetables Can Survive Under Trees?
- White Walls or Mirrors: Increasing Solar Exposure in Dark Corners
- The Ventilation Error That Cooks Plants Despite Good Sun
- Winter Sun vs Summer Sun: Adjusting Pot Positions for the Season
- Mapping Your Garden: How to Identify the ‘Warm Spot’ for Early Planting
- Why Standard Grow Lights Fail During British Winters?
- How to Boost Photosynthesis in Shady North-Facing Gardens?
How to Create a Sun Map of Your Garden in One Day?
The foundation of a high-yield garden is data, not guesswork. Before planting a single seed, the most crucial task is to understand how solar energy moves across your space. A sun map is a simple diagram that tracks the path of sunlight and shadow throughout the day, revealing the true hotspots and cold spots. This process replaces vague assumptions with concrete evidence, allowing for strategic plant placement. As Mairi Devlin, Head of Garden and Outdoor at B&Q, points out, this methodical approach is central to effective garden design.
Sun mapping helps in planning a garden by identifying the best spots for plants based on their sunlight needs.
– Mairi Devlin, Head of Garden and Outdoor at B&Q, Ideal Home
Creating a map is straightforward. Start with a rough sketch of your garden, including the house, fences, large shrubs, and trees. On a sunny or intermittently cloudy day, visit the garden every hour or two from morning until evening. At each visit, sketch the outlines of the shadows onto your map. You can use different coloured pencils for different times of the day. By the end of the day, you will have a composite image showing which areas receive full sun (6+ hours), partial sun (3-6 hours), or are in shade (less than 3 hours). This is your garden’s solar budget, the raw data you need to make every subsequent decision.
This simple exercise reveals the reality of your space, often exposing that the spot you assumed was ‘sunny’ is actually in shadow for half the day. It’s the first and most important step in moving from a passive gardener to a proactive microclimate engineer.
Dappled vs Deep Shade: Which Vegetables Can Survive Under Trees?
Your sun map will inevitably reveal areas of shade, particularly under the canopy of trees or along north-facing boundaries. Rather than viewing these as dead zones, a data-driven gardener sees them as specialised environments requiring a specific planting strategy. The key is to distinguish between ‘deep shade’, where little will grow, and ‘dappled’ or ‘partial’ shade, which can be surprisingly productive. The Royal Horticultural Society (RHS) confirms that many plants can thrive with limited direct sun, provided other conditions are met.
According to guidance from the RHS on planting under trees, the level of success depends heavily on the type and duration of light. Their key findings include:
- Areas receiving two to three hours of morning or evening sun can support a wide range of shade-tolerant plants, assuming adequate moisture.
- Dense evergreen canopies, like those of conifers, create ‘dry shade’ which is extremely difficult to plant under and is best avoided.
- For the most challenging, gloomy spots, even common ivy can be a resilient option where other plants fail to establish.
For edible crops, understanding these nuances is critical. While sun-loving fruits like tomatoes will fail, many leafy greens and root vegetables can produce a respectable harvest. The key is matching the plant to the specific light conditions. An analysis from Simply Seed provides a useful breakdown of the minimum light requirements for various popular UK vegetables, allowing for precise selection based on your sun map data.
| Vegetable | Shade Tolerance | Minimum Light Needed |
|---|---|---|
| Garlic | Partial shade if soil drains well | 5-6 hours of sun for a respectable harvest |
| Rhubarb | Tolerates partial shade well | Useful where summer sun is limited; thinner stems in heavier shade |
| Mangetout peas | Copes with lighter shade | Best in a site that still feels bright |
This analytical approach allows you to maximise the yield of your entire plot, not just the sunniest corners. It’s about working with the constraints of your garden’s solar budget, not against them.
White Walls or Mirrors: Increasing Solar Exposure in Dark Corners
Once your sun map has identified the darker, light-deficient corners of your garden, the next step is active intervention. A data-driven gardener doesn’t just accept these limitations; they engineer solutions. The most effective strategies involve manipulating light, a process of photon harvesting where you capture and redirect solar energy. The simplest and most impactful technique is using reflective surfaces to bounce light into shaded areas.
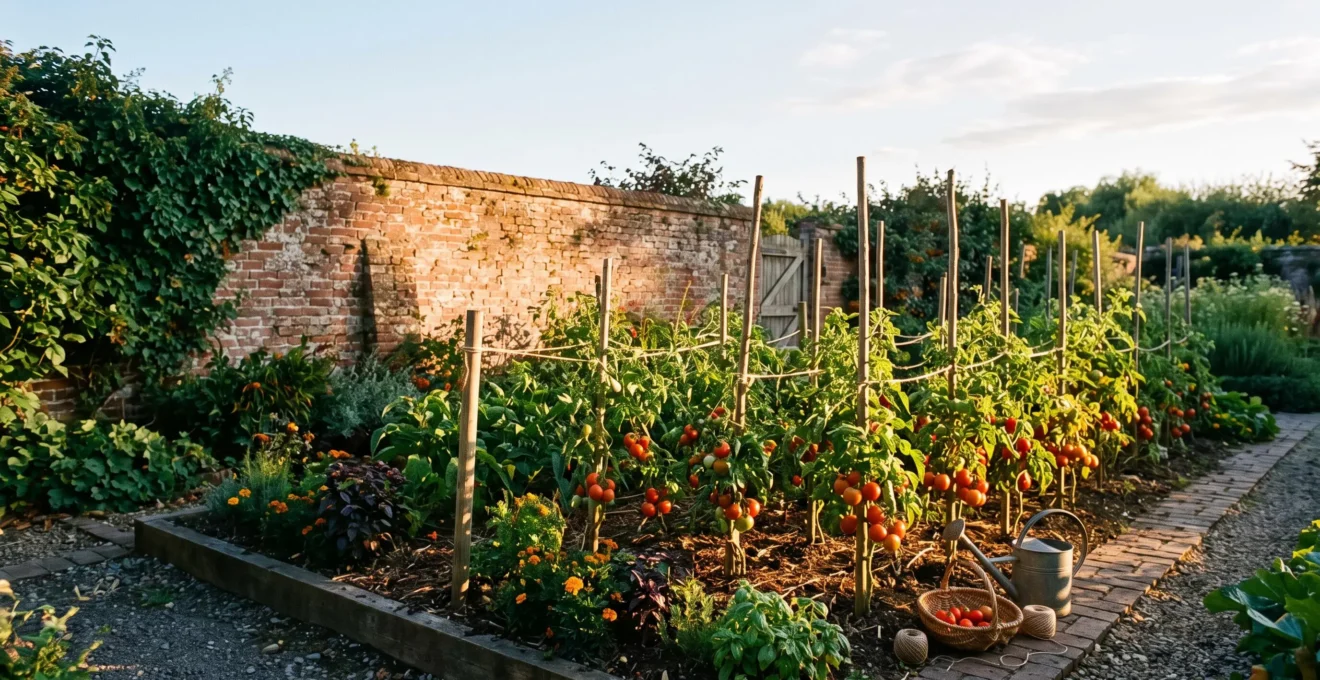
Painting a boundary wall or fence a brilliant white is a classic horticultural trick for a reason. A white surface can reflect up to 80-90% of the light that hits it, effectively illuminating the area in front of it. This doesn’t just increase light levels for photosynthesis; it also significantly raises the ambient temperature. The wall absorbs solar energy during the day and radiates it back out as heat, creating a warm microclimate. This stored energy, or thermal mass, is crucial for ripening fruits like tomatoes in the UK’s marginal climate.
This image demonstrates the principle perfectly, showing how a simple white wall transforms a shadowed space into a viable growing zone. While mirrors are sometimes suggested, they are often less practical. They create concentrated hotspots that can scorch plants and can be a hazard for birds. A large, white-painted surface provides a much more effective, diffuse light and contributes valuable thermal mass. This strategy is particularly effective for south-facing walls, which can be used to create the warmest microclimate in the entire garden, ideal for training espaliered fruit trees or growing tender crops.
By investing a weekend in painting a wall, you are not just decorating; you are actively re-engineering your garden’s solar budget, turning a previously unproductive area into a high-value growing space.
The Ventilation Error That Cooks Plants Despite Good Sun
Maximising solar gain in a greenhouse or polytunnel seems logical, but it can create a deadly trap. While you’ve successfully captured light and heat, you may have overlooked a critical variable: ventilation. In the enclosed environment of a greenhouse, temperatures can soar, and humidity can build to dangerous levels. This creates the perfect conditions for fungal diseases like tomato blight, and can literally cook your plants, causing irreversible damage despite the abundant sun.
The core issue is a lack of air movement. Stagnant, humid air prevents plants from transpiring effectively, which is their natural cooling mechanism. It also allows blight spores to settle and thrive. Effective ventilation creates a continuous flow of air that vents excess heat and moisture. According to UK greenhouse guidance, a simple rule of thumb applies: the total area of your vents should be at least 15-20% of the greenhouse’s floor space. Anything less, and you risk creating a high-humidity, high-temperature environment that is detrimental to plant health, with an ideal humidity range being between 40-60%.
Preventing blight through airflow management involves several key practices:
- Improve Canopy Airflow: As plants grow, remove the lower leaves to create a clear space between the foliage and the soil. This prevents soil splash and allows air to circulate around the base of the stem.
- Water the Soil, Not the Leaves: Always water at the base of the plant. Wet leaves, especially overnight in a humid environment, are a primary invitation for fungal diseases.
- Mulch the Surface: A layer of mulch around the base of the plants acts as a physical barrier, reducing the chance of blight spores from the soil splashing up onto the leaves during watering.
Therefore, managing your greenhouse isn’t just about maximising light; it’s about balancing a complex system of light, temperature, humidity, and airflow. The data-driven gardener uses automatic vent openers, humidity sensors, and strategic pruning to maintain this equilibrium, ensuring the captured solar energy leads to healthy growth, not disease.
Winter Sun vs Summer Sun: Adjusting Pot Positions for the Season
A static sun map, created on a single day in spring or summer, is an essential starting point. However, a truly analytical gardener understands that the sun’s position is not fixed. The path of the sun across the sky—its arc—changes dramatically between seasons, fundamentally altering the light and shadow patterns in your garden. This has profound implications for anyone growing in containers, as it presents a major opportunity for yield optimisation through strategic relocation.
In the UK, during the summer solstice in June, the sun rises in the northeast, travels high across the southern sky, and sets in the northwest. This high arc means that even north-facing areas can receive some direct light, and shadows cast by walls and fences are relatively short. In contrast, during the winter solstice in December, the sun rises in the southeast, traces a very low arc across the southern sky, and sets in the southwest. This low path means that any obstruction—a house, a tree, a fence—will cast a long shadow, plunging large areas of the garden into shade for most of the day.
This seasonal shift is the key to microclimate engineering with pots. A spot that is perfect for a tomato plant in July—baking in full sun against a south-facing wall—might be in deep, cold shadow by October. Conversely, a position that is shaded by a deciduous tree in summer might become the sunniest spot in the garden once the leaves have fallen. For overwintering hardy herbs or starting early spring salads, this newly opened spot could be ideal. The data-driven strategy is to move your containers to follow the sun. A pot of hardy rosemary might move from a partially shaded corner in summer to a prime position in front of a south-facing window in winter to maximise its limited light.
By thinking in four dimensions—three of space and one of time—you can continuously adjust your planting layout to maximise the yield-per-photon available in each season, ensuring your most valuable garden real estate is always occupied by the plants that need it most.
Mapping Your Garden: How to Identify the ‘Warm Spot’ for Early Planting
A sun map tells you where the light is, but it only reveals half the story. The other critical component for plant growth, especially for early planting and ripening, is heat. Light and heat are linked, but not identical. A spot can be bright but windy and cold, or it can be a sheltered heat trap. The ultimate goal of garden mapping is to identify the convergence of maximum light and maximum retained heat. This is your garden’s ‘warm spot’—the prime real estate for getting a head start in spring and extending the season in autumn.
This ‘warm spot’ is typically a south-facing area with protection from prevailing winds, and crucially, proximity to a significant thermal mass like a brick wall or a stone patio. These materials absorb solar energy during the day and radiate it back slowly at night, buffering the plants against cold night-time temperatures and raising the average soil temperature. Identifying this zone doesn’t require expensive equipment; it requires observation, supplementing your light map with a heat map.
A simple soil thermometer, as shown here, is an invaluable tool for the data-driven gardener. By taking readings in different parts of your garden on a cool spring morning, you can quantify the effect of thermal mass and create a true heat map. You’ll often find the soil next to a sunny wall is several degrees warmer than the soil in the middle of the lawn, a difference that is critical for seed germination and early growth. This empirical data allows you to plant with confidence, knowing you are using the most favourable microclimate available.
Action plan: Locating your garden’s true warm and sunny zones
- Observe and Record: Note where sunlight hits the garden in the morning, midday, and late afternoon over a couple of days rather than relying on guesswork.
- Use Simple Tools: Use quick phone photos, a sticky note on a window, or a simple paper sketch to record the true sunny zones.
- Test Soil Temperature: On a cool spring morning, use a soil thermometer to measure temperatures in your identified sunny zones versus shaded zones to find the true ‘warm spot’.
- Analyse Wind Patterns: Note which of your warm, sunny spots are sheltered from the prevailing south-westerly winds. A sheltered spot is significantly warmer.
- Synthesise the Data: The optimal spot for early planting is where all three factors converge: maximum sun duration, highest soil temperature, and best wind protection.
By combining a light map with a heat map, you move beyond simple sun-chasing and begin to understand your garden as a complex thermal system, which you can then manipulate for maximum productivity.
Why Standard Grow Lights Fail During British Winters?
When natural light is scarce, especially during the UK’s notoriously grey winters, the temptation to supplement with artificial grow lights is strong. The technology seems to promise a solution: a self-contained sun that can defy the seasons. However, for the average home grower aiming to produce edible crops like tomatoes or chillies, this solution often fails. The failure is not technological—modern LED lights are highly effective—but economic. The cost of running them often far exceeds the value of the produce grown.
The central problem is the sheer amount of energy required for fruiting plants. While a small light can keep herbs alive on a windowsill, inducing a tomato plant to produce a worthwhile crop requires high-intensity light for 14-16 hours a day. In the context of UK electricity prices, this represents a significant financial outlay. For example, even a modest 100W LED setup can incur substantial running costs over a typical growing season. A cost-benefit analysis from Garden UK highlights this economic reality.
| Setup | Schedule | Annual Electricity Cost | Value of Produce Grown |
|---|---|---|---|
| 100W LED, 60x60cm tent | 16 hrs/day, March-October (8 months) | £115-£130 | £200-£400 (lettuce, herbs, tomatoes) |
These costs are directly tied to the price of electricity. Based on a potential future Ofgem price cap of 26.11 pence per kWh, the financial viability becomes even more questionable. While the value of the produce can exceed the electricity cost, this calculation doesn’t account for the initial investment in the light, tent, fans, and other equipment, which can run into hundreds of pounds. Furthermore, it doesn’t factor in the gardener’s time or the cost of seeds and nutrients.
For the data-driven gardener, the conclusion is clear: unless you are growing very high-value crops or starting seedlings for a large garden where the investment pays off at scale, fighting the British winter with expensive artificial light is often an irrational economic choice. It’s more efficient to focus on optimising natural light or growing crops appropriate for the low-light season.
Key takeaways
- Systematic sun mapping is the non-negotiable foundation for maximising yield in any UK garden; guesswork is inefficient.
- Managing the ‘unseen’ factors of airflow (to prevent disease) and thermal mass (to retain heat) is just as critical as managing direct sunlight.
- It is more effective to work with your garden’s existing shade by selecting appropriate plants than it is to fight it with expensive, often uneconomical, artificial solutions.
How to Boost Photosynthesis in Shady North-Facing Gardens?
A north-facing garden, which receives no direct southern sun, represents the ultimate challenge for a UK vegetable grower. Your sun map will confirm long periods of shadow, and the soil will be cooler and damper. In this low-energy environment, trying to grow sun-worshippers like tomatoes is a recipe for failure. The analytical approach is not to fight these conditions, but to work within their constraints. The goal shifts from maximising yield of sun-loving plants to maximising the photosynthetic efficiency of shade-tolerant species.
The key is a radical shift in plant selection, moving away from annual vegetables and towards perennial edibles that are evolutionarily adapted to woodland-edge environments. These plants are genetically programmed to make the most of the limited, indirect light available. The Royal Horticultural Society (RHS) highlights several fruit varieties that perform surprisingly well in these conditions, as they originate from forest understoreys.
Case Study: RHS Garden Bridgewater Kitchen Garden
The RHS has demonstrated this principle at a grand scale in its Kitchen Garden at RHS Garden Bridgewater. Here, designers deliberately incorporated a range of shade-loving edible perennials. The project serves as a real-world proof-of-concept, showing how even a flagship garden can combine ornamental and edible planting to remain productive in lower-light spaces, providing inspiration and a tested plant list for gardeners facing similar challenges.
This strategy of choosing the right plants is far more effective than trying to alter the environment. The RHS suggests that even in partial shade with some midsummer sun, it’s possible to get a reasonable crop from specific soft fruits. Their recommended list includes:
- Redcurrants, whitecurrants, and gooseberries: These are classic woodland-edge fruits that can produce well in light or partial shade.
- Raspberries and blackcurrants: While they prefer more sun, they will still yield a reasonable crop in a brighter north-facing garden.
- Rhubarb: An exceptionally tough and productive perennial that thrives in cooler, shadier spots where other plants would struggle.
By embracing the shady nature of a north-facing plot and planting accordingly, you can create a surprisingly productive and low-maintenance edible garden. It is the ultimate expression of the data-driven approach: analysing the conditions and deploying the assets best suited to the environment, rather than forcing a solution that is destined to fail.