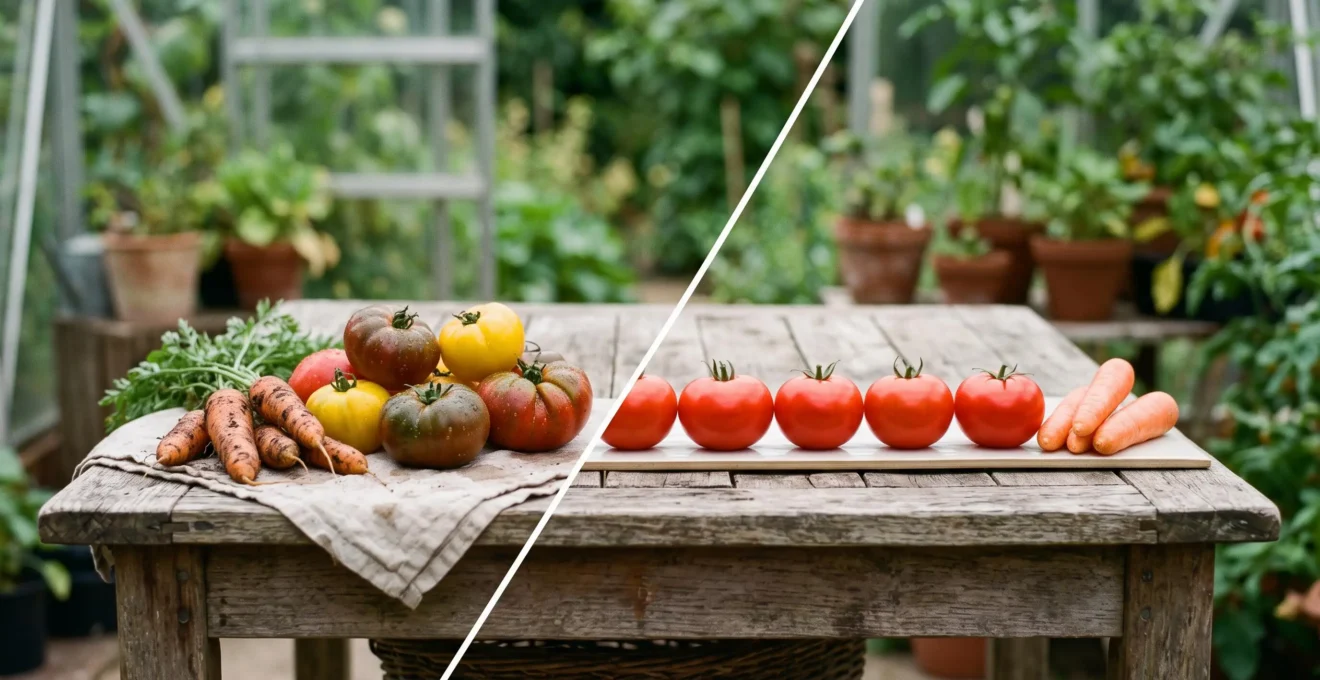
True flavour is the sensory story of a plant’s resilience, a complex quality that has been systematically bred out of modern F1 hybrids in the pursuit of commercial uniformity.
- Heirloom varieties possess a deep “genetic memory” for survival, which directs energy into producing complex flavour compounds as a defense mechanism.
- F1 hybrids are sterile and uniform by design, created for predictable shipping and shelf life, often sacrificing the very genetic traits that create profound taste.
Recommendation: To experience the richest and most authentic vegetable flavours, grow heritage varieties that have a story and a history of thriving in challenging conditions.
There is a unique disappointment reserved for the food lover who bites into a visually perfect, ruby-red tomato, only to be met with a watery, flavourless void. This experience is the quiet tragedy of the modern food system, a world that prizes cosmetic perfection and durability over sensory delight. For decades, the conventional wisdom for gardeners and chefs has been a simple trade-off: grow F1 hybrids for high yields and disease resistance, but turn to heirlooms for genuine taste. This advice, while true on the surface, misses the fundamental point.
But what if flavour isn’t an added luxury, but the direct, tangible result of a plant’s genetic history and its very struggle for survival? What if the intense, aromatic compounds we cherish in a heritage carrot or a Brandywine tomato are the echoes of battles fought against blight, pests, and poor soil? This is not just a story of taste, but a story of genetic memory versus commercial amnesia. It’s about understanding that the supposed “imperfections” and variability of heirlooms are not flaws, but the very source of their culinary greatness.
This guide will deconstruct that difference from the seed up. We will explore the critical genetic divide that dictates whether you can save a seed, uncover how historical resilience is directly linked to deeper flavour, and examine the practical choices you can make in your own garden—from variety selection to harvesting—to cultivate produce that is not just grown, but is alive with history, complexity, and unparalleled taste.
To truly understand the profound difference in flavour, we must first go back to the source: the seed itself. The following sections break down the key distinctions and practical implications for any gardener or chef dedicated to taste.
Summary: The Real Story Behind Heirloom Flavor vs. Hybrid Uniformity
- Heirloom vs Hybrid: Why You Can Only Save Seeds from One?
- Why 19th Century Varieties Survive UK Blight Better?
- The Yield Trade-Off: Are Heirlooms Worth the Lower Harvest?
- Carrots for Clay: Which Heritage Varieties Handle Heavy Soil?
- When to Pick: The Narrow Window for Heritage Pea Sweetness?
- Sun and Shade: How a Spiral Creates Different Zones for Basil and Parsley?
- Why Some Seeds Need a ‘Winter Chill’ in the Fridge Before Sowing?
- Seed Propagation Mistakes That Waste 50% of Your Germination Potential
Heirloom vs Hybrid: Why You Can Only Save Seeds from One?
The most fundamental difference between an heirloom and an F1 hybrid lies in how they are born. An heirloom is open-pollinated, meaning it is pollinated by insects, wind, or self-pollination. When you save seeds from an heirloom, you are preserving a stable genetic line. The offspring will grow “true to type,” reliably resembling the parent plant. This genetic stability is what allows a variety like the ‘Brandywine’ tomato to be passed down through generations of gardeners.
F1 hybrids, in contrast, are the first-generation offspring of a deliberate cross between two distinct and often inbred parent lines. This process is controlled to produce a specific outcome, usually combining desirable traits like disease resistance from one parent and high yield from another. However, this “hybrid vigour” is a one-time event. Seeds saved from an F1 hybrid plant will produce a chaotic mix of second-generation (F2) plants, reverting to the traits of the original grandparents in unpredictable ways. This genetic instability is not an accident; it’s a feature that ensures what one historian calls “the annual return of customers for a fresh supply” of seed. While F1 technology has benefits, it creates a cycle of dependency and can lead to the loss of unique varieties if a company ceases production.
Case Study: The Moreton Tomato’s Disappearance
The Moreton tomato, once celebrated in the mid-Atlantic states for its distinctive taste, vanished entirely once the Harris Seed Company, which held the patent on the F1 hybrid, stopped producing it. Unlike an open-pollinated heirloom, growers had no legal or biological way to keep the variety alive themselves, illustrating how commercial control over F1 genetics can erase a variety overnight regardless of how much gardeners valued it.
This commercial model has not become universally dominant in all crops. For instance, in the 2010s, F1 hybrids represented only about 0.2 percent of global wheat acreage, demonstrating that stable, open-pollinated varieties remain the backbone of many essential food systems. For the flavour-focused gardener, the choice is clear: heirlooms offer the freedom of self-sufficiency and the preservation of culinary heritage.
Why 19th Century Varieties Survive UK Blight Better?
The remarkable resilience of many older heirloom varieties is not a matter of luck; it is a story written in their DNA. When a catastrophic event like the potato blight swept through Europe in the 19th century, it acted as an intense evolutionary filter. The plants that survived were not the most uniform or the highest-yielding, but those that possessed a natural, inherent resistance. Gardeners and farmers saved seeds and tubers from these survivors, consciously and unconsciously selecting for genetic diversity and toughness. This is the essence of genetic memory: the plant’s lineage carries the code for overcoming past adversities.
This very resilience is inextricably linked to flavour. To fight off diseases like blight, plants produce a complex arsenal of phytochemicals, including phenols and terpenes. These compounds, which are bitter or toxic to pathogens, are the same molecules that we perceive as complex, interesting, and delicious flavours and aromas. A plant bred for uniformity and stripped of its natural defenses doesn’t need to waste energy producing these compounds, resulting in a blander taste. An heirloom, however, retains this defensive, flavourful chemistry.
As this image of a gnarled, earth-caked heirloom potato suggests, strength is not found in cosmetic perfection. Its irregular shape tells a story of survival against the odds. This is a variety that has earned its place in the garden, not by looking perfect, but by enduring. In choosing such varieties, we are not just growing food; we are cultivating a legacy of resilience that we can taste in every bite.
The Yield Trade-Off: Are Heirlooms Worth the Lower Harvest?
One of the most persistent arguments against heirlooms is the issue of yield. It is often true that an F1 hybrid bush bean will produce a larger quantity of beans than a heritage variety. But this comparison is fundamentally flawed because it measures the wrong thing. F1 hybrids have been selected for one primary goal: converting water and fertilizer into saleable mass as quickly as possible. This often results in produce with higher water content and less-developed cellular structure, leading to that familiar bland, watery taste.
Heirlooms, on the other hand, are often playing a longer, more complex game. They are partitioning their energy differently, investing in deeper root systems to find nutrients, tougher foliage to resist pests, and, crucially, a higher concentration of the flavourful compounds we’ve discussed. The result may be a smaller harvest by weight, but it is a harvest of concentrated flavour and superior texture. It’s the difference between a watery, mass-produced tomato and a dense, meaty Amish Paste, where every ounce is packed with rich, complex taste. The trade-off is not truly about yield, but about quality versus sheer quantity.
Furthermore, the idea that all heirlooms are low-yielding is a myth. Many heritage varieties were selected for generations precisely because they were reliable and abundant producers for families and local markets. The ‘Amish Paste’ tomato, traced back to Wisconsin Amish communities around 1870, is a perfect example. It is an indeterminate variety that produces continuous, heavy yields of large, meaty fruit ideal for both canning and fresh eating, proving that heritage and high production are not mutually exclusive.
They had great strong stems and the fruit were huge.
– Home Gardener Review, Victory Seeds
Carrots for Clay: Which Heritage Varieties Handle Heavy Soil?
Nowhere is the concept of a vegetable’s history being imprinted on its physical form more evident than in varieties bred for challenging soils. For any gardener cursed with heavy, compacted clay, the dream of growing long, straight supermarket-style carrots is often a frustrating fantasy. Slender roots struggle to penetrate the dense earth, resulting in forked, stunted, and disappointing carrots. F1 hybrids, typically bred for the uniform, sandy loam of commercial fields, often fail spectacularly in these conditions.
This is where heirloom varieties shine, demonstrating a perfect expression of “terroir.” Many heritage carrots were not just grown in heavy soil; they were shaped by it. The ‘Chantenay’ carrot, developed in the 1830s by gardeners in the Chantenay-sur-Loire district of France, is a prime example. They were contending with heavy alluvial clay, so they selected for a carrot with a broad, powerful shoulder and a conical shape that could push its way through the dense soil without forking. The carrot’s very form is a direct answer to the challenge of its environment.
For gardeners facing similar soil types, choosing the right heritage variety is the key to success. This table, based on historical data and modern gardener experiences, compares several varieties known for their excellent performance in less-than-ideal soil, as detailed in a recent comparative analysis.
| Variety | Origin & Era | Root Shape | Days to Maturity | Clay Soil Tolerance | Flavor Profile |
|---|---|---|---|---|---|
| Chantenay (Red Core) | Chantenay-sur-Loire, France, 1830s | Short, stout, conical | 65–75 days | Excellent | Strong, earthy, slightly spicy |
| Danvers 126 | Danvers, Massachusetts, USA, 1870s | Thick, tapered, blunt tip | 70–80 days | Good | Robust, earthy, less sweet than Nantes |
| Royal Chantenay | Improved Chantenay strain, 1952 | Stout, stump-rooted | 70–75 days | Excellent | Sweet, fine-grained |
| Imperator (contrast type) | Bred for uniform commercial shipping, 20th century USA | Long, slender | 70+ days | Poor — prone to forking | Mild, crisp |
When to Pick: The Narrow Window for Heritage Pea Sweetness?
Growing a flavourful heirloom is only half the battle; harvesting it at the peak of perfection is the other. For no crop is this truer than for the humble garden pea. The sublime, fleeting sweetness of a freshly picked pea is one of the greatest rewards of kitchen gardening, but that perfection exists within a remarkably narrow window. This is because once a pea pod is picked, its sugars immediately begin the process of converting into starch. This is a plant’s survival mechanism, turning quick energy (sugar) into stable, long-term storage (starch).
While modern hybrid peas have often been selected to slow down this conversion process for a longer shelf life, many heritage varieties have not. They remain closer to their natural state, meaning the “sweetness clock” ticks much faster. A pod that is bursting with sugary flavour one day can be disappointingly starchy and mealy the next. For the chef or foodie, this means that timing is everything. The best-tasting peas are those that go from the vine to the pot (or are eaten raw in the garden) in a matter of minutes, not days.
As a practical guide, your senses are your best tool. For shelling peas like ‘Lincoln’ or ‘Alderman’, the ideal moment to harvest is when the pods are fully swollen and feel tight, but the pod itself is still a vibrant, glossy green. If the pod starts to look dull or has a yellowish tinge, the sugar-to-starch conversion is already well underway. For mangetout or sugar snap varieties, the goal is to harvest them while young and tender, just as the peas inside are beginning to form. This captures them at their most crisp and succulent, before the pod walls become tough.
Sun and Shade: How a Spiral Creates Different Zones for Basil and Parsley?
Just as vegetables have unique soil needs, herbs have specific requirements for sun, heat, and moisture to develop their full aromatic potential. A common mistake is to plant all herbs in one uniform bed, forcing a moisture-loving parsley to endure the same dry, sun-baked conditions as a Mediterranean rosemary. The result is stressed plants with diminished flavour. A brilliant, low-tech solution to this is the creation of distinct microclimates within a small space, and the herb spiral is the most elegant expression of this principle.
An herb spiral is a spiralling, raised garden bed, typically made of stone or brick. Its simple design creates a variety of growing conditions. The top of the spiral is the highest point, receiving the most sun and having the sharpest drainage; it’s a perfect hot, dry environment for herbs like thyme, oregano, and rosemary. As the spiral winds downwards, the soil becomes progressively richer, cooler, and more moisture-retentive. The lower, north-facing sections provide a cooler, shadier, and damper home, ideal for herbs like parsley, chives, and mint. Basil, which loves sun but also requires consistent moisture, thrives in the middle sections.
By giving each herb the specific conditions it prefers, you are allowing it to produce the maximum concentration of the essential oils that are the source of its flavour and aroma. You are not fighting against the plant’s nature, but creating a small, diverse ecosystem where each inhabitant can thrive. This is intelligent garden design, working with nature to coax out the very best flavours it has to offer.
Why Some Seeds Need a ‘Winter Chill’ in the Fridge Before Sowing?
Some seeds carry a deeper genetic memory than others, one that is tied to the rhythm of the seasons. For many plants native to temperate climates, simply providing warmth and moisture is not enough to trigger germination. These seeds require a period of cold, damp conditions first, a process known as cold stratification. This is an ingenious evolutionary failsafe. It prevents a seed from sprouting during a warm spell in autumn, which would lead to the young seedling being killed by the first hard winter frost. The seed “knows” it must experience a prolonged chill before it is safe to wake up.
For the gardener, this means we must simulate winter in our own homes. The refrigerator becomes an essential gardening tool. The process is simple: mix the seeds with a sterile, damp medium like vermiculite, perlite, or clean sand. The medium should be moist, but not soaking wet—like a wrung-out sponge. Place this mixture in a sealed plastic bag or container and leave it in the refrigerator for a period ranging from 30 to 120 days, depending on the species.
This “winter chill” breaks the seed’s internal dormancy mechanisms. When you remove the seeds from the fridge and sow them in warm soil, they believe spring has arrived and will germinate readily. Many beloved garden plants require this treatment, including lavender, milkweed, certain primroses, and the seeds of many fruit trees like apples and pears. Ignoring this crucial step is a common reason for germination failure, as the gardener mistakes a dormant seed for a dead one. It is a potent reminder that we must understand and respect a seed’s history to unlock its future.
Key Takeaways
- Flavour is History: Heirloom vegetables taste better because their genetics are a record of survival, producing complex compounds that F1 hybrids lack.
- Rethink Yield: The choice isn’t just about quantity but quality. Heirlooms offer concentrated flavour and nutrition over the watery bulk of many hybrids.
- Work with Your Terroir: Select heritage varieties that were specifically developed to thrive in your soil and climate conditions for the best results.
Seed Propagation Mistakes That Waste 50% of Your Germination Potential
After carefully selecting historically rich, flavour-packed heirloom seeds, the final hurdle is coaxing them to life. Seed propagation seems simple, but a few common mistakes can easily cut your success rate in half, wasting both precious seeds and valuable time. Consistent failure at this stage is often not due to bad seeds, but to a misunderstanding of their fundamental needs. Getting it right is a matter of controlling a few key variables: depth, moisture, and temperature.
One of the most frequent errors is sowing seeds too deeply. A tiny seed has a finite amount of stored energy to push its first shoot up to the light. If buried too deep, it will exhaust its reserves before it can break the surface. Conversely, a seed sown too shallowly may dry out or be washed away. Another critical factor is inconsistent moisture. Soil that swings from bone-dry to waterlogged stresses seeds and can promote “damping off,” a fungal disease that kills seedlings at the soil line. Finally, every seed has an optimal temperature range for germination, and failing to provide it can leave seeds dormant indefinitely.
To avoid these pitfalls and ensure your investment in quality seeds pays off, it’s essential to conduct a simple audit of your process. The following checklist provides a systematic way to diagnose and correct the most common propagation errors.
Your 5-Point Germination Audit
- Seed Viability Check: Are your seeds fresh? Check the ‘sow by’ date on the packet. For older, questionable seeds, perform a quick germination test by placing ten seeds in a damp paper towel inside a plastic bag. If fewer than five sprout, your seed stock is likely no longer viable.
- Sowing Depth Calibration: Re-read the seed packet instructions. As a universal rule of thumb, sow a seed to a depth of roughly two times its own diameter. For very fine seeds that need light to germinate, press them firmly onto the soil surface without covering them at all.
- Moisture Consistency Audit: Evaluate your watering method. Are you using a gentle spray bottle or mister to keep the medium consistently moist like a damp sponge, or are you flooding it with a watering can? Covering trays with a humidity dome can help maintain even moisture.
- Temperature & Light Monitoring: Use a soil thermometer to check the temperature of your germination medium. Is it within the ideal range specified for your chosen variety? Cross-reference if the seed requires total darkness or exposure to light to sprout, and adjust accordingly.
- Hardening-Off Protocol Review: Don’t sabotage healthy seedlings with an abrupt transition. Do you have a plan to gradually acclimate them to outdoor conditions over 7-10 days, slowly increasing their exposure to direct sun, wind, and temperature fluctuations?
Your next great meal begins not in the kitchen, but with the choice of a single, story-rich seed. By embracing the history, resilience, and unparalleled flavour of heirloom varieties, you are taking the first and most important step toward a truly exceptional culinary experience. Start exploring heritage seed catalogues today and begin your own flavour journey.