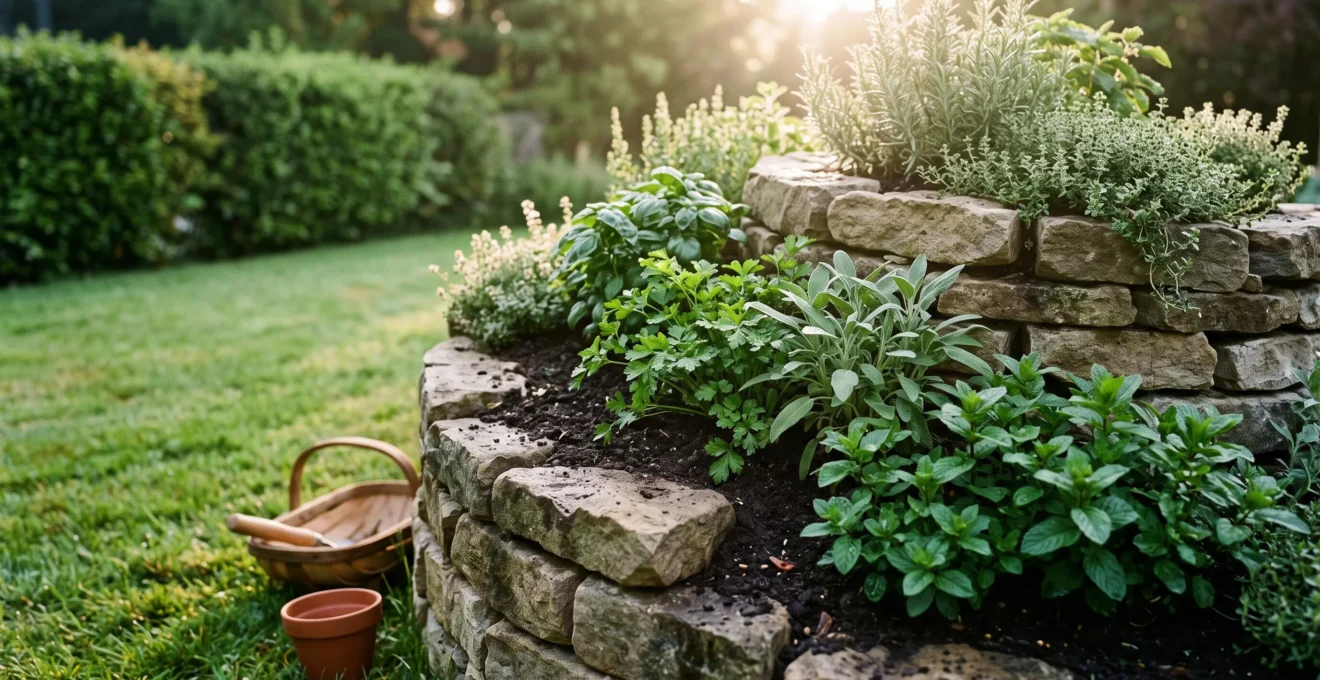
An herb spiral is more than a space-saver; it’s a precision-engineered ecological engine for maximizing herb flavour.
- Its vertical design stacks multiple distinct sun, water, and temperature zones into a tiny footprint.
- The choice of material (brick or stone) functions as a thermal battery, protecting sensitive roots from cold snaps.
Recommendation: Master the soil gradient from a dry, gritty top to a rich, moist bottom to create a self-regulating system for every herb, from Mediterranean rosemary to lush mint.
For any cook with a small garden, the dream is a full pantry of fresh, aromatic herbs. The reality, however, is often a frustrating compromise. Your sun-drenched balcony scorches delicate parsley, while the shady patch by the wall can’t satisfy a sun-worshipping basil plant. You know that an herb spiral is a popular space-saving solution, but most guides stop at the basic idea of stacking plants vertically. They miss the real genius of the design.
The secret is that a well-built herb spiral isn’t just a planter; it’s a cleverly designed ecological engine. It’s a living machine that manipulates sun, water, and temperature to create at least five distinct microclimates in a mere two square metres. This isn’t about simply arranging herbs in a pretty shape. It’s about applying fundamental permaculture principles of thermal physics and hydrology to concentrate the essential oils in your plants, resulting in more potent flavours for your kitchen.
This guide moves beyond the ‘what’ and explains the ‘why’. We will deconstruct the engineering behind this remarkable structure, showing you how to build a system that works with nature to provide the perfect niche for every culinary herb you desire. We’ll explore how material choice becomes a thermal battery, how a soil gradient creates a self-regulating water system, and why the spiral shape itself is a masterclass in ecological efficiency.
This article breaks down the core components of designing and managing a high-performance herb spiral. By understanding the science behind each element, you can move from simply growing herbs to actively engineering the perfect environment for peak flavour and productivity.
Summary: Designing an Ecological Engine for Your Culinary Herbs
- Sun and Shade: How a Spiral Creates Different Zones for Basil and Parsley?
- Brick or Stone: Which Material Keeps Mediterranean Herbs Warm at Night?
- The Mint Mistake: Why You Never Put Mint Directly in the Spiral?
- Gradient Filling: How to Vary Soil Mix from Top to Bottom?
- Pinching Out: How to Harvest Herbs to Trigger Double Growth?
- Why South-Facing Brick Walls Boost Temperature by 5°C at Night?
- Zone 1:How to Boost Photosynthesis in Shady North-Facing Gardens?
- Applying Permaculture Principles to a Standard Suburban Garden?
Sun and Shade: How a Spiral Creates Different Zones for Basil and Parsley?
The genius of the spiral shape lies in its ability to create multiple solar aspects within one structure. A standard square bed has a flat top and four distinct sides, but a spiral presents a continuous, curving slope. This creates a full spectrum of sun exposure. The top of the spiral, and its south-facing slope (in the northern hemisphere), receives the most intense, direct sunlight all day long. This hot, dry, sun-baked zone is the perfect environment for Mediterranean herbs like rosemary, thyme, oregano, and sage, which thrive in conditions that mimic their native, arid climates.
As the spiral descends, its orientation changes. The east-facing side gets gentle morning sun, while the west-facing side receives the hotter afternoon light. Crucially, the lowest part of the spiral on the north-facing side is shaded by the structure’s own height. This creates a cool, moist, and sheltered microclimate. It’s the ideal spot for herbs that bolt or scorch in direct sun, such as parsley, chervil, and cilantro. You are essentially creating different climate zones through topography.
As you can see, this single structure accommodates plants with opposing needs. Basil, which loves sun but also appreciates consistent moisture, can be placed on the east or west-facing slopes mid-way down, getting the best of both worlds. This intentional placement, guided by the sun’s path, is the first and most critical step in engineering your spiral’s microclimates. It’s a dynamic system, not just a static container, that actively sorts environments for you.
Brick or Stone: Which Material Keeps Mediterranean Herbs Warm at Night?
The material you choose for your spiral’s wall is not just an aesthetic decision; it’s a functional one that creates a “thermal mass battery.” Materials like stone, brick, and concrete have high thermal mass, meaning they can absorb and store heat energy. During the day, the walls of your spiral soak up solar radiation. As the air temperature drops at night, the walls slowly release this stored heat, creating a pocket of warmth that can raise the ambient temperature around your plants’ roots by several degrees.
This is especially critical for Mediterranean herbs at the top of the spiral. The gentle, radiant heat protects their sensitive root systems from sudden temperature drops, reducing stress and encouraging robust growth. The difference in heat storage capacity is significant; research on thermal mass shows that it takes far more energy to heat water than brick, demonstrating how effectively dense, dry materials hold onto warmth. While wood is a common building material, it has very low thermal mass and acts as an insulator, not a heat battery, making it less ideal for this purpose.
Dense materials like fired clay brick or natural stone are excellent choices. They are not only effective thermal batteries but also porous, allowing for some moisture regulation. The key is density and mass. The thicker and heavier the wall, the more heat it can store and the longer it will radiate that heat throughout the night, providing a stable and nurturing environment.
The following table, based on data about thermal mass in building materials, illustrates how different options store and release heat over time, a phenomenon known as thermal lag.
| Material (typical thickness) | Approx. Density (kg/m³) | Specific Heat Capacity (J/kg·K) | Typical Thermal Lag |
|---|---|---|---|
| Fired clay brick (230mm) | 1,600–2,000 | ~800 | 5–6 hours |
| Concrete (300mm) | – | – | 6–8 hours |
| Rammed earth (450mm) | – | – | 8–10 hours |
| Dense stone (600mm) | – | – | >12 hours |
The Mint Mistake: Why You Never Put Mint Directly in the Spiral?
There is one crucial mistake that can turn your beautifully engineered herb spiral into a monoculture nightmare: planting mint directly into the soil. Plants in the mint family (Lamiaceae), including spearmint, peppermint, lemon balm, and even oregano, are notoriously aggressive spreaders. They don’t just grow from a central root ball; they send out underground stems called rhizomes. These rhizomes can travel several feet, popping up new plants all along the way.
If you plant a single mint plant in your spiral, within a season or two its rhizomes will have infiltrated every level, choking out your other, more delicate herbs. It will fill the carefully prepared soil mixes and compete for water and nutrients, completely undoing the microclimate design you worked to create. This is a common and heartbreaking error for new gardeners. As garden writer Tanya Anderson of Lovely Greens warns in her guide, you should never plant invasive species directly in a mixed bed.
Don’t plant mint in it, or lemon balm or any other spreading mint-family plant.
– Tanya Anderson, Lovely Greens
The permaculture solution is simple: containment. You can absolutely grow mint in your herb spiral, but you must plant it in a pot first. Choose a pot at least 10-12 inches in diameter and sink it directly into the soil of your spiral, leaving the rim of the pot an inch or two above the soil line. This physically blocks the rhizomes from escaping while still allowing the plant to benefit from the spiral’s environment. Place it in the moist, partially shaded bottom zone where it will thrive without taking over.
Gradient Filling: How to Vary Soil Mix from Top to Bottom?
The second piece of hidden engineering in an herb spiral is the hydrological gradient created by the soil mix. Just as the spiral creates different sun zones, it must also create different moisture zones. This is achieved by systematically varying the composition of the soil from the top to the bottom. Water naturally flows downwards due to gravity, so the top of the spiral will always be the driest part, and the bottom will be the most moist.
To accentuate this effect, you fill the spiral with a gradient of materials. Before adding any soil, the bottom core of the spiral can be filled with rubble or coarse gravel to aid drainage. Then, you begin layering your soil mixes. The very top section, designated for herbs like rosemary and thyme, should have a lean, sandy, or gritty soil mix. You can amend standard potting soil with coarse sand or perlite to improve drainage and replicate the poor soils these plants love.
As you move down the spiral, the soil should become progressively richer and more moisture-retentive. The middle sections, for herbs like basil or tarragon, can have a standard, high-quality loam or compost-based potting mix. The lowest, shadiest section should be filled with your richest mix. Here, you can add plenty of well-rotted compost or coir, which act like sponges, holding onto moisture. This creates a water reservoir at the base of the spiral, perfect for thirsty plants like parsley and chives. This design makes the spiral remarkably water-efficient, as any water applied to the top will slowly percolate down, hydrating each zone according to its needs.
Pinching Out: How to Harvest Herbs to Trigger Double Growth?
Once your herb spiral is thriving, your harvesting technique becomes a tool for shaping the plants and boosting productivity. The key is understanding a biological process called apical dominance. Most plants have a natural tendency to grow upwards from their main, central stem (the apical bud). This bud produces hormones that suppress the growth of the side shoots (the axillary buds) located at the leaf nodes further down the stem.
By “pinching out”—or cutting off—the top of the main stem, you remove the source of these suppressing hormones. This sends a signal to the plant to wake up the dormant side shoots. As a result, the two buds just below your cut will spring to life, each forming a new stem. You have effectively doubled the number of growing tips, transforming a tall, leggy plant into a much bushier, more productive one. A review in the Journal of Plant Growth Regulation confirms that pinching is a proven horticultural method to encourage a bushier canopy and redirect the plant’s energy into lateral growth.
This technique is essential for herbs like basil, mint, and oregano. When you harvest, never just pluck individual leaves. Instead, follow the stem down to a pair of leaves and make your cut just above them. This not only gives you a nice stem for the kitchen but also guarantees your plant will grow back twice as strong. For herbs like rosemary and thyme, regular trimming of the tips will have a similar effect, encouraging a denser, more compact shape and preventing them from becoming woody too quickly. Proper harvesting is not just taking from the plant; it’s a conversation that encourages it to give more.
Action Plan: How to Harvest Basil for Double Growth
- Wait until plants are 4-6 weeks old and have several sets of leaves before the first harvest.
- Locate a main stem and follow it down to a point just above a pair of side leaves (a leaf node).
- Pinch or cut the stem cleanly about 1/4 inch above the leaf node, never in the middle of a stem section.
- Always harvest from the top third of the plant to encourage bushy growth, not from the lower sides.
- Remove any flower buds as soon as they appear to keep the plant’s energy focused on leaf production and maintain flavour.
Why South-Facing Brick Walls Boost Temperature by 5°C at Night?
The principle of the “thermal mass battery” doesn’t just apply to the walls of the herb spiral itself, but also to its placement within your garden. A south-facing brick or stone wall is one of the most valuable assets in a temperate-climate garden. Just like the spiral’s own walls, a large, dense wall absorbs a tremendous amount of solar energy during the day and radiates it back out during the cool of the evening and night.
Placing your herb spiral near such a wall supercharges its microclimate. The radiant heat from the wall can raise the nighttime temperature in the immediate vicinity by as much as 5°C (9°F), creating a uniquely warm and protected “heat island.” This effect is governed by thermal lag—the time it takes for heat to travel through a material. According to materials science research, a standard 230mm (9-inch) brick wall has a thermal lag of about 5 to 6 hours. This means the peak heat from midday will start radiating out from the wall in the early evening, precisely when temperatures begin to fall.
This borrowed heat is a significant advantage. It can extend your growing season in both spring and autumn, protect tender plants from late frosts, and allow you to grow herbs that might otherwise be marginal for your climate zone. The combination of a south-facing wall and a well-built herb spiral creates one of the most stable and favourable microclimates you can engineer in a small suburban garden. It’s a perfect example of the permaculture principle of observing and using existing energy flows—in this case, stored solar energy.
Zone 1:How to Boost Photosynthesis in Shady North-Facing Gardens?
What if your entire garden faces north or is heavily shaded by buildings or trees? While challenging, it doesn’t mean an herb spiral is impossible. In fact, the spiral’s design offers clever solutions to maximize what little light is available. The primary strategy is to use the spiral’s verticality. A standard flat garden bed in a shady spot gets very little direct light. By building upwards, the top of the spiral is physically elevated, lifting plants out of the deepest shadows and into a zone where they can catch more angled sunlight, especially in the early morning or late afternoon.
The second technique is to amplify the available light by creating reflective surfaces. Painting a nearby wall or fence a brilliant, matte white can dramatically increase the amount of ambient light bouncing back onto your spiral. This diffused light is less intense than direct sun but is perfectly adequate for many plants to photosynthesise. This turns a light-absorbing dark fence into a light-bouncing reflector, effectively brightening the entire area. This is a classic Zone 1 permaculture design trick: identifying a limiting factor (lack of light) and turning an adjacent element (the wall) into part of the solution.
Finally, you must adjust your plant selection. A shady herb spiral won’t be ideal for sun-lovers like rosemary, but it can be an incredible producer of shade-tolerant herbs. The cool, moist conditions at the base will be perfect for lush growth of mint, parsley, chervil, sorrel, and lemon balm. Even the upper, drier sections can support hardier herbs like chives and certain varieties of oregano that can handle partial shade. By combining vertical elevation, light reflection, and smart plant choices, you can create a productive and thriving herb spiral even in a less-than-ideal location.
Key Takeaways
- An herb spiral engineers multiple microclimates using sun exposure, elevation, and a soil moisture gradient.
- Dense materials like stone or brick act as a thermal battery, storing daytime heat and releasing it at night to protect roots.
- The spiral shape maximizes the “edge effect,” a core permaculture principle that boosts biodiversity and productivity in a small area.
Applying Permaculture Principles to a Standard Suburban Garden?
The herb spiral is more than a clever gardening project; it’s the perfect microcosm of core permaculture principles applied to a standard garden. It demonstrates how, by observing and working with natural energy flows, you can create a system that is productive, self-regulating, and resilient. One of the most important principles it embodies is “Use Edges and Value the Marginal.” In nature, the most diverse and productive areas are the “ecotones”—the edges where two ecosystems meet, like the boundary between a forest and a meadow.
The spiral shape is a masterclass in maximizing this “edge effect.” A square garden bed measuring 1.5m x 1.5m has a perimeter (edge) of 6 metres. An herb spiral built on the same 2.25 square metre footprint can have a planting edge of 10 metres or more. This dramatic increase in functional edge space is a key reason for its high productivity. In fact, foundational ecology research found that biodiversity and biomass can be 2 to 5 times greater at these ecological edges.
Use edges and value the marginal. The interface between things is where the most interesting events take place.
– David Holmgren, Permaculture: Principles and Pathways Beyond Sustainability
Furthermore, the spiral is a model of “stacking functions.” The structure isn’t just a container for soil (one function). It simultaneously serves as a solar collector, a thermal battery, a water distribution system, and a habitat that creates multiple niches for different species. By building this one simple feature, you are layering at least five ecological functions into a single small space. This is the essence of smart, efficient design. It transforms a patch of lawn into a tiny, powerful, and productive ecosystem.
Start designing your own ecological engine today and transform a small patch of your garden into a productive, aromatic, and self-regulating culinary paradise.