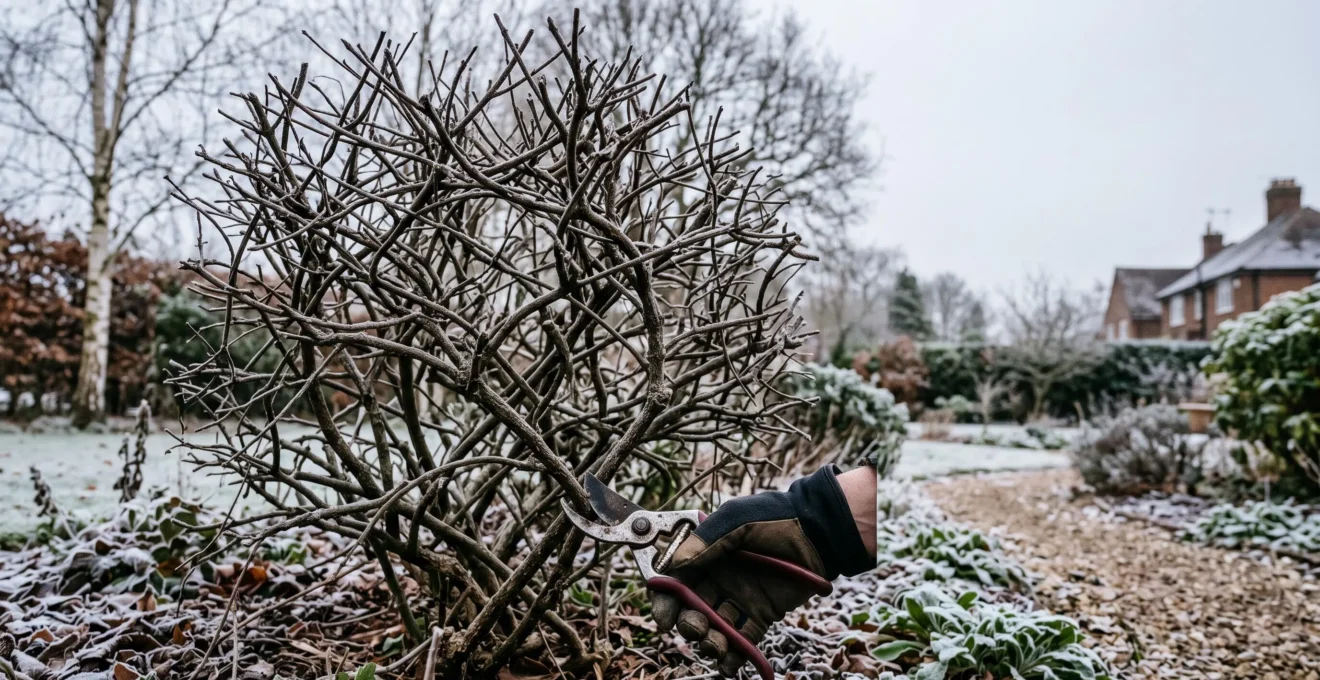
In summary:
- Restoring a neglected shrub is a multi-year process; patience is key. Start by removing up to one-third of the oldest, thickest stems from the base.
- Always work with clean, sterilized tools to prevent the spread of devastating diseases between plants.
- Before you cut, perform the “scratch test” to confirm if a branch is truly dead (brown and dry) or just dormant (green and moist).
- Avoid using pruning sealants on large cuts. A clean cut exposed to air allows the shrub to activate its own natural, more effective healing process.
Inheriting a garden can feel like receiving a wonderful gift, until you’re confronted with a looming, tangled mass of woody shrubs that have been neglected for years. The task of taming this overgrown jungle can be intimidating. Common advice often sounds drastic and terrifying: “Just cut it all back!” This can leave a new homeowner frozen, fearing that one wrong cut will kill the plant for good. This fear leads to inaction, and the shrub only grows more wild and unhealthy.
But what if the key wasn’t just about cutting, but about healing? The truth is that corrective pruning is less like a brutal haircut and more like restorative surgery. The secret lies in moving beyond simple rules and instead learning to read the plant. It’s about making a diagnosis, understanding the shrub’s biological responses, and executing strategic cuts that encourage it to heal itself and grow back stronger. This is a conversation with the plant, not a battle against it.
This guide will walk you through the mindset and techniques of a restorative pruning specialist. We will move step-by-step through the diagnostic process, from assessing the shrub’s overall health to understanding its specific needs. You will learn how to make confident decisions, promote vigorous new life, and ultimately transform that daunting tangle into a beautiful, healthy, and structurally sound feature of your garden.
To navigate this restorative journey, this article breaks down the process into key diagnostic and technical stages. The following summary outlines the essential steps and concepts we will cover to empower you to prune with confidence and precision.
Summary: How to Fix a Neglected Shrub
- The 1/3 Rule: Renewing Old Shrubs Without Killing Them?
- Winter or Summer: When to Prune ‘Bleeders’ Like Acers and Birches?
- The Dirty Tool Mistake That Spreads Canker Between Trees
- Dead or Dormant: The ‘Scratch Test’ Method to Save Healthy Branches
- Sealant or Air: How to Treat Large Pruning Wounds Correctly?
- How to Coppice Shrubs to Force Vibrant New Growth?
- Festooning: Bending Branches to Increase Fruit Buds in Small Spaces?
- Structural Deciduous Shrub Varieties for Winter Interest in Urban Gardens
The 1/3 Rule: Renewing Old Shrubs Without Killing Them?
The most common scenario with a neglected shrub is a dense thicket of old, woody, unproductive stems and a few wispy new shoots. The goal is to reverse this, encouraging a base of strong new growth without sending the plant into shock. This is where the cornerstone of restorative pruning comes in: the renewal pruning method, often called the “one-third rule.” Instead of cutting the entire shrub to the ground, you implement a strategic, three-year plan to gradually replace all the old wood.
In the first year, you identify and remove up to one-third of the oldest, thickest, and most tired-looking stems, cutting them right down to the ground. This opens up the plant’s center to light and air, signaling the roots to send up vigorous new canes. You repeat this process in years two and three, targeting the next oldest set of stems each time. By the end of the third season, you are left with a completely renewed shrub, composed entirely of growth that is three years old or less. This method is ideal for multi-stemmed shrubs like Forsythia, Mock Orange, and Red Osier Dogwood.
It’s important to distinguish this gradual approach from a “complete rejuvenation,” which is a much more drastic, one-time action. As this comparative analysis from a recent guide on renewal pruning shows, the right method depends on the shrub’s condition.
| Method | Frequency | Technique | Best For |
|---|---|---|---|
| Renewal Pruning (1/3 Rule) | Every 3-4 years, ongoing | Cutting out up to about a third of the oldest, fattest stems down to a bud near the soil line | Shrubs that still flower/fruit well and just need refreshing |
| Complete Rejuvenation Pruning | One-time drastic action | Cutting all stems down to a bud closest to the soil line | Severely neglected, overgrown shrubs needing a full reset |
Winter or Summer: When to Prune ‘Bleeders’ Like Acers and Birches?
The standard advice to “prune in late winter or early spring when the plant is dormant” is generally sound. During dormancy, the plant’s energy is stored in its roots, and a pruning cut won’t remove precious resources needed for the spring growth spurt. However, there’s a critical exception to this rule for a group of trees and shrubs known as “bleeders.” Species like maples (Acer), birches (Betula), walnuts (Juglans), and grapevines (Vitis) are like pressurized pipes in late winter. Their sap begins to rise early and with great force, and a pruning cut made at this time will result in a messy, continuous ooze of sap.
While this “bleeding” is not typically fatal, it is stressful for the plant, wastes valuable energy, and can attract pests to the sugary liquid. The solution is simple: timing. For these specific plants, the best time to prune is in mid-to-late summer, after the leaves have fully developed and “hardened off.” At this point, the intense upward pressure of sap has subsided, and any cuts you make will remain clean and dry, allowing the plant to begin the healing process immediately.
Knowing which plants are prone to bleeding is a key diagnostic skill for any gardener. The risk varies by species, and consulting a quick reference can prevent a stressful situation for both you and your plant. A guide from university extension services often categorizes them by risk level.
| Risk Level | Example Species | Recommended Pruning Window |
|---|---|---|
| Severe Bleeders | Maple, Walnut, Grapevine | Mid-to-late summer, after leaves harden |
| Moderate Bleeders | Birch, Elm, Hornbeam | Mid-to-late summer or deep dormancy |
| Minor Bleeders | Beech, Yellowwood | Late winter generally acceptable |
The Dirty Tool Mistake That Spreads Canker Between Trees
Thinking like a restorative surgeon means adopting one of surgery’s most critical principles: hygiene. Pruning tools—shears, loppers, and saws—are the number one vector for spreading devastating plant diseases like canker, fire blight, and fusarium wilt. A single cut into a diseased branch can coat your blade with microscopic fungal spores or bacteria. When you move to the next plant and make a fresh cut, you are effectively inoculating it with the pathogen. The risk is not theoretical; research on contaminated pruning tools found that pathogens were transferred to healthy plants 70% of the time.
Plant pathologist Monica Elliott of UF/IFAS investigated an outbreak of lethal fungal disease in Canary Island date palms and found the culprit. As she explained, “the pathogen is transmitted primarily from palm to palm by infested pruning tools — someone trims infected leaves, infested sawdust remains on the tool, and when they trim leaves from the next plant, they inoculate it with the pathogen.” This principle of cross-contamination applies across the plant kingdom. The only defense is a strict sterilization protocol.
This doesn’t have to be complicated. Keeping a small spray bottle of disinfectant or alcohol-soaked rags in your garden bucket is all it takes. The crucial part is building the habit of cleaning your tools between each plant, and immediately after cutting out any wood that looks remotely suspicious or diseased.
Action Plan: Pruning Tool Sterilization Audit
- Tool Assessment: Before you start, inspect your pruners, loppers, and saw. Are they sharp and free of rust and old plant debris? A clean, sharp cut heals faster.
- Disinfectant Prep: Prepare your chosen disinfectant. A solution of 70% isopropyl alcohol is highly effective and readily available. Soak a clean cloth or cotton balls with it.
- Pre-Pruning Sterilization: Thoroughly wipe down the blades and all cutting surfaces of your tools before making the first cut on any plant.
- In-Process Hygiene: After finishing work on one shrub and before moving to the next, re-sterilize your tools. If you cut a branch that you suspect is diseased, sterilize the tool immediately before making another cut.
- Post-Pruning Cleanup: After all work is complete, clean off any sap and debris, then give your tools a final sterilization wipe-down before storing them in a dry place. This prevents rust and ensures they are ready for next time.
Dead or Dormant: The ‘Scratch Test’ Method to Save Healthy Branches
One of the biggest fears for a novice pruner is accidentally cutting off a healthy branch that was simply dormant. A bare branch in winter can look deceptively dead. How do you tell the difference? Before you make a potentially regrettable cut, you must perform a quick diagnostic check—a way to take the plant’s vital signs. The most reliable method is the “scratch test.”
Using your thumbnail or the tip of a clean pocketknife, gently scratch a very small section of the bark on a questionable branch. You are trying to reveal the thin, green layer just underneath the outer bark, known as the cambium. This layer is the living, growing part of the branch. The color you find is your answer:
- Bright Green: The tissue is alive and healthy. The branch is dormant, not dead. Do not remove it unless you are doing so for structural reasons.
- Pale Green or Yellow: The branch is stressed but still alive. It may recover with improved conditions.
- Brown and Dry: The tissue is dead. The branch will not produce new growth and can be safely removed.
You can combine this with a “bend test.” A living, dormant branch will be flexible and bend, while a dead branch will be brittle and snap. This simple diagnostic toolkit, using information from a source like a nursery’s guide, removes the guesswork and allows you to prune with precision and confidence, preserving every viable part of the plant.
| Cambium Color | Meaning |
|---|---|
| Bright Green | Vigorous and healthy tissue |
| Pale Green/Yellow | Stressed but alive |
| Brown, Dry, Brittle | Completely dead tissue |
Sealant or Air: How to Treat Large Pruning Wounds Correctly?
After removing a large, old branch, you are left with a significant wound on the main trunk. For decades, the common wisdom was to “protect” this wound by covering it with a thick layer of pruning paint or sealant. The logic seemed sound: seal the opening to keep out insects and disease. However, modern arboriculture has completely reversed this advice. We now know that trees have their own highly effective, built-in wound response system.
This process is called Compartmentalization of Decay in Trees (CODIT). When a tree is wounded, it doesn’t “heal” in the same way an animal does by replacing damaged tissue. Instead, it “seals.” The tree chemically and physically creates a barrier wall around the wounded area, isolating it from the healthy wood. This four-part wall system effectively compartmentalizes the potential decay, preventing it from spreading into the rest of the tree. Applying a sealant over the top of this process is counterproductive.
As expert arborists now confirm, these paints do more harm than good. They trap moisture against the wood surface, creating a perfect, dark, damp environment for fungal spores to thrive. They also prevent the wound from drying and can crack over time, trapping even more moisture and debris.
Arborists no longer recommend wound sealants or pruning paint — they can actually trap moisture against the cut and promote decay rather than prevent it.
– TNT Tree Care (arborist advisory), Why Spring Is the Worst Time to Prune Maple Trees on the South Shore
How to Coppice Shrubs to Force Vibrant New Growth?
Sometimes, a shrub is so overgrown, dense with dead material, or leggy that the gradual, three-year renewal plan seems insufficient. For certain fast-growing, multi-stemmed shrubs, there is a more drastic but highly effective reset button: coppicing. This is the most extreme form of rejuvenation pruning, where you cut all stems and canes down to just a few inches above the ground.
While it looks shocking, for the right plant, this is a powerful signal to the root system to invest all its energy into sending up a flush of fresh, vibrant, and healthy new shoots. The result is a completely new shrub, starting over from scratch. This technique is typically performed in late winter or early spring, just before the new growing season begins. Within weeks, new shoots will emerge from the plant’s base (its “stool”), and by the end of the season, you will often have a respectable, albeit smaller, shrub.
This method is only suitable for shrubs that have a strong root system and the ability to regenerate from their base. Good candidates include many native species that are adapted to this kind of renewal by fire or animal browsing. Common shrubs that respond well to coppicing include:
- Red Osier Dogwood (Cornus sericea)
- Ninebark (Physocarpus opulifolius)
- Elderberry (Sambucus canadensis)
- Forsythia
- Mock Orange (Philadelphus)
- Silky Willow (Salix sericea)
Festooning: Bending Branches to Increase Fruit Buds in Small Spaces?
While most corrective pruning focuses on removal, some advanced techniques involve repositioning branches to change a plant’s growth habits. One such technique, particularly useful for fruit trees like apples and pears, is festooning. This is the practice of gently bending young, flexible branches downwards and tying them in place so they are horizontal or even arching below horizontal.
The science behind this is fascinating. In plants, a phenomenon called “apical dominance” means that growth hormones (auxins) produced at the tip of an upright branch flow downwards, suppressing the development of side buds. By bending a branch downwards, you disrupt this hormonal flow. The auxins no longer concentrate at the tip, which slows down vegetative (leafy) growth and instead signals the buds along the length of the branch to switch from producing leaves to producing fruit buds. The tree essentially thinks it is under stress and shifts its energy into reproduction.
For the home gardener, especially in urban spaces, festooning is a brilliant way to encourage a young fruit tree to become productive earlier and to control its size. Instead of growing tall and leafy, the tree’s energy is channeled into creating a compact, fruitful structure. This is typically done in early summer on the current season’s new, pliable shoots, using soft string and weights or by tying the branch tips to the lower trunk.
Key Takeaways
- The 1/3 renewal rule is a patient, multi-year strategy that replaces old, tired wood with vigorous new growth without shocking the plant.
- Tool hygiene is non-negotiable. Sterilizing blades with alcohol between plants is the single best way to prevent the spread of devastating diseases.
- Trust the tree’s natural ability to heal large wounds. A clean cut exposed to air is far superior to using outdated pruning sealants that trap moisture and promote decay.
Structural Deciduous Shrub Varieties for Winter Interest in Urban Gardens
The ultimate goal of restorative pruning goes beyond simple plant health; it’s about revealing a plant’s inherent beauty and architectural form. In the growing season, this structure can be hidden by a mass of foliage. But in winter, after the leaves have fallen, the true “bones” of the garden are exposed. A well-pruned deciduous shrub ceases to be a dormant blob and becomes a piece of living sculpture, providing visual interest against a stark winter landscape.
Your pruning choices directly shape this winter silhouette. By selectively thinning crowded stems, removing crossing branches, and encouraging an open, elegant framework, you are not just managing the plant for next year’s flowers—you are curating its off-season appeal. This is especially important in small urban gardens, where every plant must work hard to earn its space throughout the year.
Certain shrubs are prized specifically for their winter structure or color. Pruning them correctly enhances these features. For example, coppicing a Red Twig Dogwood (Cornus sericea) encourages the growth of the most brightly colored new stems. Thinning an old Harry Lauder’s Walking Stick (Corylus avellana ‘Contorta’) reveals its fantastically twisted and spiraling branches. The act of pruning becomes an art form, revealing the hidden beauty within the plant.
Your journey as a restorative gardener starts with a single, confident cut. Begin with one shrub, apply these diagnostic principles, and watch as you bring it back to life. You have the knowledge to turn a neglected space into a source of beauty and pride.