The greatest value of upcycled art isn’t saving the planet or making cute crafts; it’s teaching children to become resourceful engineers by transforming constraints into creative fuel.
- Working with “trash” forces divergent thinking and problem-solving in ways that new, uniform materials cannot.
- By learning to manage a “material library” and distinguishing upcycling from recycling, kids grasp complex systems and the true value of resources.
Recommendation: Reframe “craft time” as a “design challenge.” Provide a curated box of clean recyclables and a problem to solve (e.g., “build a bridge that holds a toy car”) instead of a step-by-step tutorial.
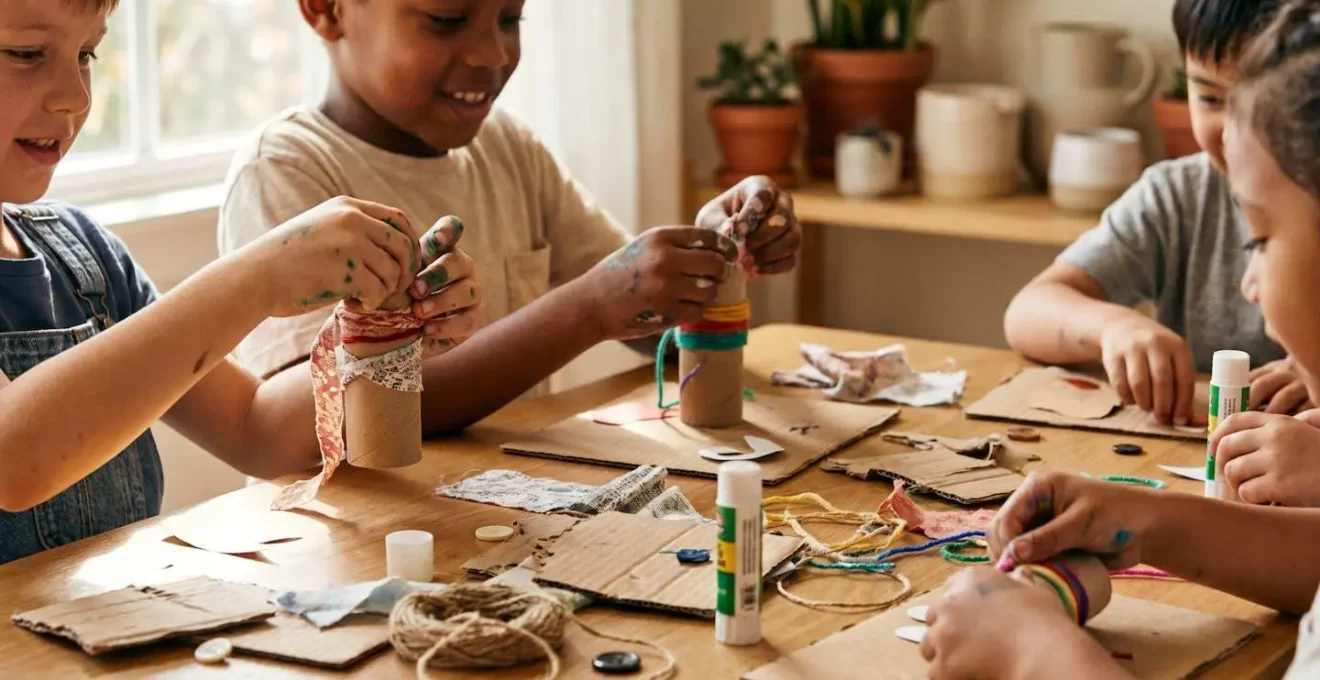
As a parent, you’re likely familiar with the siren call of a cardboard box or a collection of bottle caps. The promise of a free, creative afternoon activity is hard to resist. The common wisdom is that turning this “trash” into treasure is a great way to teach kids about recycling and keep them occupied without a trip to the store. We gather toilet paper rolls and yogurt cups, assuming the primary benefits are frugality and a vague lesson in environmentalism. We focus on the cute, finished product—the robot, the castle, the colorful collage.
But what if the real magic has nothing to do with the final creation? What if the most valuable lessons are hidden not in the outcome, but in the process itself? This approach often overlooks the profound cognitive skills being developed. The inherent limitations of these materials—their odd shapes, their stubborn refusal to do what’s expected—aren’t a drawback. They are the curriculum. This is where upcycling transcends simple crafting and becomes a powerful training ground for the next generation of engineers, designers, and innovators.
This guide moves beyond the “what” of making cute objects and dives into the “why” and “how.” We’ll explore how reusing materials teaches superior design skills, how to safely source and store your creative arsenal without turning your home into a landfill, and how to use these projects to teach the critical distinction between upcycling and recycling. We will show you how to shift from prescriptive crafts to open-ended engineering challenges, fostering a true maker mindset that values resourcefulness and innovation above all.
Summary: Beyond the Recycling Bin: How Upcycled Art Projects Build a Maker’s Mindset
- Why Does Reusing Trash Teach Better Design Skills Than New Materials?
- How to Source Clean “Trash” for Art Projects Safely?
- The Hoarding Risk: How to Save Materials Without Cluttering the House?
- Upcycling or Recycling: Teaching Kids the Distinction Through Art
- How to Build a Bridge from Cardboard Tubes: An Engineering Challenge
- Process Art or Crafts: Which Builds Better Problem Solving Skills?
- Maker Mindset or Follow Instructions: Which Builds Innovation?
- Building a Home Maker-Space: Fostering Engineering Skills at Home?
Why Does Reusing Trash Teach Better Design Skills Than New Materials?
A fresh pack of construction paper is a blank slate, but it’s also a predictable one. Every sheet is the same size, texture, and thickness. It offers possibility, but it doesn’t demand ingenuity. Now, consider a yogurt cup, a cardboard tube, and a plastic bottle. These items come with built-in challenges and unique properties. They have curves, ridges, and limitations. They don’t cooperate easily. This is precisely why they are superior tools for teaching design thinking.
Working with upcycled materials forces a child to engage in divergent thinking—the ability to see multiple solutions to a single problem or multiple uses for a single object. A cardboard tube isn’t just a tube; it’s a pillar for a castle, a telescope, a wheel axle, or a segment of a marble run. This mental flexibility is the bedrock of creativity and problem-solving. It’s a different kind of intelligence, as research shows divergent thinking correlates modestly with traditional IQ measures, indicating it’s a distinct skill that can be nurtured.
Unlike a kit with pre-cut pieces, reclaimed items demand a phase of material tinkering. A child must ask: What can this do? How does it bend? Can I cut it? How does it connect to other objects? This hands-on investigation builds an intuitive understanding of physics, engineering, and material science. The “design friction” provided by the imperfect nature of trash forces a child to adapt, iterate, and innovate—skills far more valuable than simply following a set of instructions.
How to Source Clean “Trash” for Art Projects Safely?
The vision of a workshop filled with creative potential can quickly be overshadowed by a parent’s primary concern: safety. The idea of letting kids play with “trash” understandably raises questions about germs, sharp edges, and hazardous materials. A successful home maker-space begins with establishing a safe and simple system for sourcing and preparing your upcycled inventory.
The first rule is to be selective. Not all trash is treasure. Your goal is to collect materials, not garbage. Focus on items that are easy to clean and pose minimal risk. Common items like paper rolls, egg cartons, plastic bottles, cardboard boxes, milk jugs, and cereal boxes are excellent starting points. These materials are generally safe for children to use in crafts when properly cleaned and checked for potential hazards before use. Immediately discard anything that held raw meat, harsh chemicals, or seems impossible to clean thoroughly.
Before any material enters your craft collection, it must be processed. This is a non-negotiable step. A simple but consistent safety protocol ensures that creativity never comes at the expense of well-being. Here are the essential guidelines to follow:
- Adult Supervision: Always supervise children when they are using scissors, hot glue, or handling metal cans with potential sharp edges.
- Cleanliness: Ensure all recyclables are thoroughly washed with soap and water and are completely dry before being stored or used. This prevents mold and gets rid of any sticky residue.
- Smooth Edges: If you use tin cans, the adult’s job is to make them safe. Use a file, a can opener that cuts the side, or heavy-duty tape to cover any sharp inner rims.
- Non-Toxic Materials: When it’s time to decorate, always use child-safe, non-toxic glues and paints to finish your upcycled masterpieces.
The Hoarding Risk: How to Save Materials Without Cluttering the House?
There’s a fine line between a well-curated library of creative materials and a chaotic pile of trash that takes over the living room. The fear of “hoarding” is a legitimate concern for any parent embarking on the upcycling journey. The secret to avoiding clutter is to treat your material stash with the same intention and organization you would a library, not a landfill. The goal is to create an inspiring, accessible system, not just a holding pen for recyclables.
The first step is to define its physical boundaries. Designate a specific shelf, a set of clear bins, or a rolling cart as the *only* home for upcycling materials. When the space is full, it’s full. This finite limit forces you and your children to be selective about what you keep. This isn’t just a storage strategy; it’s the first lesson in resource management. Immediately processing items is key: flatten boxes, wash and dry plastic containers, and sort small parts into labeled jars or bags. This “inbox processing” prevents a pile-up and makes materials ready for immediate use.
An organized system not only prevents clutter but also fuels creativity. When a child can easily see and access sorted materials, they are more likely to be inspired to use them. A transparent bin full of blue bottle caps is an invitation to create a mosaic; a jumble of mixed trash is just overwhelming.
As you can see, a well-organized system transforms potential clutter into an intentional and beautiful resource. To maintain this balance, establish a few practical rules. Check all recycled items for safety and cleanliness before they’re even considered for the craft bin. Anything with sharp edges, cracks, or is simply too grimy should stay in the recycling bin. By creating a curated collection, you teach a valuable lesson: resourcefulness is about seeing the potential in select items, not about saving everything.
Upcycling or Recycling: Teaching Kids the Distinction Through Art
In the mind of a child, putting a plastic bottle in the blue bin and using a plastic bottle to build a rocket might seem like the same “good deed.” Both actions keep it out of the trash. However, there’s a world of difference between recycling and upcycling, and art projects provide the perfect hands-on opportunity to teach this crucial distinction. Understanding this difference elevates a simple craft activity into a profound lesson on material lifecycles, energy consumption, and value creation.
Recycling is a large-scale industrial process that breaks materials down to their raw form to create something new, often of lesser quality (a concept known as downcycling). It’s energy-intensive. Upcycling, on the other hand, is a creative act that adds value to an object without breaking it down, extending its life in its current form. Critically, the environmental impact of upcycling is often lower than standard recycling because it bypasses the industrial process. When your child turns a glass jar into a lantern, they are preserving the material’s integrity and value, not just sending it off to be melted down.
This table helps clarify the key differences, making it an excellent teaching tool to review with your child before starting a project. As explained by a recent comparative analysis, the distinction lies in the process and the outcome.
| Aspect | Recycling | Upcycling |
|---|---|---|
| Process | Breaks down waste materials into base components or raw materials to make new products | Creatively repurposes or transforms waste materials into new items without breaking them down |
| Quality Outcome | Often leads to downcycling – materials of lower quality than original | Enhances quality or value, resulting in products of higher value or uniqueness |
| Environmental Impact | Requires significant energy and industrial processing | Lower impact, extends lifecycle without extensive processing |
| Creative Element | Focuses on functionality and large-scale industrial process | Encourages creativity, innovation, and personal artistic value |
| Scale | Large-scale industry supporting waste management sectors | Often smaller-scale, individual initiatives stimulating local economies |
How to Build a Bridge from Cardboard Tubes: An Engineering Challenge
Here is where the maker mindset truly comes to life. Instead of saying, “Let’s make something with these tubes,” reframe the activity as an engineer would: “We have a supply of these structural beams. Our challenge is to build a bridge that can span the space between these two books and support the weight of this toy car.” You’ve just transformed a craft project into an engineering problem with clear constraints and a measurable goal.
The beauty of cardboard tubes is their surprising strength and versatility. This simple material can be used to teach fundamental engineering principles like tension, compression, and the power of geometric shapes. The key is to approach the project not as a single task, but as a progressive challenge with stages of increasing complexity. This allows kids of all ages to participate and learn at their own pace.
Start with the basics and progressively add layers of complexity. This iterative process of building, testing, and improving is the core of the engineering design cycle.
The real learning happens during the test phase. When the bridge collapses, it’s not a failure; it’s data. Ask questions: Where did it break first? Why do you think that part was the weakest? How could we make it stronger? This hands-on analysis teaches resilience and analytical thinking. You can follow a structured approach to guide the learning:
- Level 1: Build a simple beam bridge using cardboard tubes laid flat between two supports. Test its strength.
- Level 2: Reinforce the structure. Introduce the concept of triangles—the strongest shape in construction—by adding triangular supports.
- Level 3: Construct a complex truss bridge, explaining how some parts are being pulled (tension) and others are being pushed (compression).
- Test Phase: Create a protocol for stress-testing the bridge to failure (e.g., “How many toy cars can it hold?”). Analyze weaknesses, then iterate on the design to improve it.
Process Art or Crafts: Which Builds Better Problem Solving Skills?
The world of children’s art is often split into two camps: crafts and process art. A craft is typically product-oriented, with step-by-step instructions designed to lead every child to a nearly identical result—think of the classic cotton-ball sheep. Process art, on the other hand, focuses on the experience of creation itself. There are no instructions, no expected outcome, only materials and the freedom to explore them. Upcycled art, when done right, is the ultimate form of process art.
While crafts can be fun and help develop fine motor skills, their rigid structure leaves little room for genuine problem-solving. The “problem” has already been solved by the person who wrote the instructions. Process art, however, is all about problem-solving. As the Cool.org Education Team notes, the essence of this creative act is about discovery:
Upcycling involves taking recycled or usually discarded items and recontextualising them into a work of art
– Cool.org Education Team, Creative Sustainability – Upcycling Art Lesson Plan
This act of “recontextualising” is where the cognitive heavy lifting occurs. When a child is presented with a box of assorted materials and no end goal, they must invent the problem and the solution. They learn to measure, observe, and experiment, developing critical problem-solving skills as they figure out how separate materials can be transformed into something entirely new. This encourages divergent thinking, forcing them to see the myriad possibilities within a single object rather than the single path laid out by a craft kit.
The next time you’re about to start a project, ask yourself: am I providing a map or a compass? A craft is a map to a known destination. Process art is a compass that allows your child to explore uncharted territory and find their own way. The latter is far more effective at building the resilient, adaptable problem-solvers the future will require.
Maker Mindset or Follow Instructions: Which Builds Innovation?
Innovation is rarely born from following a script. It sparks from a place of curiosity, experimentation, and the ability to see new potential in existing resources. This is the core of the maker mindset, and it stands in direct contrast to a culture of simply following instructions. While the ability to follow directions is a useful skill, it doesn’t build innovators. For that, you need to cultivate a mindset that embraces constraints and sees challenges as opportunities.
This is where upcycling projects become so powerful. A new Lego kit, with its perfect pieces and detailed guidebook, teaches a child to execute a plan. A pile of cardboard, plastic bottles, and tape teaches a child to *create* a plan. The inherent limitations of the materials become a creative catalyst. This isn’t just a quaint idea; it’s a proven educational strategy. As research shows that educators can implement constraint-based strategies to develop student creativity. The “constraint” of using only what’s in the recycling bin forces a level of ingenuity that a fully stocked craft closet cannot.
By incorporating upcycling into their play, students are inspired to think creatively about sustainability while making the most of their materials. These projects reduce waste and offer fun, innovative ways to teach valuable skills like problem-solving and resourcefulness. It’s about helping the environment, one masterpiece at a time, but more importantly, it’s about building a generation of thinkers who don’t wait for the perfect tools or instructions. They see a problem, they survey their available resources—no matter how humble—and they start building a solution. That is the essence of innovation.
Key Takeaways
- Upcycled art is less about the finished product and more about the process of developing engineering and design skills.
- Material constraints are not a drawback; they are a feature that fuels creativity and forces innovative problem-solving.
- Establishing clear systems for sourcing, cleaning, and storing materials is essential for safety and preventing household clutter.
Building a Home Maker-Space: Fostering Engineering Skills at Home?
You don’t need a dedicated workshop or expensive equipment to foster engineering skills at home. A “maker-space” is not about the space; it’s about the mindset. By thoughtfully organizing your upcycled materials and a few basic tools, you can create a powerful hub for innovation in any corner of your home. The key is to make it accessible, safe, and inspiring.
For families in apartments or smaller living spaces, portability is crucial. Mobile solutions like a rolling cart or stackable bins can be easily moved and stored away. This “pop-up” maker-space approach makes creativity manageable and demonstrates that resourcefulness extends to the use of space itself. By repurposing materials into functional projects, families can save money, reduce waste, and, most importantly, foster a culture of innovation and sustainability right at home.
Safety, however, remains the top priority. A well-organized maker-space includes not just materials, but also the right safety gear. This teaches children that real building and real engineering come with real responsibilities. Treating safety seriously professionalizes the activity and builds respect for the tools and the process.
Your Action Plan: Essential Safety for a Home Maker-Space
- Eye Protection: Get properly fitting safety goggles for your child. Make it a non-negotiable rule: “goggles on before tools out” to protect eyes from debris or dust.
- Hand Protection: Find well-fitting gloves to protect small hands from splinters, paper cuts, or rough materials.
- Foot Protection: Enforce a “closed-toe shoes only” rule in the making area to protect feet from dropped tools or sharp objects.
- Workspace Stability: Ensure the work surface is stable and at a comfortable height. A wobbly table is a recipe for accidents.
- Proper Lighting: Make sure the workspace is well-lit. Good visibility is crucial for preventing mishaps and doing detailed work.