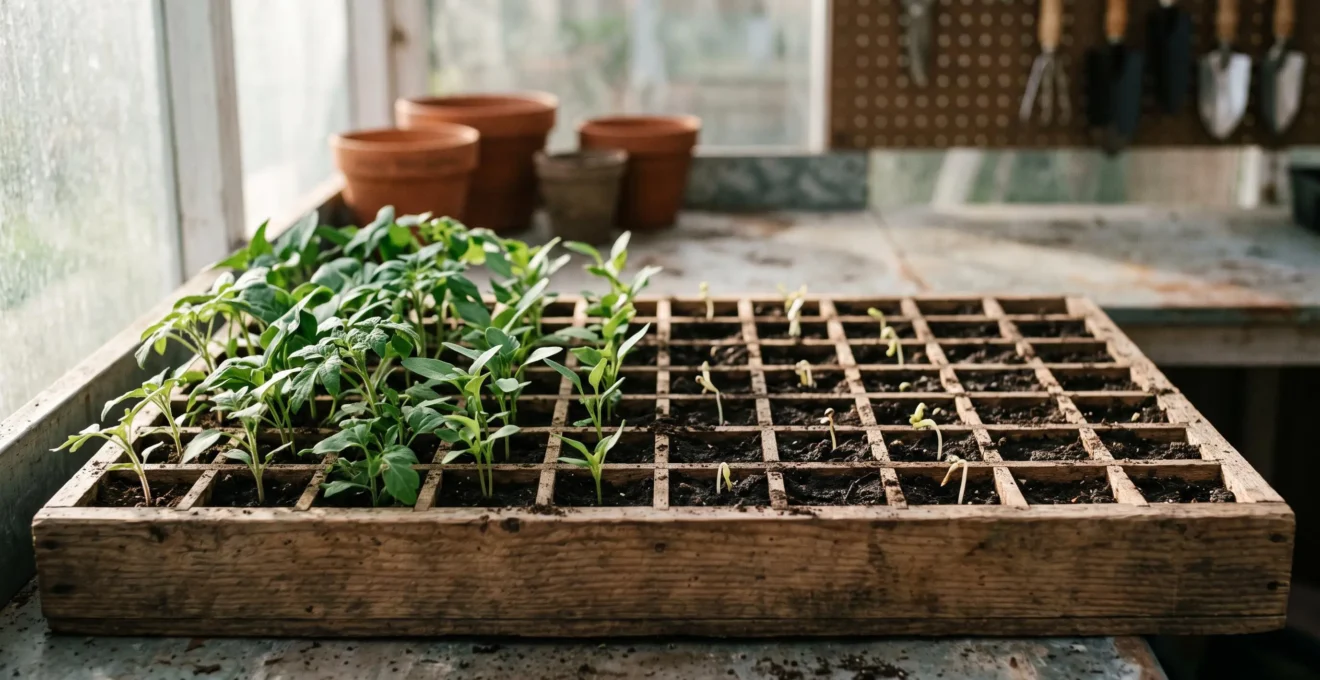
Contrary to popular belief, successful seed starting isn’t about ‘green thumbs’ or luck; it’s a science. Most failures stem from ignoring specific biological triggers related to temperature, light, and soil pathogens. This guide moves past generic tips to explain the ‘why’ behind these triggers, giving you the precise control to unlock the full genetic potential of every heirloom seed you sow.
For the dedicated gardener, there are few frustrations as acute as a tray of expensive, rare heirloom seeds that fails to sprout. You follow the common advice—use fresh seed, don’t overwater, provide some light—and yet, you’re met with bare soil. This experience leads many to believe they simply lack a ‘green thumb’, or that certain varieties are just ‘difficult’. As a specialist nursery owner, I can tell you this is rarely the case. The issue is not your skill, but the quality of the advice you’ve been given.
Most gardening tips are platitudes; they tell you *what* to do but fail to explain *why*. The truth is that seeds are complex biological organisms, each with a unique set of keys needed to unlock its dormancy. Success doesn’t come from generic rules but from understanding and manipulating these specific biological triggers. It’s about learning to think like a plant biologist, decoding the environmental signals that tell a seed it’s safe to grow. This is the secret to moving from a hopeful amateur to a proficient propagator who can confidently grow any variety they choose.
This guide will take you beyond the superficial advice. We will delve into the science of seed starting, exploring the critical roles of temperature cycles, soil health, light quantity, sowing depth, and genetic stability. By understanding these principles, you will gain the control and confidence to achieve germination rates you previously thought were only possible for professional nurseries.
The following sections break down the most common yet misunderstood aspects of seed propagation. This table of contents will guide you through the core scientific principles that separate failure from consistent, abundant success.
Contents: Unlocking the Science of Seed Germination
- Why Some Seeds Need a ‘Winter Chill’ in the Fridge Before Sowing?
- How to Sterilize Soil to Stop Damping Off Killing Seedlings?
- Windowsill vs Grow Light: Is Natural Light Enough for February Sowing?
- The Depth Rule: Why Surface Sowing is Vital for Tiny Seeds
- When to Prick Out: The ‘True Leaf’ Sign You Must Wait For
- Heirloom vs Hybrid: Why You Can Only Save Seeds from One?
- Why Standard Grow Lights Fail During British Winters?
- Why Robust Heirloom Vegetable Varieties Taste Better Than F1 Hybrids?
Why Some Seeds Need a ‘Winter Chill’ in the Fridge Before Sowing?
Many gardeners are frustrated when seeds of perennials like Echinacea or Astrantia fail to germinate, assuming the seeds were bad. The real issue is often a missed biological signal. These seeds are programmed to survive winter and germinate in spring. Sowing them in a warm propagator without a cold period is like asking them to sprout in the middle of August—it goes against their internal clock. This required period of cold, moist conditions is known as cold stratification or vernalization.
This process breaks down germination-inhibiting hormones within the seed. Without this ‘winter’, the seed remains dormant, no matter how ideal the other conditions are. You are essentially mimicking a natural winter in your refrigerator. The duration is critical; it’s not just about getting them cold, but keeping them cold for the right amount of time, which typically ranges from 4 to 12 weeks depending on the species. A recent study highlights this, finding that optimal cold stratification duration is the key factor in germination. A 2026 study on Rudbeckia fulgida demonstrated that with the correct duration, it’s possible to achieve 96-100% germination rates, a level of success impossible without this step.
The process is simple: mix seeds with a sterile, moist medium like vermiculite or sand, place them in a sealed plastic bag, and label it with the date and species. Then, place it in your refrigerator (not the freezer) for the prescribed period. This single, proactive step can be the difference between a tray of bare soil and a full stand of healthy seedlings. As a research team noted in the journal *Plants*, “Cold stratification duration is the dominant factor shaping germination responses,” underscoring that this is not an optional tweak but a fundamental requirement for many species.
How to Sterilize Soil to Stop Damping Off Killing Seedlings?
There is no greater heartbreak for a propagator than to watch a tray of perfectly germinated seedlings suddenly collapse and die. This phenomenon, known as damping off, is caused by a host of soil-borne fungi and fungus-like organisms (like Pythium and Rhizoctonia). These pathogens thrive in cool, damp conditions—exactly the environment of many seed-starting setups. They attack the seedling at the soil line, causing the stem to rot, topple over, and die, often overnight.
Many gardeners blame overwatering, and while excessive moisture is a contributing factor, the root cause is the presence of pathogens in your growing medium or on your equipment. Standard potting mixes or reused soil from the garden are often teeming with these organisms. The solution is not to water less, but to start with a completely clean environment. Sterilization is not an extreme measure; it is essential insurance.
You can purchase sterile seed-starting mix, or you can sterilize your own compost or soil. A common home method is to bake it. Moisten the soil, place it in an oven-safe container, cover it with foil, and heat it to 82-93°C (180-200°F) for 30 minutes. Be warned, this can create an unpleasant odour. A less smelly alternative is to pour boiling water through your compost in a container with drainage holes. But soil is only half the battle; your pots, trays, and tools must also be decontaminated. As experts at the Utah State University Extension warn, “The chance of having an outbreak of damping off is increased when seedlings are kept very wet,” but pathogens must be present in the first place for an outbreak to occur.
Your Damping-Off Prevention Checklist: Creating a Sterile Field
- Sanitation First: Ensure all work areas, tools, and pots are free of old soil and debris before you even open your seed packet.
- Tool Decontamination: Treat tools and workbenches for at least 30 seconds with a solution of 10% household bleach or 70% isopropyl alcohol.
- Pot Cleaning: Thoroughly wash used pots and trays with soap and water to remove all physical soil residue, which can harbour pathogens.
- Pot Sterilization: After washing, soak pots for a minimum of 20 minutes in a 10% bleach solution, then rinse them thoroughly with clean water to remove any bleach residue that could harm seedlings.
- Ventilation is Key: Once seedlings emerge, ensure good air circulation around them to help the soil surface dry out slightly between waterings, creating a less hospitable environment for fungi.
Windowsill vs Grow Light: Is Natural Light Enough for February Sowing?
A common piece of advice is to place seed trays on a “bright windowsill.” For sowings in late spring, this might suffice. But for a gardener in a high-latitude region like the UK starting seeds in February or March, this is a recipe for failure. The seedlings that emerge are often pale, weak, and stretched, a condition called etiolation. They are desperately reaching for a light source that is simply not intense or long-lasting enough.
The critical concept to understand is the Daily Light Integral (DLI), which is the total amount of photosynthetically active radiation a plant receives in a 24-hour period. It’s a measure of light quantity. Young vegetable and flower seedlings require a DLI of at least 10-12 mol·m⁻²·d⁻¹ to develop into strong, stocky transplants. However, research on transplant quality shows that on an early spring day, even a south-facing window might only receive 5 to 25 mol·m⁻²·d⁻¹ of ambient DLI. On an overcast day, this number plummets, falling far below the minimum threshold required for healthy growth.
This is where supplemental lighting is not a luxury, but a necessity. A quality full-spectrum LED grow light provides a consistent, high-intensity source of light that you control completely. By running a light for 14-16 hours a day, positioned just a few inches above the seedlings, you can easily provide the optimal DLI, regardless of the weather outside. This guarantees your plants will be compact, strong, and dark green, with well-developed root systems ready for transplanting.
As the image above illustrates, the difference is stark. The weak, leggy seedlings on the windowsill are at a significant disadvantage compared to the robust, compact plants under the grow light. The windowsill seedlings will struggle to support themselves and will be more susceptible to disease and damage when moved outdoors. Investing in a proper grow light is investing in the fundamental energy source your plants need to thrive from day one.
The Depth Rule: Why Surface Sowing is Vital for Tiny Seeds
The general rule of thumb for sowing seeds is to plant them at a depth of twice their diameter. This works well for larger seeds like peas or beans, which have enough stored energy to push a shoot up through a layer of soil. However, applying this rule to tiny, dust-like seeds—such as those of Begonia, Lobelia, or many alpines—is a fatal mistake. These seeds have minimal energy reserves and will exhaust themselves and die before they ever reach the surface if buried at all.
The reason for this goes beyond energy. Many of these small-seeded species are positively photoblastic, meaning they require exposure to light to initiate germination. Light acts as a signal that they are at or near the soil surface, where a tiny seedling has a chance of survival. Burying them, even under the thinnest layer of soil, effectively puts them in a dark room and tells them to remain dormant. Botanical research indicates that for some species, germination can be triggered by light levels as low as 0.1 to 100 lux—a signal that is completely blocked by even a light dusting of fine compost.
Case Study: The Light-Sensing Mechanism of Photoblastic Seeds
A molecular review of seed biology explains this phenomenon in detail. Tiny, photoblastic seeds contain a pigment called phytochrome, which acts as a light sensor. When exposed to red light (present in daylight), the phytochrome switches to an active form that triggers a cascade of hormones, initiating the germination process. When the seed is in darkness (i.e., buried), the phytochrome remains inactive, and germination is inhibited. This is a brilliant survival mechanism, ensuring the seed only attempts to grow when it’s in a position to immediately start photosynthesizing.
Therefore, the correct method for these seeds is surface sowing. Prepare your tray with moist, fine-textured compost, and gently firm the surface. Then, carefully sprinkle the seeds directly on top. Do not cover them with soil. To maintain humidity, you can cover the tray with a clear plastic dome or a sheet of glass until germination occurs. Once the seeds sprout, the cover can be removed to increase air circulation.
This macro view shows the correct placement. The seeds are in direct contact with the moist soil for water absorption but are fully exposed to the air and light, allowing their internal light-sensing mechanisms to function as nature intended.
When to Prick Out: The ‘True Leaf’ Sign You Must Wait For
Once your seeds have successfully germinated, the next critical stage is “pricking out,” or transplanting the tiny seedlings from their crowded seed tray into individual pots or modules. Timing this step correctly is vital for minimizing shock and ensuring continuous growth. Many enthusiastic gardeners act too soon, damaging fragile seedlings that are not yet ready for the move. The key is to learn to read the plant’s signals.
When a seed first germinates, it unfurls a pair of leaves called cotyledons. These are not true leaves; they are embryonic leaves that were already formed inside the seed. Their main function is to provide the initial burst of energy for the seedling through photosynthesis until the true leaves can develop. They often look very different from the plant’s mature foliage and are not an indicator of readiness. Pricking out a seedling at this stage is risky, as its root system is likely underdeveloped and the plant is at its most vulnerable.
The reliable sign to wait for is the appearance of the first set of true leaves. These are the leaves that emerge after the cotyledons and will resemble the shape and texture of the adult plant’s leaves. Once a seedling has a pair of true leaves, it signifies that the plant has established a basic root system and is actively photosynthesizing and growing. It now has the resilience to handle the stress of being transplanted. A good rule of thumb is to wait until the first set of true leaves are at least the same size as the cotyledons.
When you do prick out, technique is everything. Never handle the seedling by its delicate stem, which can be easily crushed. Instead, as shown in the image, gently hold it by one of its leaves (preferably a cotyledon, as it is less critical than a true leaf). Use a small tool like a dibber or a pencil to loosen the soil around the roots, and lift the entire seedling, root ball and all, with as little disturbance as possible. Immediately transplant it into its new pot and water gently to settle the soil around the roots.
Heirloom vs Hybrid: Why You Can Only Save Seeds from One?
For a gardener interested in self-sufficiency and preserving unique varieties, saving seeds is a rewarding practice. However, a common and costly mistake is attempting to save seed from a hybrid plant. The resulting offspring will be a disappointing, chaotic mix of traits, and will not resemble the parent plant you loved. To understand why, we need to look at the fundamental genetic difference between heirloom and F1 hybrid varieties.
Heirloom varieties are open-pollinated. This means they are pollinated by insects, wind, or other natural mechanisms. Over many generations of selection, they have become genetically stable. When you plant an heirloom tomato, and it is pollinated by another tomato of the same variety, the seeds it produces will grow into plants that are “true to type,” reliably displaying the same characteristics of size, flavour, and colour as the parent. This genetic stability is what allows you to save their seeds year after year.
F1 Hybrids, on the other hand, are the first-generation offspring of a deliberate cross between two different, distinct, and often inbred parent lines. This is done by plant breeders to achieve “hybrid vigour” (heterosis), combining desirable traits from both parents, such as high yields, disease resistance, or uniform ripening. The “F1” stands for Filial 1, meaning the first generation. These plants are often exceptional, but their genetic makeup is highly specific and unstable. If you save seeds from an F1 hybrid (which are now F2 seeds), the next generation will not exhibit hybrid vigour. Instead, the genes will segregate out according to Mendelian genetics, producing a wide and unpredictable array of plants. Some might resemble one grandparent, some the other, and many will be inferior to the original F1 plant.
In essence, saving seed from an heirloom is like photocopying a stable original document. Saving seed from an F1 hybrid is like trying to reconstruct a complex recipe when you only have the finished cake and no knowledge of the two separate, secret ingredient lists that were combined to make it. For gardeners who want to save seed, the choice is clear: you must start with stable, open-pollinated heirloom varieties.
Why Standard Grow Lights Fail During British Winters?
Many gardeners who invest in a basic grow light are still disappointed with their results, especially in a location like the UK during winter. The plants may look a little better than those on the windowsill, but they still appear weak and aren’t thriving. The problem is that not all grow lights are created equal, and many entry-level models are simply not powerful enough to overcome the profound light deficit of a British winter.
The challenge has two components: light quality and light quantity. Winter sunlight in the UK is weak. The sun’s angle is low, meaning the light travels through more of the Earth’s atmosphere, which filters out much of its intensity. Furthermore, the days are short and frequently overcast, drastically reducing the total hours of usable light. As gardening expert Joe Lamp’l states, “Even a south-facing window that gets all-day sun in the wintertime does not provide enough hours of good-intensity sun.” Your grow light’s job is not just to ‘supplement’ this poor light, but to almost completely replace it.
Many cheap LED panels or fluorescent tubes sold as ‘grow lights’ lack the power output (wattage) and the correct light spectrum. Seedlings require strong blue light for compact, leafy growth and red light for root development and eventual flowering. A proper grow light will have a balanced, full-spectrum output that mimics the intensity of spring sunshine. A low-wattage light, or one with a poor spectrum, simply cannot provide the energy the seedling needs for robust photosynthesis. It’s the equivalent of trying to feed a growing athlete on a diet of watery soup. While it’s better than nothing, it won’t build strength. For serious winter seed starting in the UK, investing in a high-output, full-spectrum LED light fixture is non-negotiable for producing the kind of strong, healthy transplants that will thrive in the garden.
Key Takeaways
- Mimic nature’s cycles: Success hinges on understanding and actively replicating biological triggers like cold periods (stratification) and light signals (photoblasticity) to break seed dormancy.
- Sterilization is not optional: A sterile environment, for both soil and equipment, is the single most effective insurance policy against damping-off pathogens that can wipe out seedlings overnight.
- Natural winter light is a myth: Windowsills in high-latitude winters do not provide the necessary quantity of light (DLI). Measuring and supplementing with a quality grow light is essential for strong, compact seedlings.
Why Robust Heirloom Vegetable Varieties Taste Better Than F1 Hybrids?
It’s a common refrain among seasoned gardeners and chefs: heirloom tomatoes, carrots, and lettuces simply have a more complex and satisfying flavour than their modern supermarket counterparts. This isn’t just nostalgia; it’s a direct consequence of their different breeding histories and genetic priorities. The superior taste of many robust heirloom varieties is a result of being selected for flavour above all else for generations.
Heirloom varieties are the result of decades, sometimes centuries, of selection by farmers and home gardeners. Their primary criteria for which seeds to save were simple: what grew well in their local soil and, most importantly, what tasted best at their dinner table. This long, slow process of selection favoured plants that produced complex sugars and volatile aromatic compounds—the very building blocks of flavour. These varieties were preserved because they brought joy and nourishment, not because they could withstand a 1,000-mile journey in a refrigerated truck.
In contrast, many modern F1 hybrids, particularly those developed for large-scale commercial agriculture, are bred with a different set of priorities. The primary goals are often: high yield, uniform size and colour (for easy packing), disease resistance (for monoculture farming), and, crucially, a long shelf life and durability for shipping. While these are valuable commercial traits, they are often achieved at the expense of flavour. For example, breeding for a thicker-skinned tomato that resists bruising can inadvertently reduce the production of the delicate compounds that create a rich, complex taste. The focus shifts from the eating experience to the logistical and economic needs of a global food system.
By choosing to grow robust heirloom varieties, you are opting into a different value system. You are prioritizing the culinary qualities that have been cherished and curated by generations of gardeners. While they may not all look perfectly uniform or last for two weeks on a shelf, their reward is delivered where it matters most: in their unparalleled depth of flavour.
Apply these principles, and you’ll move from a gardener who hopes for germination to one who engineers it. Start your next seed tray with the confidence of a professional, ready to cultivate the rare and flavourful varieties that make gardening truly rewarding.